Showing posts with label blog candy. Show all posts

Saturday, October 13, 2012

A Very Merry Christmas SOTM blog hop


Welcome to our October Stamp of the Month Blog Hop! This month Close to My Heart is offering a stamp set called "Very Merry Christmas". This set can be purchased exclusively through a Close to My Heart Independent Consultant for only $5 with a qualifying purchase of $50. (That’s a $17.95 value!)


In this hop, you will see projects featuring this fun stamp set from many talented crafty ladies!
Enjoy our blog hop - we hope we inspire you to create your “very” own Merry Christmas projects!

We are having a giveaway – that’s right blog candy for you hoppers! Carolyn of Nuts 4 Scrappin  is giving away a stamp set to one of our hoppers! She is giving away a stamp set called "Bonjour". You can see a picture of the stamp set on her blog. All you have to do to be eligible to win is to leave a comment on each blog and become a follower of Carolyn's blog.

If you have just hopped onto my blog, please start at the beginning at Lucy's blog – Love 2 Create. If you came from Lucy's blog – Love 2 Create then you are in the right place!


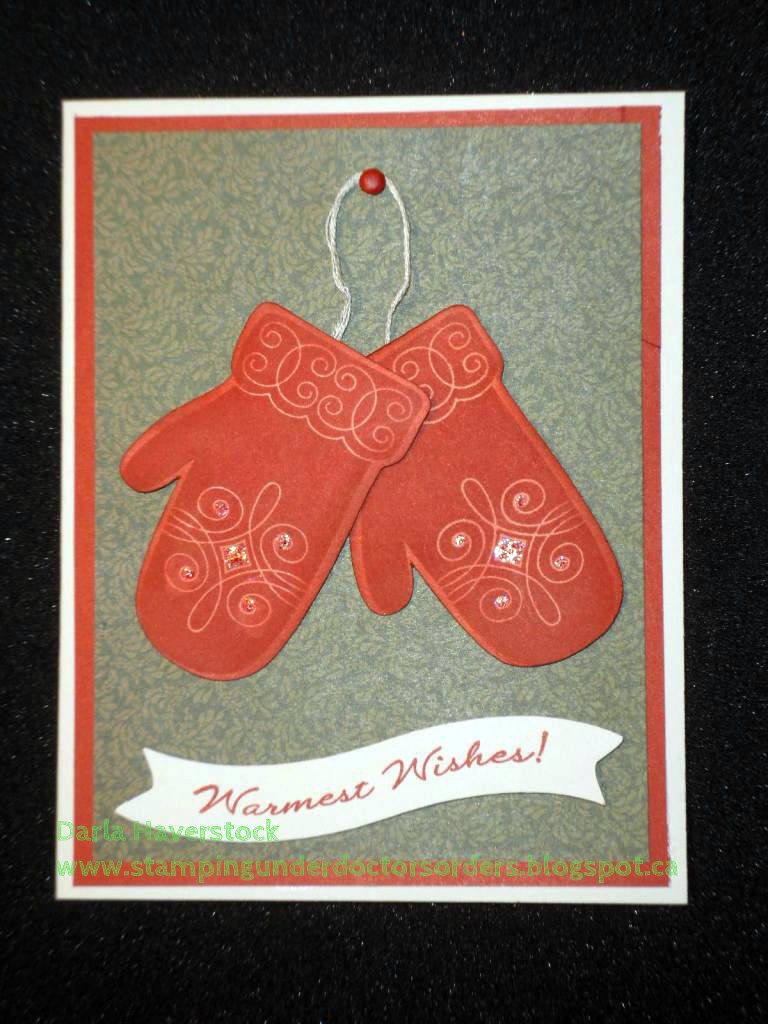
I actually felt a little guilty about how quickly my project came together for this hop. A quick couple cuts on the cricut with my Artiste cartridge... stamp, add a little extra ink on the mittens with a sponge dauber, stick the layer together and voila. Oh and of course a little bit of Stardust Glitz glitter gel to add a bit of sparkle to the mitten. Simple and easy card but I have to say I love the result.


Check it out:


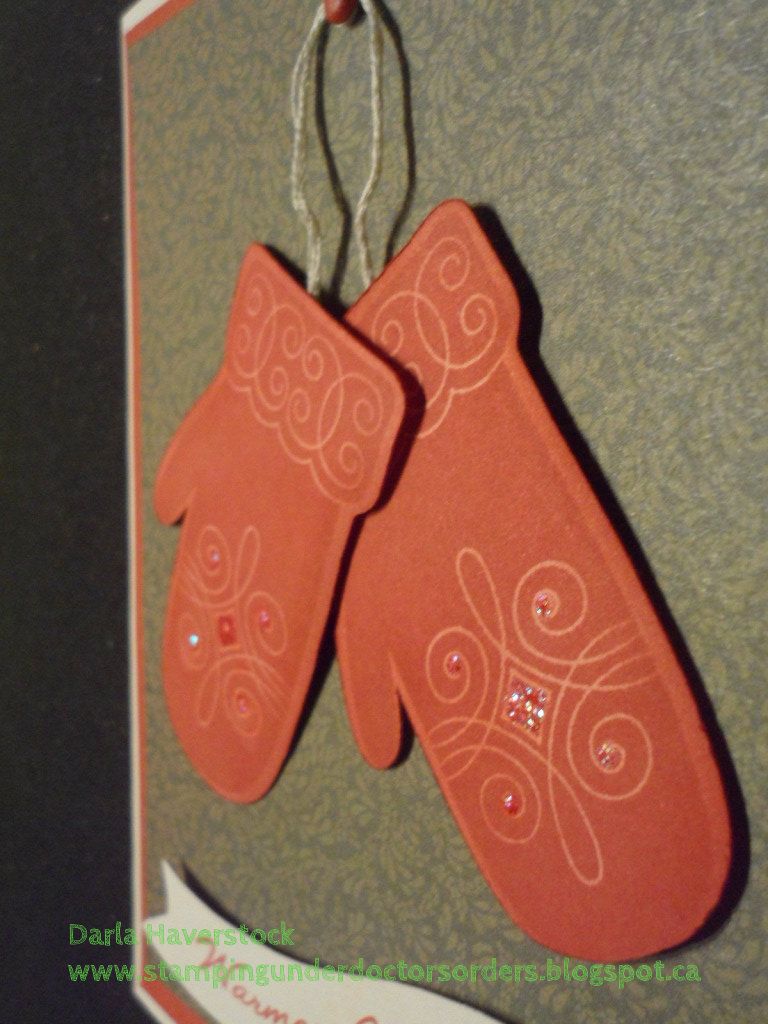
Oh, and a side shot to show the dimension added by using some 3D foam tape for the banner and mittens.

Details:
The cuts I used were all from the Artiste cartridge  They are the mitten which can be found on page 79 as well as a banner shape on page 58 that I did distort in Cricut Craft Room as I wanted it to be 3/4" x 3 1/2" but at 3/4" height it was only about 2 1/2" long so I used CCR to keep the height at 3/4" and stretch the length out.
The card base is colonial white, 2nd layer is Cranberry and the patterned paper is from the Pear and Partridge papers. I also used some colonial white embroidery floss and a cranberry brad. The ink is all of course.. cranberry ink. Mittens and banner on 3D foam tape and a little bit of Stardust Glitz glitter gel added to the mitten for some sparkle.


Your next stop on our Very Merry Christmas blog hops is Michelle  ~My Creations With Michelle

SIDE NOTE: Michelle (your next stop on this hop) and I are offering an all day, 12 card Christmas class on December 1st if you're local here in Halifax, Nova Scotia. 6 cards will be designed by myself and 6 by Michelle. Contact either one of us for more info.
If you're not local but still want to make the cards feel free to contact one of us as well as I'm sure we can arrange to put a little card kit together for you to make at home.

Products Used:


Here is the complete lineup in case you get lost along the way:

  1. Lucy ~ Love 2 Create
  2. Darla ~ Caution: Crafting is Contagious
  3. Michelle ~ My Creations With Michelle
  4. TinaGale ~ My Scrappy Ideas
  5. Jennifer ~ 4 Hearts Scrapbooking
  6. Carolyn  ~ Nuts 4 Scrappin'
  7. Stephanie  ~ The Quilted Scrapper
  8. Amanda ~ Scraps of Love
Thanks for hopping along with us - we hope we were able to inspire you to create your own "Very Merry Christmas" projects.

Saturday, October 6, 2012

Make It From Your Heart


Today we will show you how to Make It From Your Heart! Jeanette Lynton has created a brand NEW “how-to” program to not only guide you but also inspire you to create beautiful artwork. This amazing publication has so many different pattern blueprints that you can interpret in ANY WAY you want!
Make It From Your Heart

Through our blog hop, we hope to inspire you to use your own artistic instincts to interpret and create your own artwork. Each of our crafty consultants has chosen a different page of this book to create two projects for you – that’s right two projects with the SAME pattern! One project will follow the blueprint pattern as laid out. The second project will use the pattern “with a twist” to show you how versatile the patterns are.


We are having a giveaway – that’s right blog candy for you hoppers! Lucy of Love 2 Create will be giving away a copy of the Make It From Your Heart – Volume 1. All you have to do to be eligible to win is to leave a comment on each blog.


If you just happened to come to this blog, you should begin your hop at the beginning at Lucy's blog

Before I even get to my project can I just say for the record that I love our new how-to book! It's very economical at only $7.95 with TONS of inspiration in it!!

My project today uses pattern number 19 on page 42 of the new how-to book Make It From Your Heart - Volume 1..

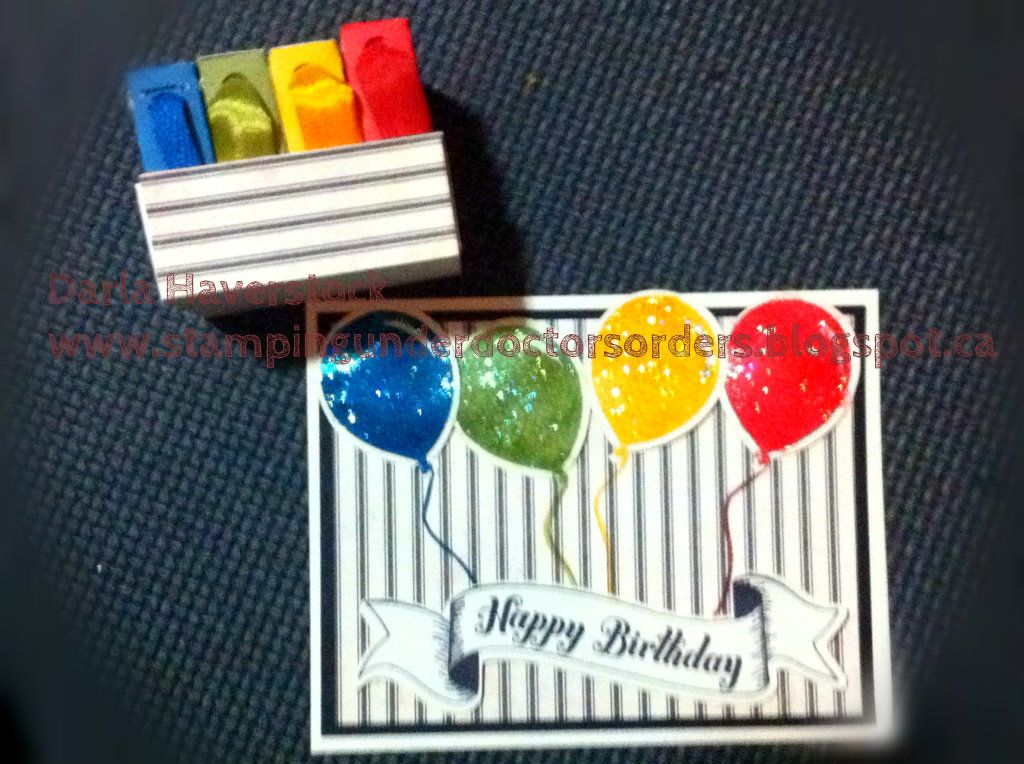
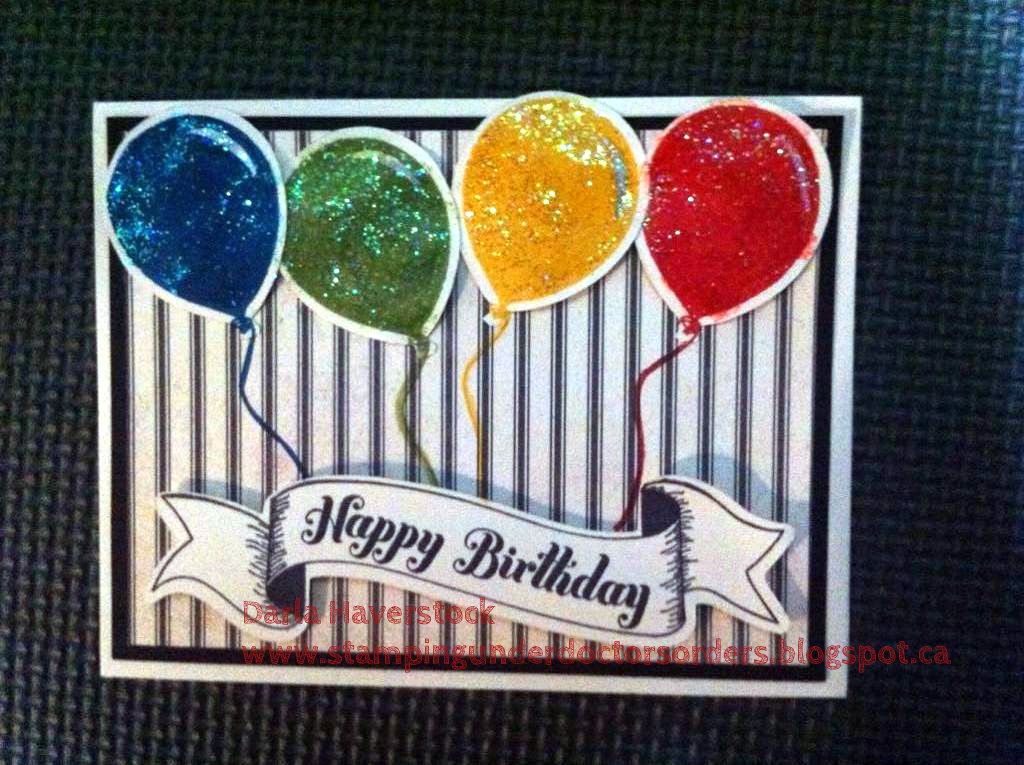
I saw the vertical stripes that are in this pattern as well as the smaller squares on each stripe and decided to make this card and some cute little ribbon boxes and caddy. 

The card is made using the stamps that come bundled with the Artiste cartridge, which made it super easy to put together. I just cut out the shapes from colonial white cardstock as directed on the carrier sheet of the stamp set (love that it now includes the page # from the handbook) and stamped them accordingly. I stamped the balloons in Pacifica, Olive, Honey and Cranberry ink and after popping them up on foam tape in the middle and sticking the edges of the balloons flat down I then added some Stardust Glitz Glitter Gel. I stamped the strings directly on the card overlapping onto the balloon shape in the same colours. The Happy Birthday banner is in Black to coordinate with the stripes on the moonlight patterned paper. The banner is also on foam tape.


I love our colour ready seam binding and as I collect re-inkers I plan to order a roll of seam binding for each and ink them up in all the colours. As you can see I don't have any pacifica reinker yet and although you can just ink it with a stamp pad I actually had some twill ribbon left from the pacifica mini-medley assortment so I put that in. I also used our new alcohol markers on the olive one just to see how it would turn out and I absolutely love how fast it dries using the alcohol marker. I wouldn't do a whole roll this way since you'll use up your markers quickly doing it that way but if you want some for a project right away and don't have time to let the ink dry overnight (which is what I would recommend if using reinker or even a stamp pad) the alcohol markers work wonderfully! 


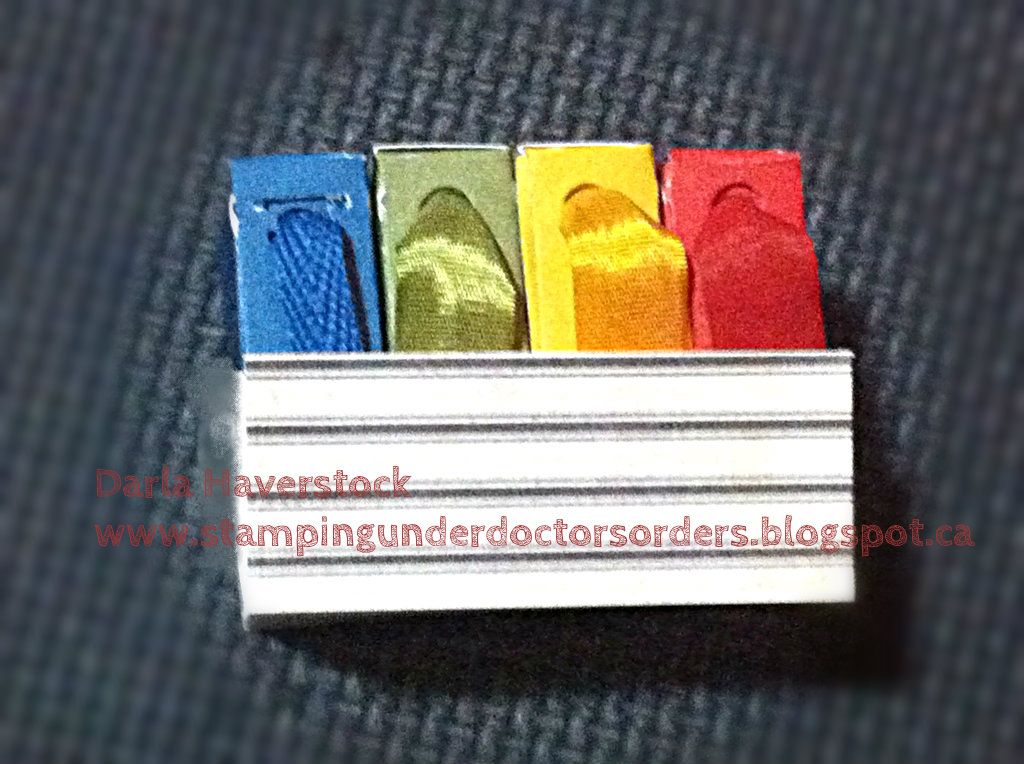
Since I removed the seam binding from the roll to dye it and can never manage to get it back on the roll the same way I thought it would be cute and a great way to store them all by making some boxes in the same colour paper.

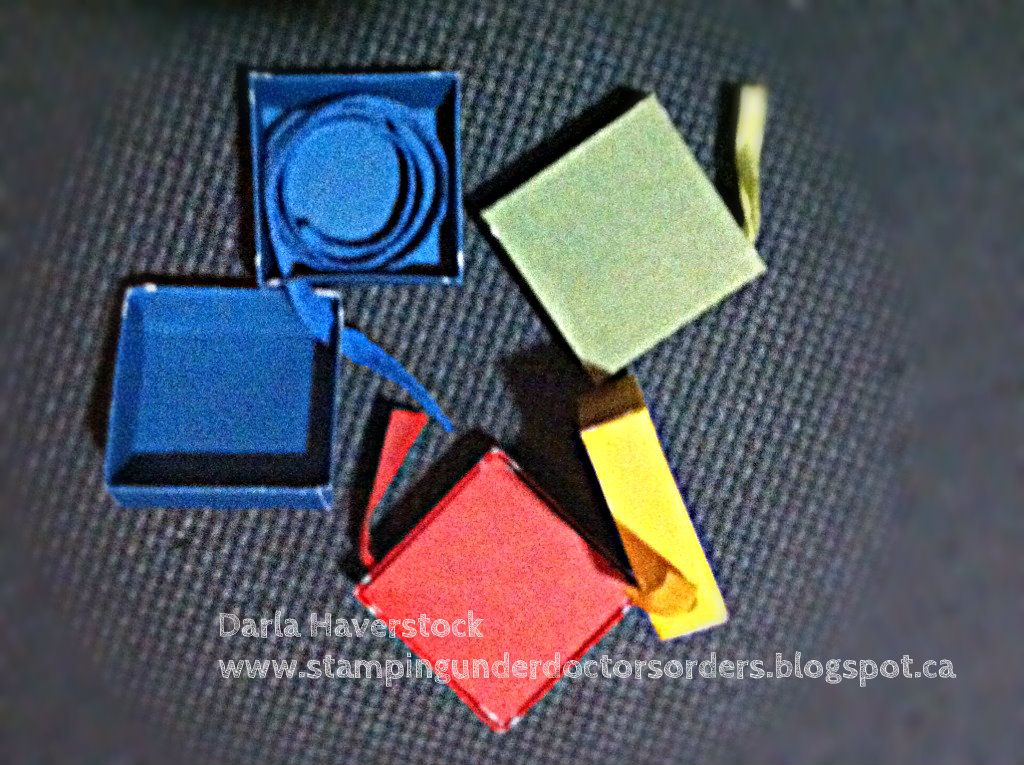
I cut the lid for the tall box on page 40 of the Artiste cartridge (shift + 3D Object + 1st row far right of the white keys or 1-10 for those that know my numbering system) at 3.5" for the top of each box and 3.4" for the bottom of each box in the various colours of cardstock and then turned Real Dial Size on and cut one at 5.5" in colonial white as a holder for all the boxes. Then I assembled the box tops and bottoms and used a hole punch to punch a hole in the same spot on the side of both top and bottom I rolled up some ribbon and put it in the box and fed the end through the bottom part first and then the top and then closed up the box. I cut a strip of the moonlight patterned paper for the front panel of my box to coordinate with my card so it could be used as a gift set (although this particular set is just my test run of how this will work for my own craft room).

Here's a photo of the ribbon boxes in different views including one opened up so you can see how I fed the ribbon through the holes
.


The next stop to making it from your heart is Michelle ~ My Creations with Michelle.

Products Used:


Here is the list of all the talented consultants who are participating in this months blog hop:
  1. Lucy ~ Love 2 Create 
  2. Darla ~ Caution: Crafting is Contagious
  3. Michelle ~ My Creations with Michelle
  4. Maria ~ Maria's Paper Craft Place
  5. Theodora ~ Celebrate Crafts
  6. Bethany ~ Stamping at Home
  7. Stephanie ~ Quilted Scrapper
  8. Wendy ~ My Scrapbooking Blog

Saturday, September 22, 2012

September ARTISTE Blog Hop


Welcome to our September ARTISTE Blog Hop! Each month we are showcasing the amazing, exclusive ARTISTE Cricut cartridge which can be only purchased through a Close to My Heart Independent Consultant.

We don't want to scare you but Halloween is a little over a month away and we know you have to be thinking about what YOU are going to create for this spooky holiday! We decided to show you all the creative projects you can make using our exclusive Artiste Cricut cartridge. You will be hopping along our haunted trail of creativity - you never know what you will see next!

If you just happened to come to this blog, you should start at the beginning at Lucy's blog

Also, to help you get ready to start making your own Halloween projects Lucy has some blog candy for you! She is giving away a Moonlight Complements Dimensional Elements pack! That's two (2) sheets of Printed Dimensional Elements that you can use to create your own Halloween project! There is a picture of the blog candy on her blog. All you have to do to be eligible to win is to leave a comment on everyone's blog AND become a follower of Lucy's blog. (If you are already a follower, just let her know in your comment.)

Okay.. first I need to apologize. If you came to visit my blog earlier blogger apparently did not keep all the updates I did to my post so all you saw was a Christmas themed project. I'm sure you all had thought I lost my mind! 

The truth is I was working away on my project for this hop and looking through the handbook I got excited to try the holder you will see below and I wanted a bunch of cards to put in it so I pulled out my Pear & Partridge Workshop On The Go Cardmaking Kit and got working on the cards. I also didn't like the plain squares so as you will see below I switched it out for a shape from the Artiste cartridge as well.

Now.. 2 days ago I was going through the hop write up and editing my post for you all when I realized that I had completely ignored the hop theme "Halloween" so a complete re-do was in order! I edited the whole thing and re-scheduled it to post but apparently blogger really liked my Chrsitmas project as it reverted the whole post back to that. Good new is now I'm going to show you both today instead of saving the Christmas one for tomorrow like I was going to had blogger cooperated. :)

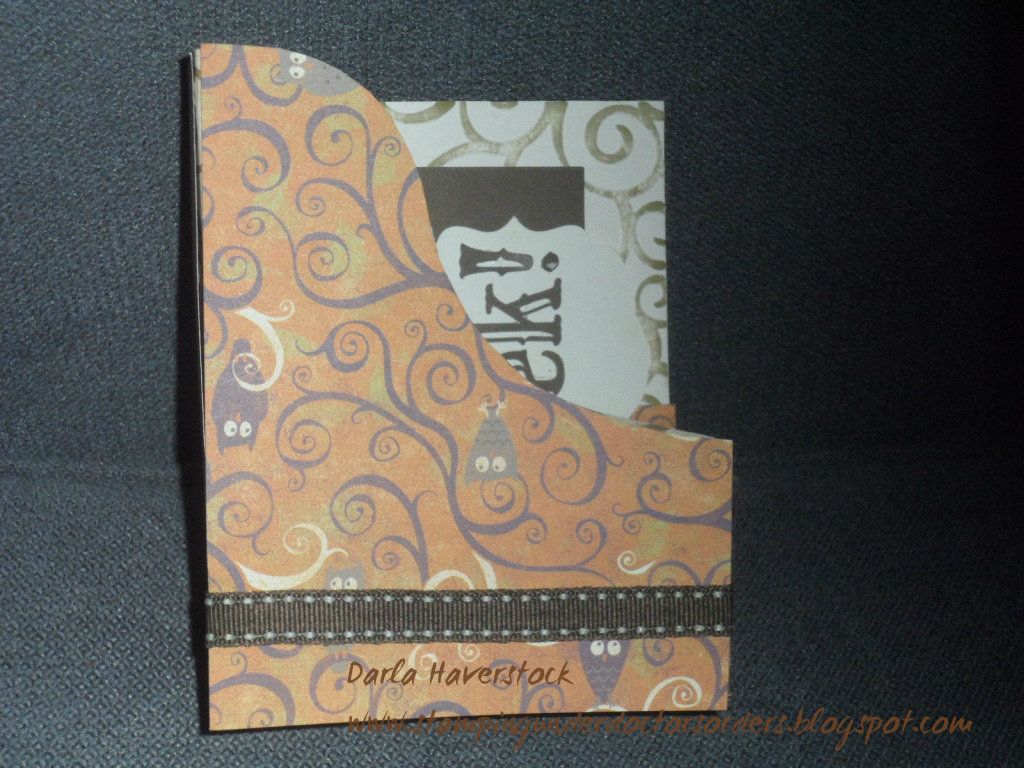
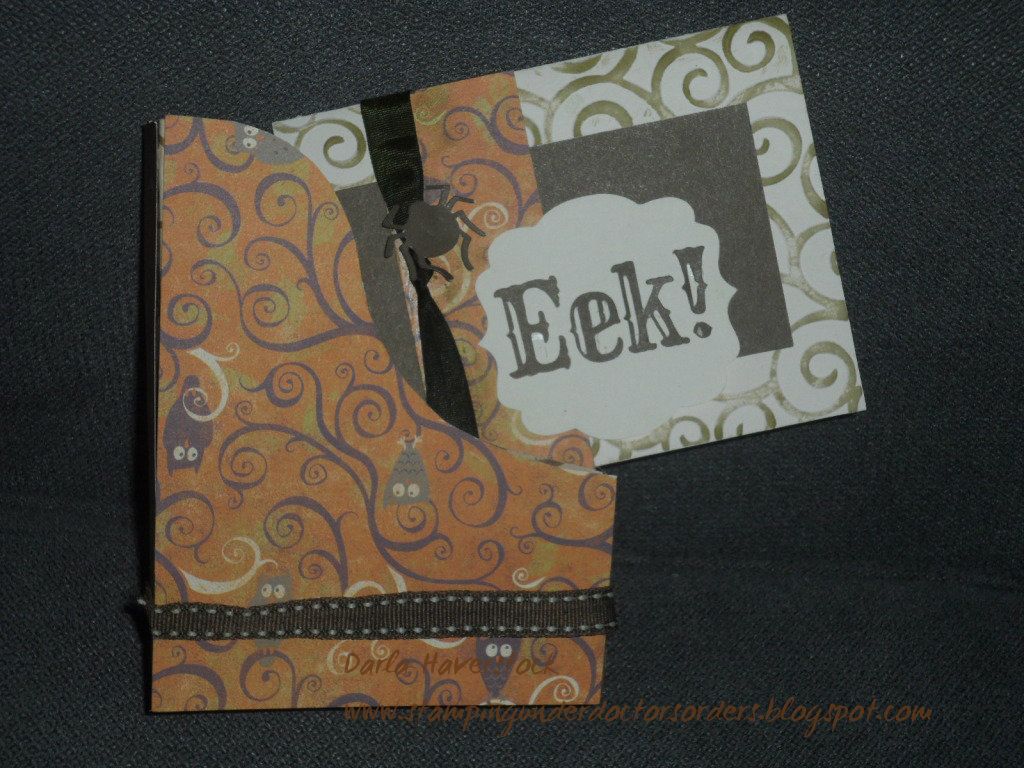
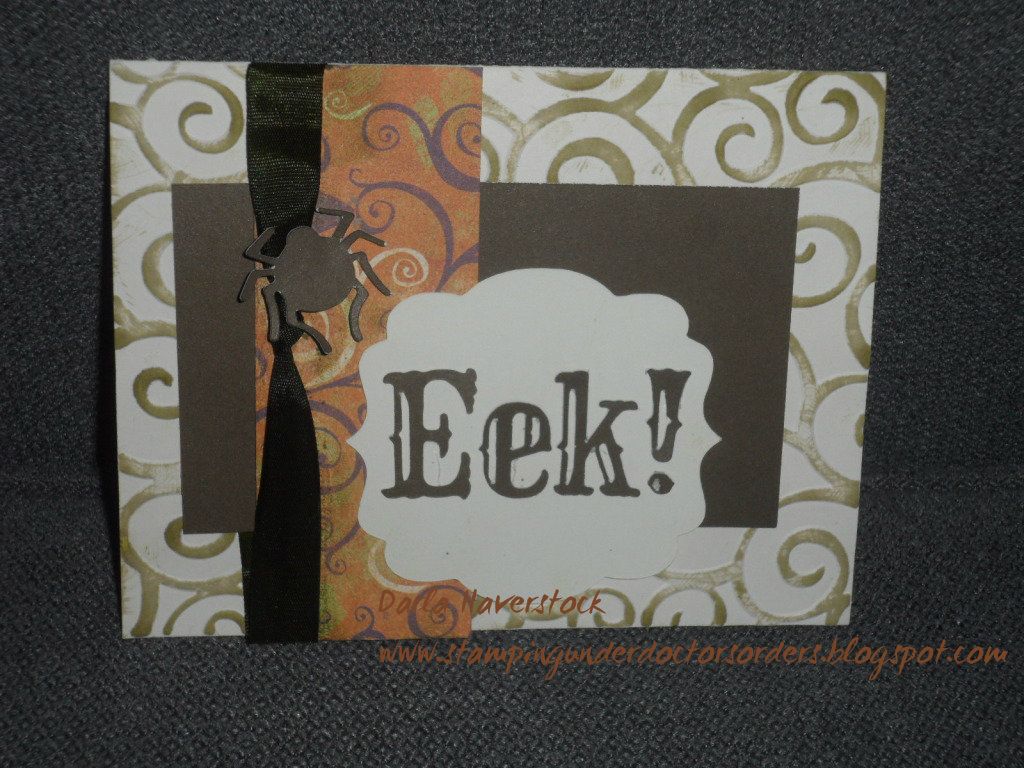
I decided I still wanted to use the same concept.. so I switched out the Pear & Partridge B&T for the Moonlight B&T. I embossed my card base and ran my cocoa ink pad over the embossing to highlight it and instead of using stamps I cut the phrase "Eek!" from page 76 of the Artiste handbook and I also added the spider (accent 4 with shift on page 77) cut from more of the same left over cocoa cardstock from the Pear & Partridge Workshop On The Go Cardmaking Kit, seriously I wonder how many more projects I can make from this kit?? I added some color ready seam binding that I died with the Olive stamp pad and eur"eek"a a Halloween themed project to share for you.

Here are some pictures of my Halloween theme card and holder set:


Now for more details on the shapes and to see what the Christmas themed one looks like and how easy it was to switch just scroll down and you can see my post that anyone that came this morning saw as well as you will find the hop lineup and your next stop at the end.

Let me know which one do you like best??

If you don't want to see the Christmas one and just want to be on your way to the next stop.. The next stop on the haunted trail is Diana - Dianas Free Moments and you're going to love what she has for you.

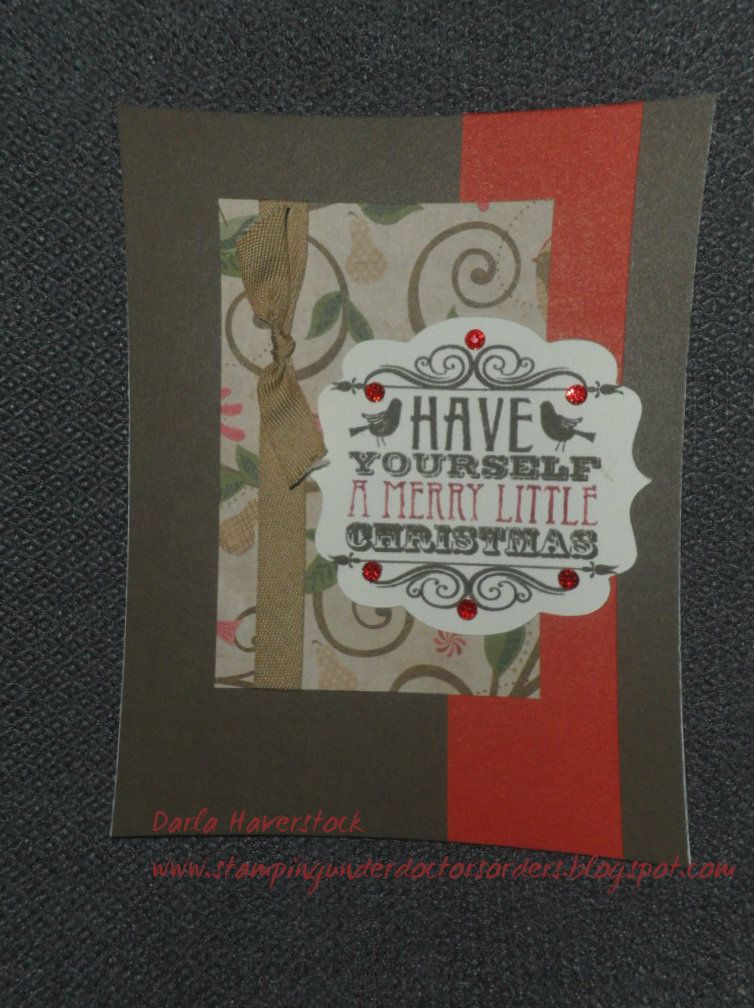
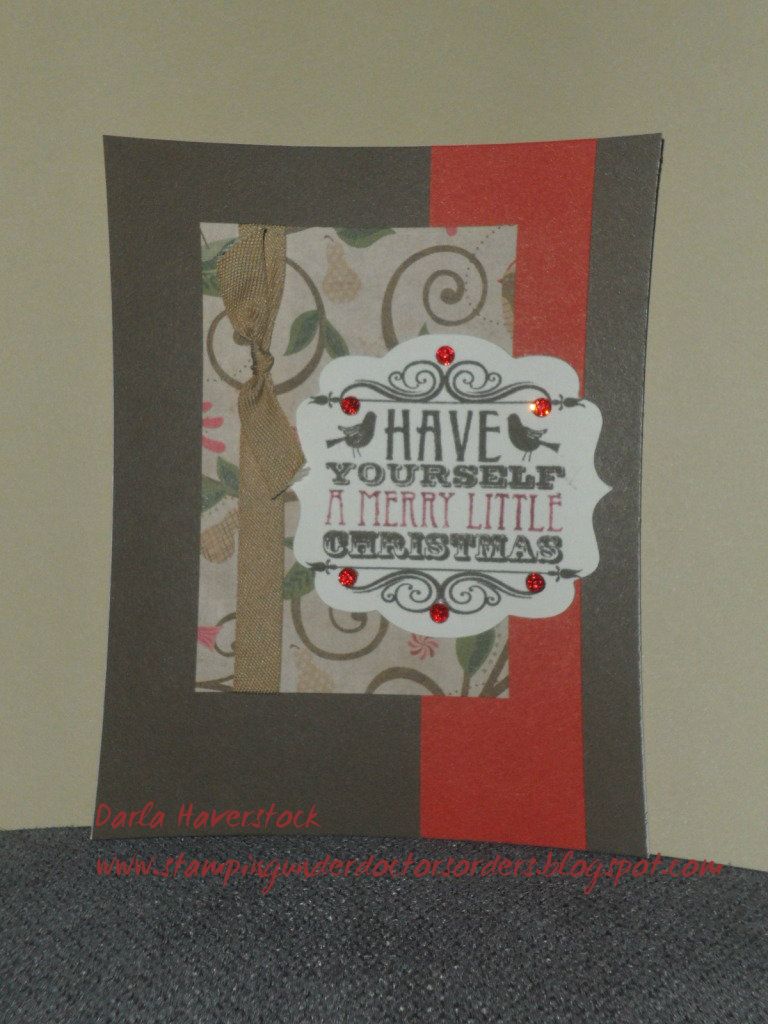
Today I used the Pear & Partridge Workshop On The Go Cardmaking Kit and essentially used the projects exactly as the workshop instructions that come in the kit say to.. except I found the plain squares for the focal images boring so I used the Accent 3 shape from page 61 of the Artiste Cricut Cartridge for 2 out of the 3 card designs in the kit.


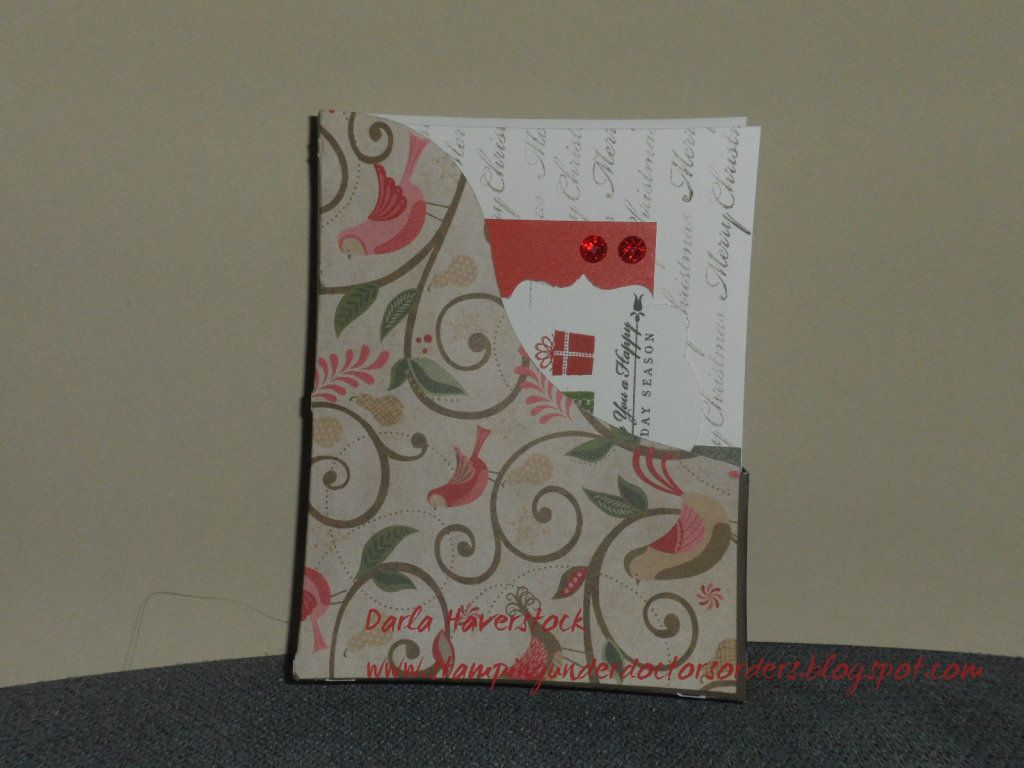
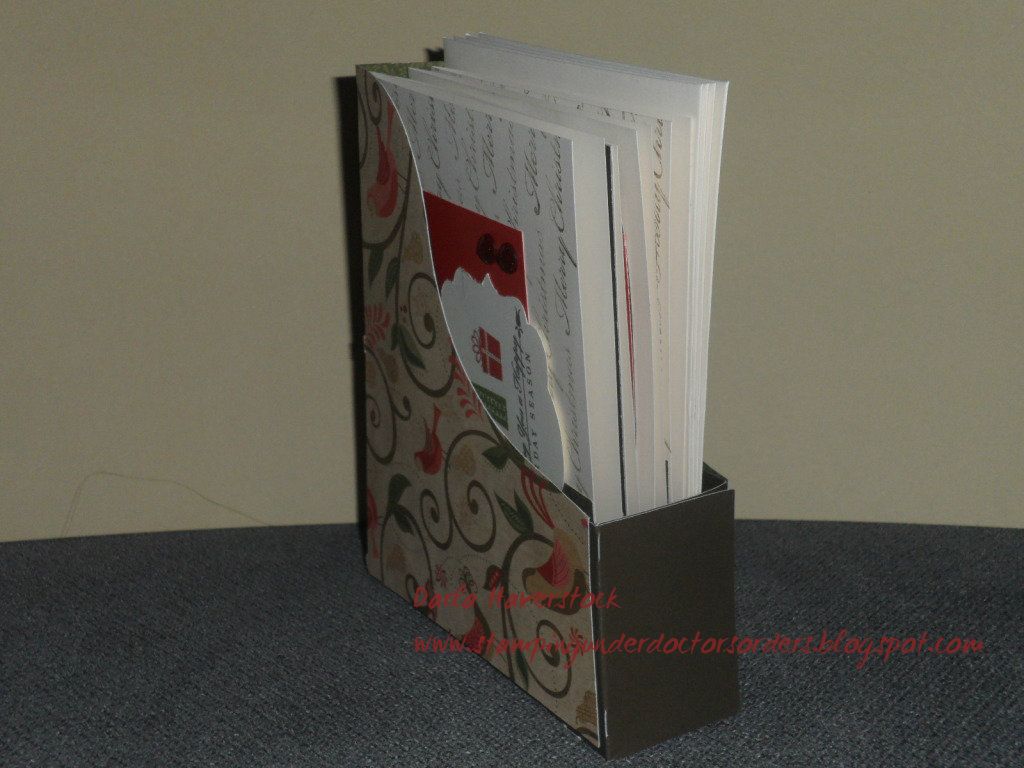
I also added a little holder for all the cards using the paper left in the package after making all 15 of these cards, yep... you heard me.. there was paper left over and actually still is a bit left after making the holder.


For the holder I cut the Accent 3 shape on page 47 of the Artiste Cartridge from my left over Pear & Partridge B&T from this kit and the Accent 3 with the shift key on page 47 of the Artiste Cartridge from the left over Cocoa cardstock from the kit. I think I will embellish the holder a bit more... maybe add some ribbon and bling! :) What do you think?

I used the Cranberry marker to ink the "A MERRY LITTLE" on this card instead of cutting out a seperate piece and masking it and inking in the cranberry ink I just found this went faster.

I just love the stamp set that came in the Pear & Partridge Cardmaking Kit as well. It's so cute and versatile! It has 6 sentiments (one being that lovely one with the birds and filigree on it to be used as a focal image), 3 different present, 3 different ornaments, the string for the ornament, 2 partridge birds and a branch. I can see myself grabbing this set a lot.


Products Used:


The next stop on the haunted trail is Diana - Dianas Free Moments

Here's the entire blog hop lineup in case you get spooked along the way:

  1. Lucy - Love 2 Create  Previous
  2. Darla - Caution Crafting is Contagious You are here
  3. Diana - Dianas Free Moments Go here next
  4. Carolyn - Nuts 4 Scrappin'
  5. Julia Hammond - You Can Create 
  6. Wendy Kessler - My Scrapbooking Blog
  7. Pam Stewart - I Candy Scraps
  8. Carolyn Mendoza - Crafting With Carolyn 
  9. Jennifer Kramer - 4 Hearts Scrapbooking 
  10. Maria Woodworth - Maria's Paper Craft Place 
  11. Kindred Hearts - It Makes TOTAL Cents
  12. Ginger Morriello - Ginger's Creative Cottage 

Thanks for stopping by for some Halloween fun -- hope we didn't scare the creativity out of you! Muah-ha-ha!

Saturday, August 25, 2012

August Artiste Blog Hop


Welcome to our August ARTISTE Blog Hop! Each month we will showcase a feature of the amazing ARTISTE Cricut cartridge which can be purchased exclusively through a Close to My Heart Independent Consultant (if you don't have one I'd love to help you out).

We're so excited to be doing this hop and we have a fabulous lineup with some very talented ladies. There will be lots of fun projects AND some blog candy!!!

This month we will be showcasing a different page from the Artiste cartridge! Did you know there are 700 images on this cartridge?? That's right -- 700!!!

If you just happened to come to this blog, you should start at the beginning at Lucy's blog - http://www.love2createitall.com.

If you want to take a look at the booklets that come with the Artiste cartridge here's the links for you:
Artiste handbook
Assembly Instructions

Well, we've been on vacation for the last 3 weeks (tomorrow is our last day, back to normal on Monday). We have done a lot of travelling and camping during our vacation which meant a very BORED 3 year old sat in the backseat prompting me to come up with more fun stuff for him to do while buckled in.

Besides the great mini-album cuts on the Artiste Cartridge and LOTS of other stuff there are a few puzzle cuts on there which of course got me wondering what I could make with that for my kids that wouldn't get destroyed...
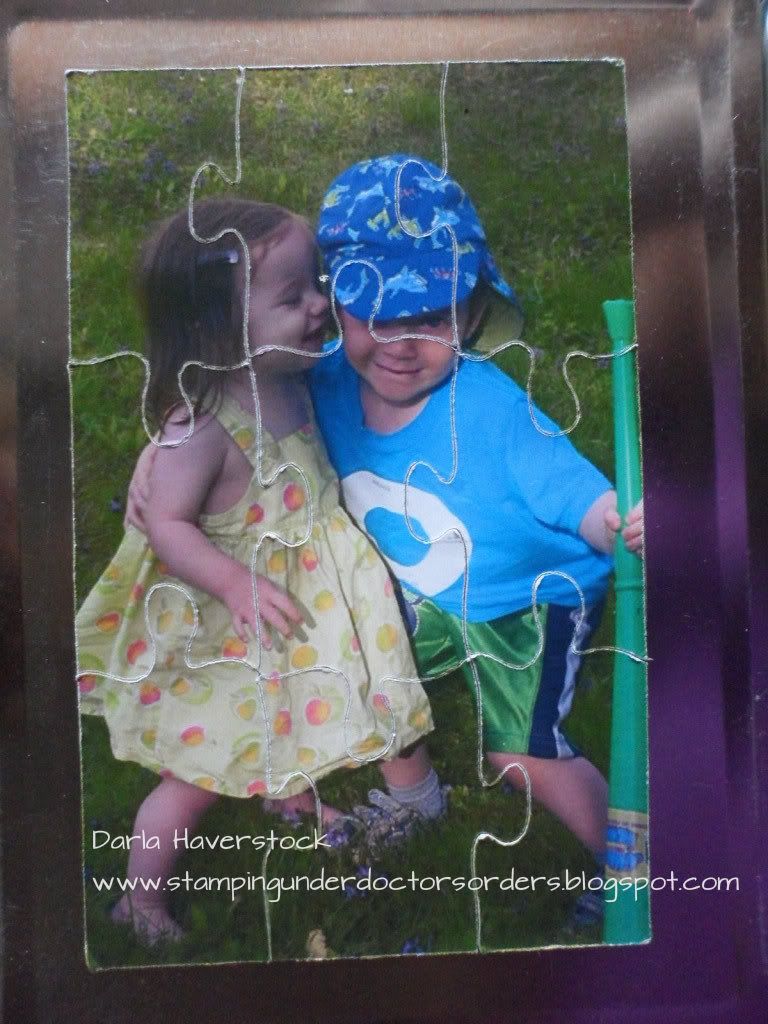
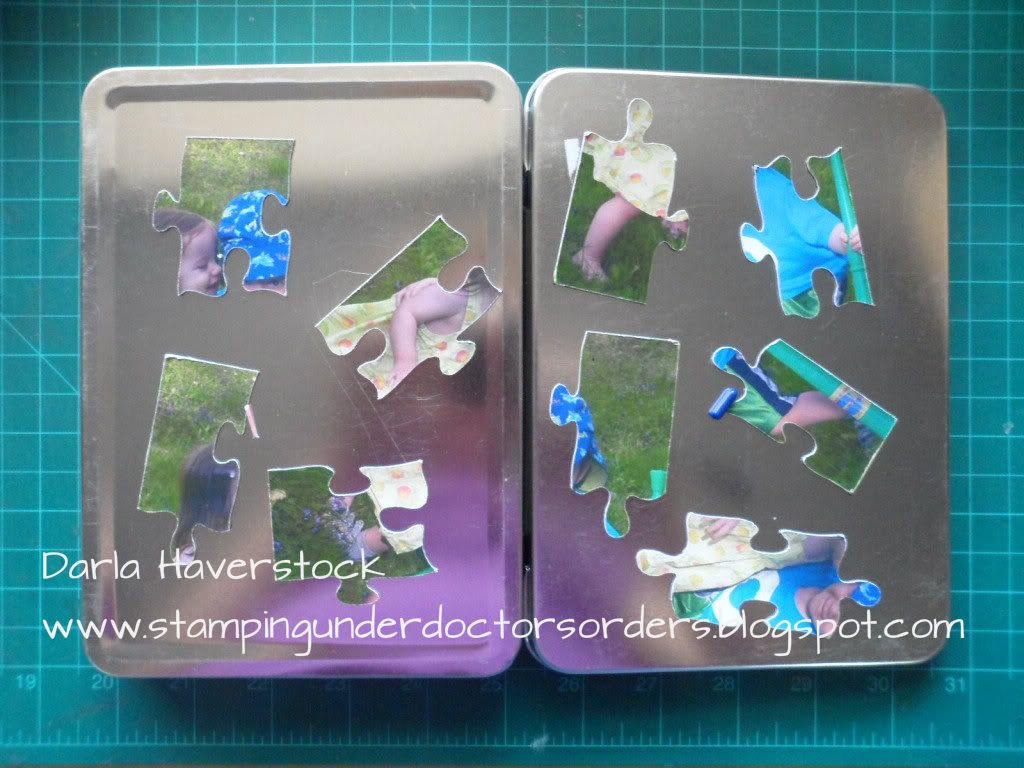
Introducing my magnetic puzzles stored in a tin....

I had some metal containers I had picked up for 99 cents at a liquidation place as well as some magnetic sheets that have adhesive on top of them from the dollar store.

I printed off photos of my kids and stuck them to the magnetic sheets, cut it using my deep cut blade and the puzzle image on page 57 of the Artiste Cartridge (resized using Cricut Craft Room so I could pull it out of proportion and make it fit the picture better) and ta-da!!

You will see that the edges get a bit worn after handled by the kids so I might laminate the top next time... but other than that I am very happy with this project.


Thank you CTMH and my new Artiste cartridge for saving my sanity!!!!
The best part is that it stores in the tin and then you can open the tin up and use the outside of it to assemble the puzzle. I love toys that stay together.

I also posted a project using one of the 3D purses from the cartridge earlier this month here.

Now make sure you head over to Julia's Blog and see the eye candy she has for you!

Here is the list of all the talented consultants who are participating in this months blog hop:

  1. Lucy ~ http://www.love2createitall.com
  2. Darla ~ http://www.stampingunderdoctorsorders.blogspot.com <--- You are here
  3. Julia http://youcancreatectmh.blogspot.com/
  4. Theo www.celebratecrafts.com
  5. Tina Gale http://tiggersscrapplace.blogspot.com
  6. Stephanie http://www.quiltedscrapper.blogspot.com
  7. Mandy http://www.mandydesigns.blogspot.com
  8. Joanne http://josiesjoy.blogspot.com
  9. Laura W http://scrappinsweetiesescape.blogspot.com/
  10. Rebecca ~ http://blog.scrapprincess.com/
  11. Maria Woodworth - http://mariawoodworth.blogspot.com
  12. Judith Ashmore- www.grammiejudys.blogspot.com
  13. Lisa Woodward~http://mycraftyspaces.blogspot.com
  14. Laura Charko - http://koladesigns.wordpress.com/
  15. Jennifer Kramer- http://4heartsscrapbooking.blogspot.com/
  16. Eva Friesen ~ http://loveofcreating.blogspot.com/
Thanks so much for stopping by and hopping with us - we hope you LOVE all the projects we created!

    Friday, July 27, 2012

    July Art Philosophy Blog Hop

    Welcome to our July Art Philosophy Blog Hop! Each month we will showcase a feature of the amazing Art Philosophy Cricut cartridge which can be purchased exclusively through a Close to My Heart Independent Consultant.
    We're so excited to be doing this hop and we have a fabulous lineup with some very talented ladies. There will be lots of fun projects AND some blog candy!!!

    Lucy Kelleher, our hostess and fellow CTMH Consultant, will be giving away a stamp set! She is giving away a prior Stamp of the Month set that can no longer be purchased called "You Are ...". (This stamp set has a $17.95 retail value). You will find a picture of the stamp set on her blog. To enter to win, you will need to leave a comment on her blog and on every stop of the blog hop. If you also become a follower of Lucy's blog, she will give you another entry .

    This month we will be showcasing the "Card" feature of the cartridge. Did you know there are 100 different card shapes you can make with this cartridge? You heard me correctly -- 100!!! Now we won't be able to show you ALL 100 card options, but we will show you as many as we can.

    If you just happened to come to this blog, you should start at the beginning at Lucy's blog - http://www.love2createitall.com/.

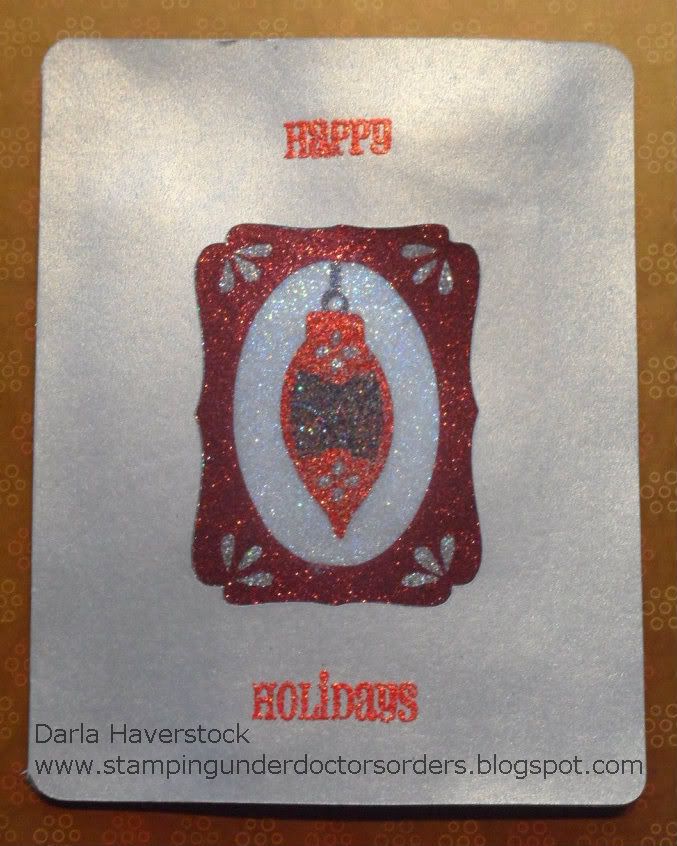
    My project today uses the card feature key on page 47 (without the shift key) which is the 3rd row down 7th key over (going left to right) of the white image keys on your keypad.

    First.. a close up of the glittery goodness!! :)


    Here's what the whole card looks like from the front:


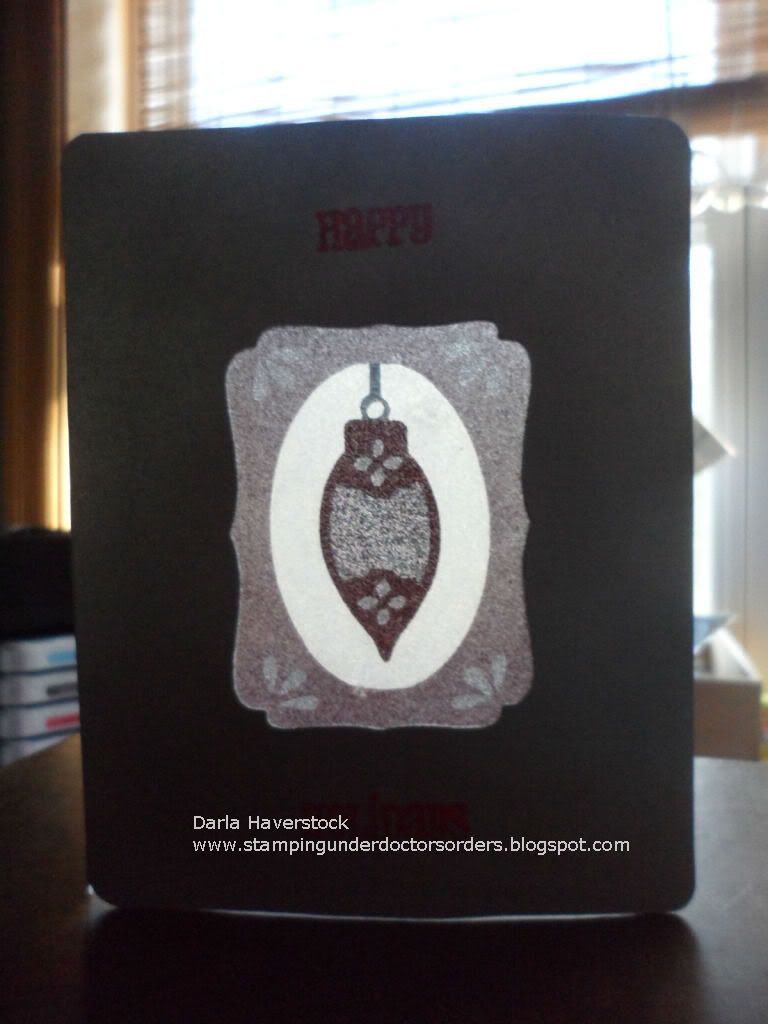
    Now.. just to show you that this really was the card shape which has a cutout window in the middle of the front panel and not just a plain card with this stuck on it (and because I thought the picture looked really neat)... here's a shot of my card open in front of a window so you can see that you can see through it. :)

    Here's how I achieved this look.
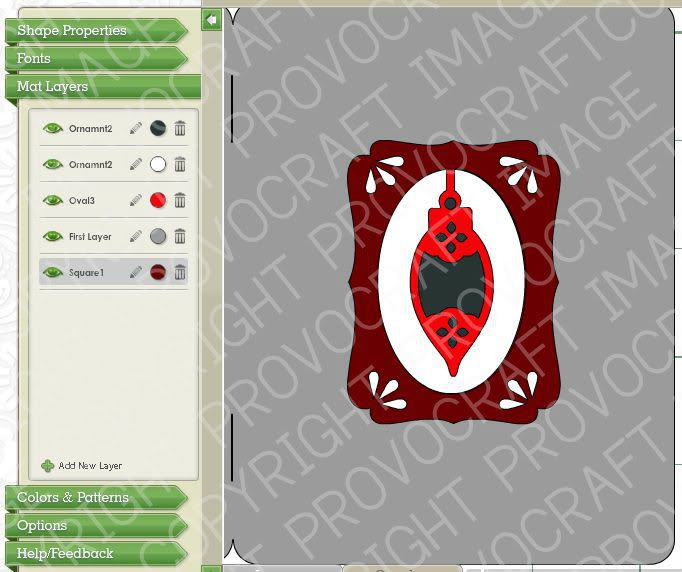
    First I made my file in Cricut Craft Room so all the pieces would line up and cut in the correct spot as well as I was able to play with the colours to decide which ones I wanted to use.

    Next I loaded my silver paper (the paper I used was Reflections cardstock from Michaels) and cut the card shape @ 5.5" using CCR. Then I took a piece of acetate which I had applied a piece of Scortape to first and with the mat still loaded in the machine i carefully lifted the cut card shape up on the side with the cutout and ligned up my piece of acetate with the acetate side on the mat and the tape backing facing up so that it would cut the pieces in middle of my acetate 9yes I could have just cut a bigger piece and put t in approximately the right spot since CCR shows you where on the mat it will cut but this way I knew exactly how much edge I would have on the acetate around my shape). I cut all oth the layers for the ornament and the label shape like the opening in the card front with my setting on 4 speed, 4 pressure, 4 blade depth and a mulitcut of 2 since the kind I used was BCT tape which has a very thick backing on the tape.

    Now I had my card shape cut from the silver card and a solid square of acetate with adhesive on it and all the pieces cut out of the tape backing.

    I removed the tape backing on the outer edge leaving all of the part you can see through the window cut opening of the card covered. and lined it up with my card from behind and stuck it on. now i just removed one section of backing at a time and applied my glitter to the exposed adhesive rubbing it on really well with my fingers and then using a shaving brush to brush away all the excess glitter.

    I used my Say it in Style stamps (which is no longer available as of August 1 so make sure you order ASAP if you want this amazing set of sentiments) to stamp the sentiment in versamark ink and heat emboss with red tinsel embossing powder.

    The next stop on your blog hop fun is Gloria Shirr so hop on over and see what wonderful project she has to share with you today! :)


    Here is the list of all the talented consultants who are participating in this months blog hop:

    1. Lucy ~ Love2Create
    2. Darla ~ Caution: Crafting is Contagious!
    3. Gloria Shirr - Purpleglo Creations
    4. Laura Wolff- Scrappinsweetie's Escape
    5. Eva-For the Love of Creating
    6. Danielle ~ Little Bit of Scrap
    7. Connie ~ Connie's Crafty Closet
    8. Wendy ~ My Scrapbooking Blog
    9. Joanne - Josie's Joy
    10. Laura Charko - Koala Designs
    11. Carolyn Heniges - Nuts 4 Scrappin'
    12. Kindred Hearts (Penny) - It Makes Total Cents
    13. Stephanie Feist- The Quilted Scrapper
    14. Julia Hammond You Can Create

    Thanks so much for stopping by and hopping with us - we hope you LOVE all the projects we created!


    Thursday, May 24, 2012

    Gypsy screens giveaway!

    Today I have some exciting news for you!!

    Lucy Kelleher and I recently decided to team up to cover US and Canada between us respectively for Close To My Heart products. We also decided to send out a couple Art Philosophy cartridge bundles to some fellow bloggers to use and post their honest review - good, bad or indifferent :)

    Karin Adamczyk of http://cricutdivablog.blogspot.ca/ is posting her first post today reviewing the cartridge and since this is very exciting for Lucy and I, we decided to do a giveaway for all those that take the time to not only read our posts but also read Karin's review of the fabulous Art Philosophy Cricut cartridge bundle. 

    Karin sells "Cartridge Screens on Gypsy" which are essentially a collection of pictures of the backs of ALL the cricut cartridge boxes that you can load onto your gypsy (or on your laptop or any mobile device) and view in the photo application for a quick glance of each cartridge.  She also sells a PDF version of these called "Cartridge Screens on iPhone" which can be loaded onto any device as well, that is simply a PDF document version instead of a whole bunch of individual JPEG files.

    SIDENOTE: For all of you who LOVE to participate in groups on FB... when you go to Karin's blog you should check out all the groups/pages she has. Karin has conveniently created a tab on the top of her blog called Facebook Pages and Groups where she has listed them all out by category for you. I'm sure she has one for you!!

    Since we really didn't feel that a written description does justice to Karin's fantastic "Cartridge Screens on Gypsy" I decided to make a video for you showing you exactly what these are and how to load them onto your gypsy.    


    Check out the video below:


    EDITED: THIS CONTEST IS NOW CLOSED
     
    So HOW do you enter the giveaway??  
    EASY!!
    Follow the instructions in my video (HINT: you'll find out that there is ANOTHER giveaway somewhere if you watch the video)
    or
    If you don't want to know where to find the other giveaway just leave a comment on this post as well as a comment on Karin's first post about the cartridge here before midnight Eastern Standard Time June 7, 2012.

    Can't wait to hear what you think and hope you enter our giveaway -- I just LOVE these screens. 


    Come back and see me on Saturday for a Father's Day Blog Hop: Art Philosophy style!! :)

    Wednesday, December 7, 2011

    Wow!! HUGE GIVEAWAY!

    You really should check out this giveaway http://keepsakesbymelissa.blogspot.com/2011/12/my-annual-end-of-year-christmas.html
    There's a $150 Michaels gift card, copic marker set and more up for grabs.
    Make sure you look around while you're there too as you can find some great inspiration.

    Thursday, October 27, 2011

    Who doesn't love giveaways right?!?!
    Go check out
    http://craftyfoxcards.blogspot.com/2011/10/candy.html
    For some yummy candy!!!

    Also if you want to please go to
    http://scrappercreations.blogspot.com/2011/10/win-gypsy.html
    Click "like" by my name! If I win it, I already own one and plan to give it to one of my customers or class attendees in a drawing, so if you go to any of my classes or have ordered anything from me (or plan to) than you want me to win this for you!!!

    Thursday, June 17, 2010

    Thank you!!

    Wow! I have a lot of thank you's to write since I haven't posted in FOREVER!!

    I have to thank Asela Hopkins for the wonderful stamp set and card from her blog candy... I haven't inked it up yet as I've been very busy with other things lately and haven't had the chance but it is calling my name as it is GORGEOUS!!

    you can find the stamp set at Gina K Designs. I will try to get a picture of the card and post it too but it's just awesome!!
    I have to thank Heather Lee Reppen for a beautiful thank you card and some flower embellies and a little stamp from donating to the CF foundation. Also for a wonderful stamp set and card that she sent for winning a blog candy she had.
    A thanks to Trudy www.truesgiftsfromtheheart.blogspot.com for her blog candy of 3 digi stamps and a set of digi papers from Cuddly Buddly designs and thanks to Kim from Cuddly Buddly for offering it.
    I will thank Melanie Muenchinger in advance for the card she's sending for knowing how many times she was featured in CardMaker magazine (although I still missed one) as a blog candy.
    I think I might be missing someone.... if I am my sincerest apologies. :)

      
    Get widget