Showing posts with label card class. Show all posts

Thursday, April 17, 2014

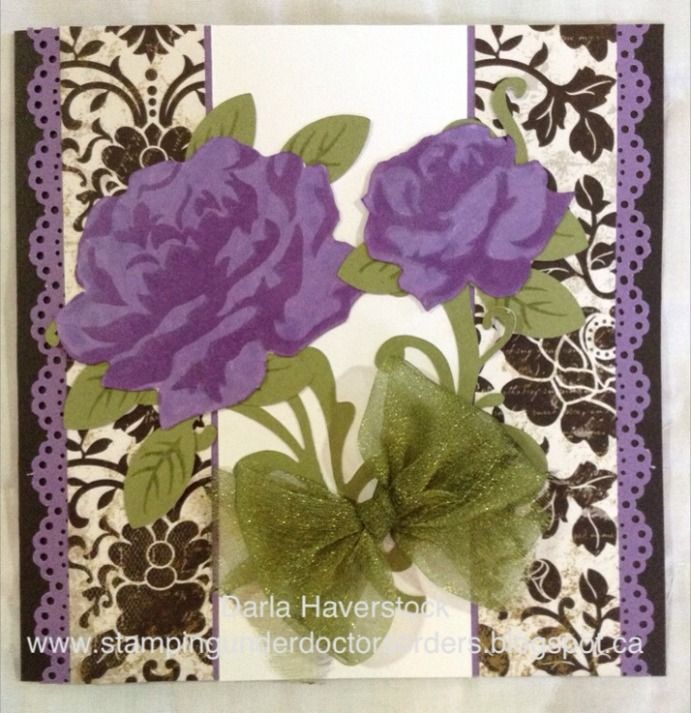
Ivy Lane Cards

After cutting and assembling the Ivy Lane card kit I realized I still had enough paper to make a few more with just a little more colonial white added.

I still used the cuts from the guide but used them a bit different from what the guide that comes with the kit says to.


I taught these cards at the Crop for the Cure that just happened last weekend and will be teaching them again at a crop put on by Scrapbookingcafeonline.ca May 9, 10, 11 weekend. 

What do you think? 

Saturday, March 22, 2014

Cascade Card

Here is a cascade card I made with a great crafty friend of mine Jolene.

I cut and scored the card base, she cut the layers to fit. I coloured and cut out the images and she decided on the placement of them. 

We were very happy with how this turned out.


I will be teaching this one as a class both at the Crop For The Cure in Cape Breton, NS the April 11, 2014 weekend and the Scrapbooking Cafe Crop in Truro, NS May 9, 2014 weekend.
Class fee is $5 with everything supplied except adhesive. 10 people per class.

We used Twilight cardstock, Timberline paper and white daisy cardstock to stamp on. The stamps I used were D1579 Windy Day and D1581 Give a Lift with Crystal Blue ink.

Jolene and I also have our own full day scrapbooking crop in Halifax for just $20!! A large portion of the proceeds go to support the Halifax Military Family Resource Center. Come check it out and join us! More info on it here.

Products Used:

Monday, March 18, 2013

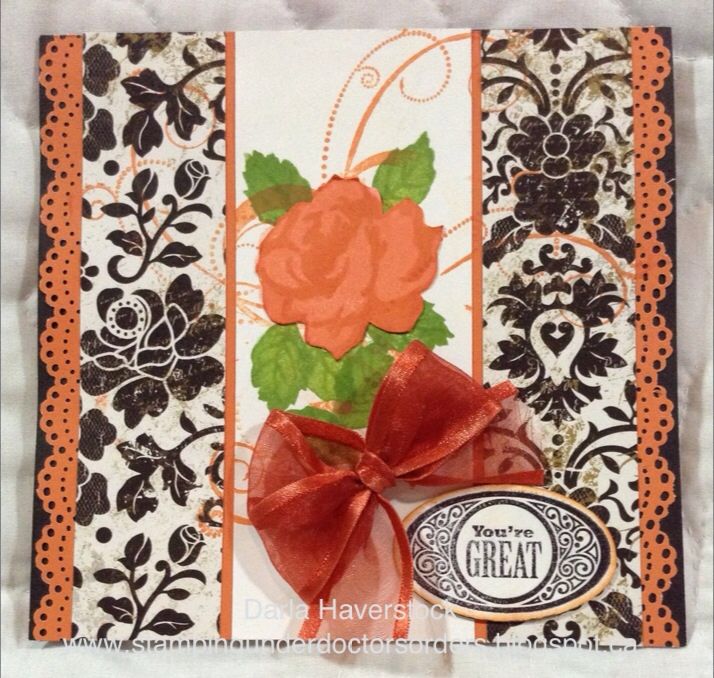
You're GREAT

I have another card over at the Card a Day Blog today. Head on over there to see some fantastic inspiration posted EVERY day and also go enter a card in the monthly contest over there.


I did this card in sunset cardstock and ink because orange is the favourite colour of a friend of mine who this card was for to celebrate her new job. The patterned paper is the For Always paper pack which I am in LOVE with. The flower and leaves is from the Stamp of the Month set this month "Floral Happiness", the swirls are from "Love Life" and the You're GREAT sentiment is from "Casual Expressions". The ribbon is from my stash and the edges of the sunset are punched with a lace doily Martha Stewart punch which could easily be substituted with a border from either Art Philosophy or Artiste cricut cartridges. 

I wasn't 100% happy with it for anyone other than someone who likes orange mostly because orange is NOT my favourite colour. :)

so.... I re worked the card with Gypsy and it will be a birthday card for the Spring Fling card class this Saturday March 23rd. There are still a few spots left if you're interested let me know. 


PRODUCTS USED:

Saturday, October 13, 2012

A Very Merry Christmas SOTM blog hop


Welcome to our October Stamp of the Month Blog Hop! This month Close to My Heart is offering a stamp set called "Very Merry Christmas". This set can be purchased exclusively through a Close to My Heart Independent Consultant for only $5 with a qualifying purchase of $50. (That’s a $17.95 value!)


In this hop, you will see projects featuring this fun stamp set from many talented crafty ladies!
Enjoy our blog hop - we hope we inspire you to create your “very” own Merry Christmas projects!

We are having a giveaway – that’s right blog candy for you hoppers! Carolyn of Nuts 4 Scrappin  is giving away a stamp set to one of our hoppers! She is giving away a stamp set called "Bonjour". You can see a picture of the stamp set on her blog. All you have to do to be eligible to win is to leave a comment on each blog and become a follower of Carolyn's blog.

If you have just hopped onto my blog, please start at the beginning at Lucy's blog – Love 2 Create. If you came from Lucy's blog – Love 2 Create then you are in the right place!


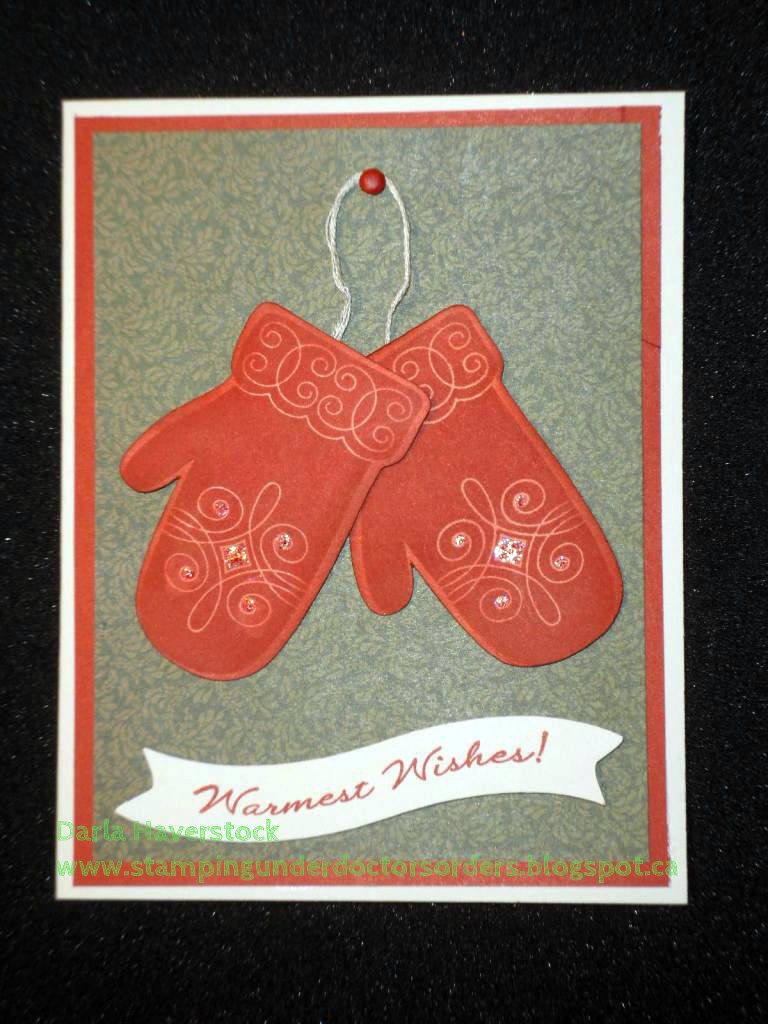
I actually felt a little guilty about how quickly my project came together for this hop. A quick couple cuts on the cricut with my Artiste cartridge... stamp, add a little extra ink on the mittens with a sponge dauber, stick the layer together and voila. Oh and of course a little bit of Stardust Glitz glitter gel to add a bit of sparkle to the mitten. Simple and easy card but I have to say I love the result.


Check it out:


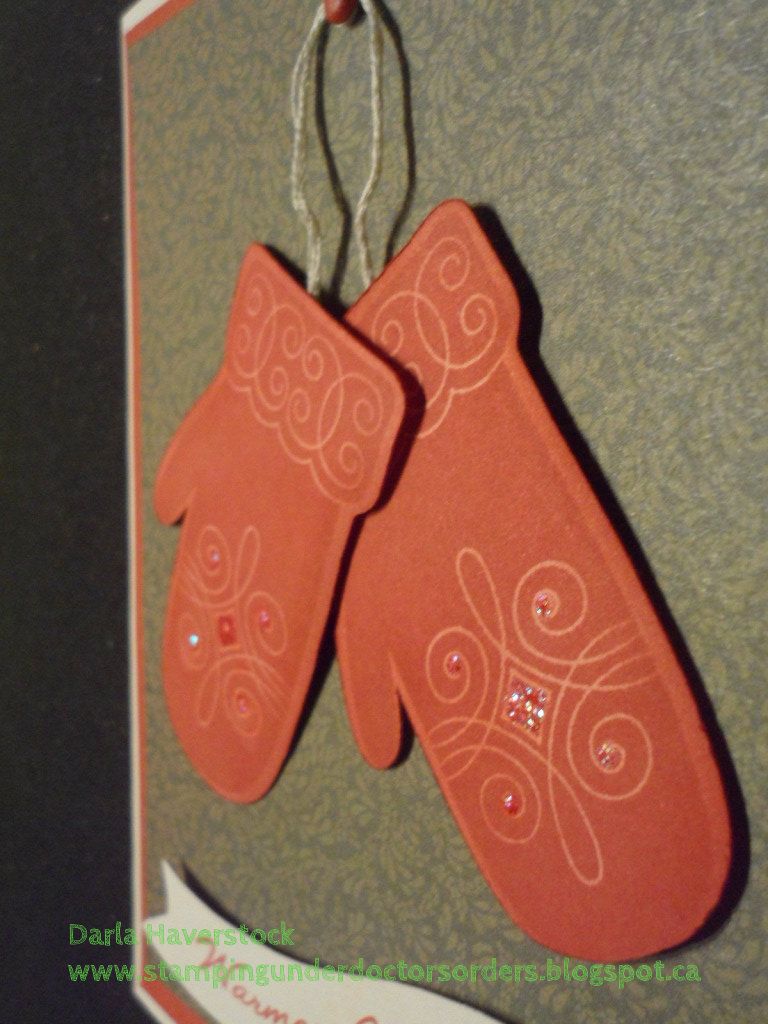
Oh, and a side shot to show the dimension added by using some 3D foam tape for the banner and mittens.

Details:
The cuts I used were all from the Artiste cartridge  They are the mitten which can be found on page 79 as well as a banner shape on page 58 that I did distort in Cricut Craft Room as I wanted it to be 3/4" x 3 1/2" but at 3/4" height it was only about 2 1/2" long so I used CCR to keep the height at 3/4" and stretch the length out.
The card base is colonial white, 2nd layer is Cranberry and the patterned paper is from the Pear and Partridge papers. I also used some colonial white embroidery floss and a cranberry brad. The ink is all of course.. cranberry ink. Mittens and banner on 3D foam tape and a little bit of Stardust Glitz glitter gel added to the mitten for some sparkle.


Your next stop on our Very Merry Christmas blog hops is Michelle  ~My Creations With Michelle

SIDE NOTE: Michelle (your next stop on this hop) and I are offering an all day, 12 card Christmas class on December 1st if you're local here in Halifax, Nova Scotia. 6 cards will be designed by myself and 6 by Michelle. Contact either one of us for more info.
If you're not local but still want to make the cards feel free to contact one of us as well as I'm sure we can arrange to put a little card kit together for you to make at home.

Products Used:


Here is the complete lineup in case you get lost along the way:

  1. Lucy ~ Love 2 Create
  2. Darla ~ Caution: Crafting is Contagious
  3. Michelle ~ My Creations With Michelle
  4. TinaGale ~ My Scrappy Ideas
  5. Jennifer ~ 4 Hearts Scrapbooking
  6. Carolyn  ~ Nuts 4 Scrappin'
  7. Stephanie  ~ The Quilted Scrapper
  8. Amanda ~ Scraps of Love
Thanks for hopping along with us - we hope we were able to inspire you to create your own "Very Merry Christmas" projects.

Saturday, April 28, 2012

Art Philosophy Blog Hop

Welcome to the Art Philosophy Cricut Cartridge Blog Hop.
All the stops along this blog hop will be show casing projects made with the very versatile Art Philosophy Cricut Cartridge. If you are visiting from Amanda's blog then you are in the right place, if not, please go and start from the beginning at my team member Courtney's blog.

I always struggle coming up with new ideas for masculine cards so I challenged my self to make one for this and here is what I came up with:

Original Artwork c CTMH
Card design by: Darla Haverstock

I used the paper lace 2 cartridge to make my own embossing folder for the background (if you're local I teach classes on how to do this). I then inked the embossed panel by lightly rubbing the ink pad over the raised parts (I used Silver Staz-on ink). The bike image and sentimetnt tag is from C1483 Born To Ride and the sentiment tag coordinates with which is the 4th row 5th column of the white buttons on the keypad overlay and is cut at 1 1/2" (which it tells you right on the stamp set what size to cut it at). The "tire tread" strip is from the stamp set that comes in the Cruisin' Workshop on the Go kit (I love this one!!).

Hope you enjoyed my project today.


Next you should go to Connie's blog and see what she has in store for you. :)


If you get lost along the way here is the entire line up

  1. Courtney - http://www.creatingwithcourtney.blogspot.com
  2. Brandy- http://www.canadianscrappers.blogspot.ca
  3. Audrey- http://scrappingwithscrappy.blogspot.com
  4. Amanda- http://ajcreationsfromtheheart.blogspot.com
  5. Darla - http://www.stampingunderdoctorsorders.blogspot.com  <---YOU ARE HERE
  6. Connie - http://conniescraftycloset.blogspot.com  <---GO HERE NEXT!!
  7. Stephanie- http://www.quiltedscrapper.blogspot.com
  8. Erin - http://www.imcreaterin.blogspot.ca
  9. Lucy - http://love2createitall.blogspot.com
  10. Vanessa http://wwwpaperkraftsunlimiteddesings.blogspot.com/
  11. Carol http://CarolLoftus.blogspot.com
  12. Eva- http://www.loveofcreating.blogspot.com
  13. Wendy K. http://www.myscrapbookingblog.com
  14. Michelle http://www.myflightsoffancy.com/blog
  15. Gloria - http://www.purpleglocreations.blogspot.com
  16. Chrissy - http://www.chrissycurtiscrafts.blogspot.com
  17. Ann Marie Lessner - www.creativeramblings345.blogspot.com
  18. Michelle Degnan Powell - http://scrappinprincess-michelle.blogspot.com/

Tuesday, April 24, 2012

INSIDE THE CRAFTERS STUDIO - Celebrate easel card

This is my project that I made for my guest designer spot over at CreatingwithArtPhilosophy for February 10th, 2012. If you attended my full day cricut class in Truro you got to make this for yourself. :) For this card I used the center point feature with the cricut marker to create the white shaped layer with the brown frame inside. I made a video on how to do this which you can find here

Everything for this card was cut using the Art Philosophy cricut cartridge. The stamps used were the ones that come bundled with the cartridge as well. :)


Sunday, October 23, 2011

More to come!!!

This was a card class I did. The white card with the swirls is a complete scraplift from http://www.ustream.tv/channel/anns-crafts
Please check out Anns post for that one!! Thank you Ann for letting me use this idea!!

The rest are my own designs!
Everything on these cards (with the exception of the ribbon on the white card from Ann) is cut out on the cricut from the Art Philosophy cartridge!!

Can you see why I love this cartridge so much???

I will do a separate post for my designs.

  
Get widget