Showing posts with label cricut craft room. Show all posts

Saturday, November 17, 2012

Christmas in November


Welcome to our Christmas in November Blog Hop where we are showcasing the exclusive Art Philosophy Cricut cartridge which can be purchased exclusively through a Close to My Heart Independent Consultant.

It's hard to believe that it's already November and that the US Thanksgiving is less than a week away. And well, that means, it's almost Christmas! We have created Christmas themed projects for you and hope to inspire you to get started on YOUR Christmas creations.

If you just happened to come to this blog, you should start at the beginning at Lucy's blog - Love 2 Create. If you came here from Lucy's blog - Love 2 Create, then you're in the right place!


I decided to keep it simple with this one and made gift tags for a few special presents I will give out at Christmas.
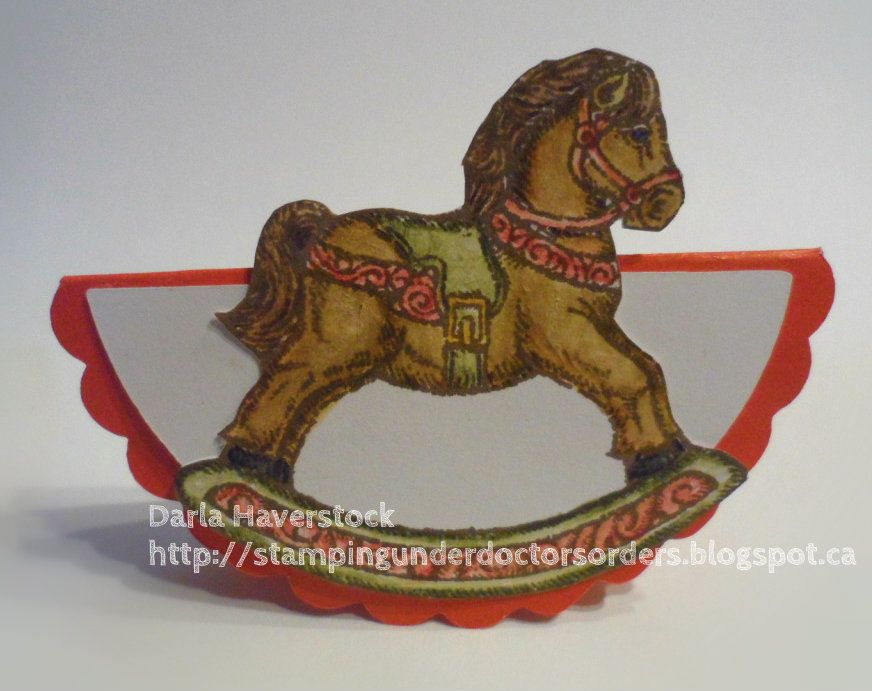
Love that this will actually "rock" if you give it a little tap. :)

I used the card feature from page 69 in the Art Philosophy handbook cut at 3" from Cranberry cardstock for my card base. I used cricut craft room to alter the layer feature from this same page hiding one of the cut lines so it became a solid semi circle instead of a frame and I did change the dimensions on it a bit as well making it a height of 1.194" and width 2.625" and cut it from White Daisy cardstock. I then stamped the rocking horse image from the Christmas Delights stamp set in chocolate ink on white daisy card and used my watercolour pencils to colour it in. I love that this image can be Christmas themed by making it Christmas colours and using it on a Christmas project OR it can be coloured completely differently and used for any other occasion be it a baby shower, birthday, etc. Fussy cut my image (you don't have to cut the section out between the bottom of the horse and top of the rocker piece since your layer from behind would show through here anyways.

I will probably put a little loop of ribbon on these to attach them to presents but I left it off for now as I might not want it for some and it's a lot easier to add it if I want it then it is to take it off. 

Here's a look at the stamp set I used, it is by far one of my absolute favourites!


The next stop on your blog hop fun is Diana ~ Diana's Free Moments.

Products Used:

Here's the entire blog hop lineup in case you get lost along the way:

Lucy ~ Love 2 Create 
Darla ~ Caution: Crafting is Contagious
Diana ~ Diana's Free Moments
Carolyn ~ Nuts 4 Scrappin'
Kindred Hearts ~ It Makes Total Cents
Tammy ~ Closer 2 My Heart
Arlene ~ Arlene's Creative Space
Traci ~ Paper Crafting 101


If you do not already have a Close To My Heart consultant and would like to purchase any of the products or want more info I would be happy to help you out. You can visit my CTMH website to see all of the wonderful products and you will find all of my contact info there as well as a link to find a consultant that may be in your area if you wish to have someone local to you.

Thursday, November 15, 2012

Advent Calendar Blog Hop

Welcome to our second of 2 Blog Hops happening this month. In this Hop you will find that each consultant has created a calendar, we've used different materials and created our own take on advent calendars! Close To My Heart has an Advent Calendar WOTG kit that you can purchase from your local consultant, or you can purchase from from me here

If you just happened across my blog, welcome to our Cross Canada advent calendar hop. I am the first stop in our hop across Canada starting here in Halifax, Nova Scotia. If you started at someone else in the hops blog and are going back around to where you started then you should have come from Teresa over at her blog Country Crafting Mama.

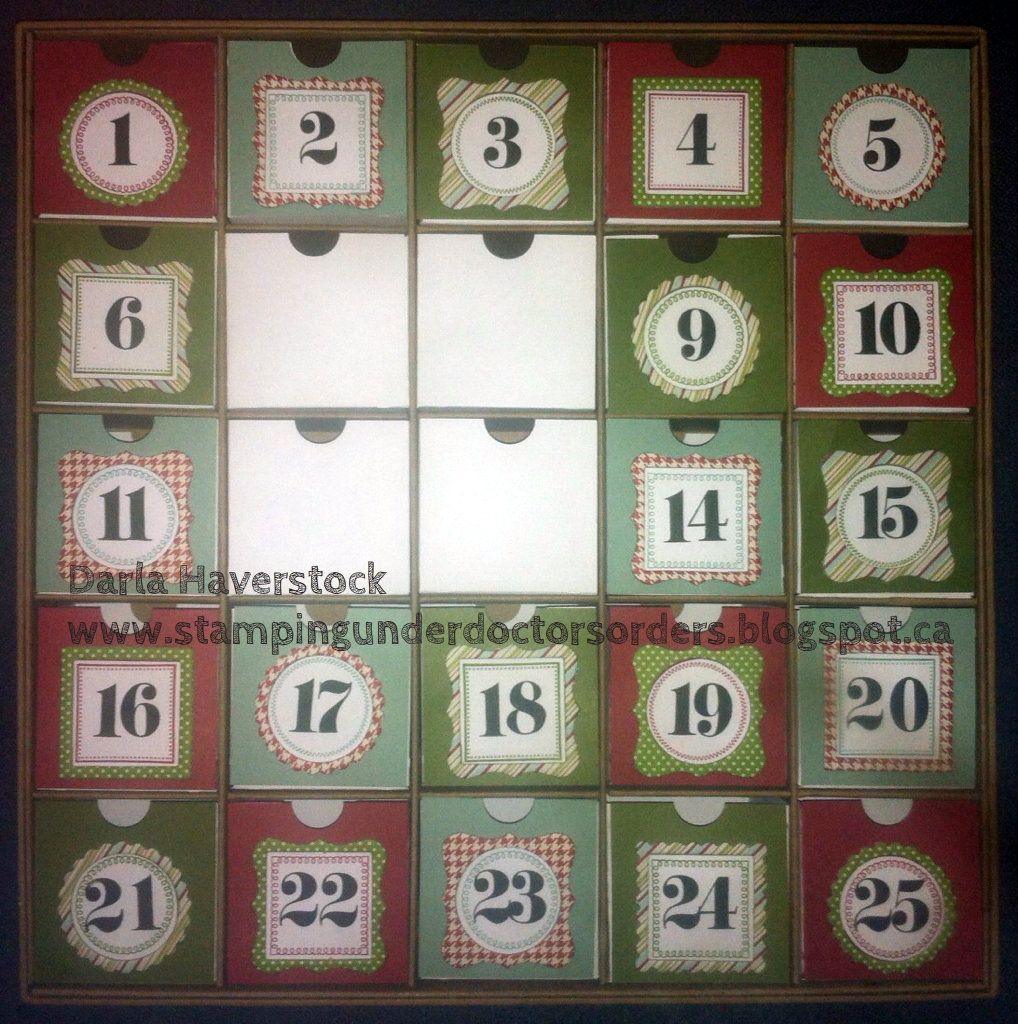
First let me show you how I put my advent WOTG together. I didn't follow the instructions exactly.. although I did follow them more closely than I normally would. LOL

.
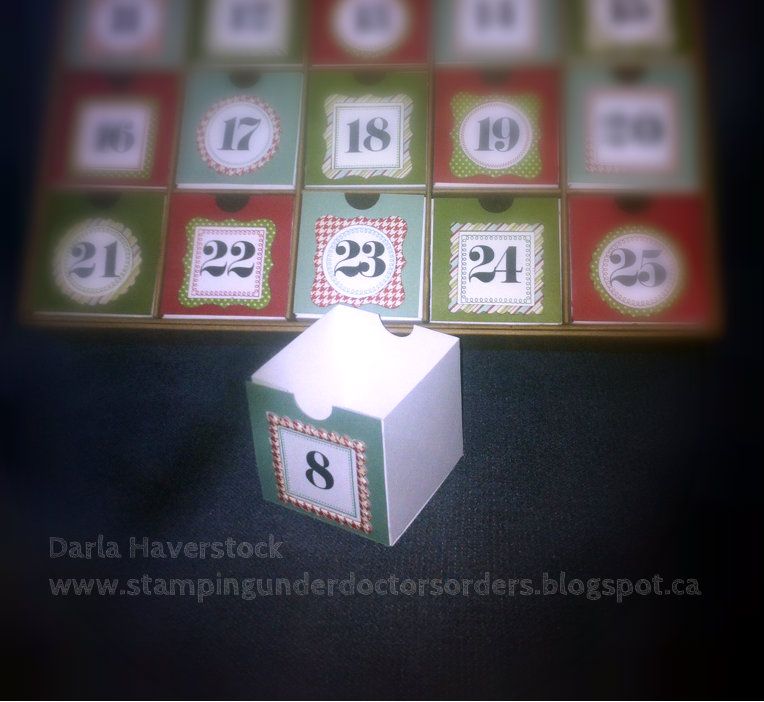
I constructed all of my boxes from white cardstock and then cut 2.5" squares from the arious colours of cardstock and stuck them on the fronts. This gave my drawers a little more durability (which is good considering my kids are definitely not gentle with things) and allowed me to use a circle punch on the other side too and instead of having to store this away the other 340 days a year I can simply turn all the drawers the other way and use it for storage in my craft area... or anything else really.. haven't quite decided what I'll do with the other side yet.I'm kind of thinking I'll find a nice photo and cut it to fit the drawer fronts on the other side and then stick them on in the correct order so it displays a tiled picture. Not sure which picture to use though until I decide exactly what room it's going to be kept in.

Here's a photo of a few drawers in the other way...


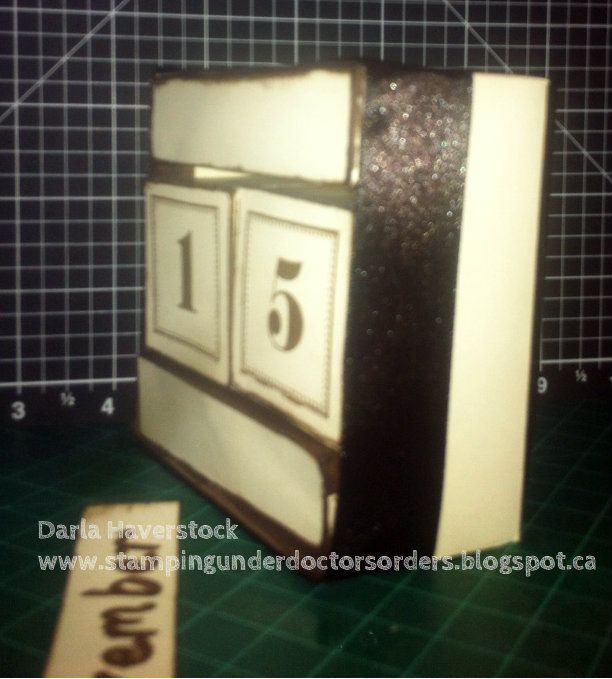
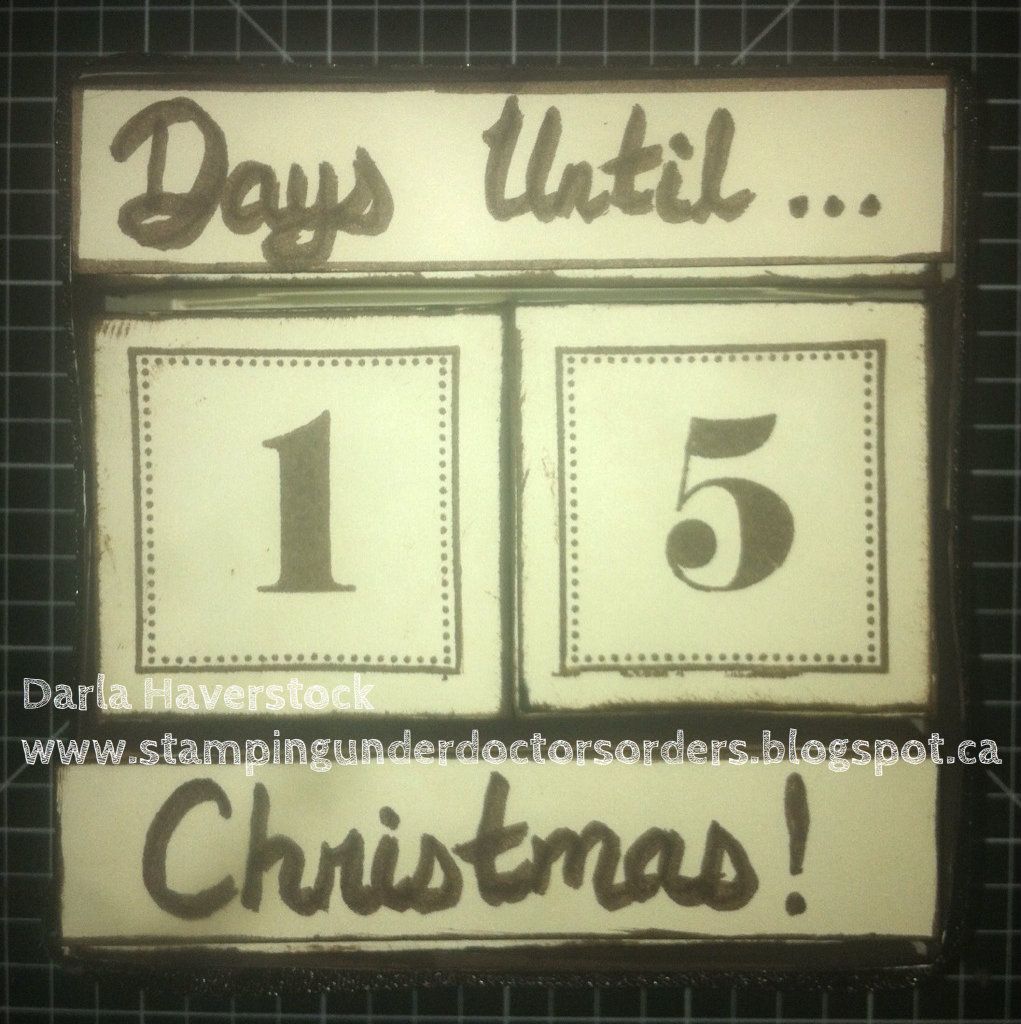
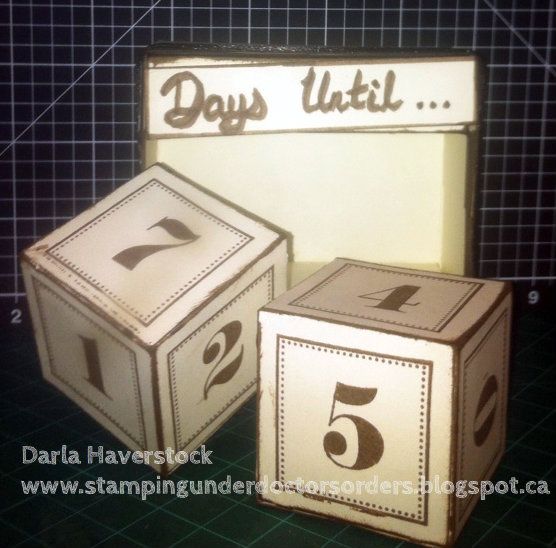
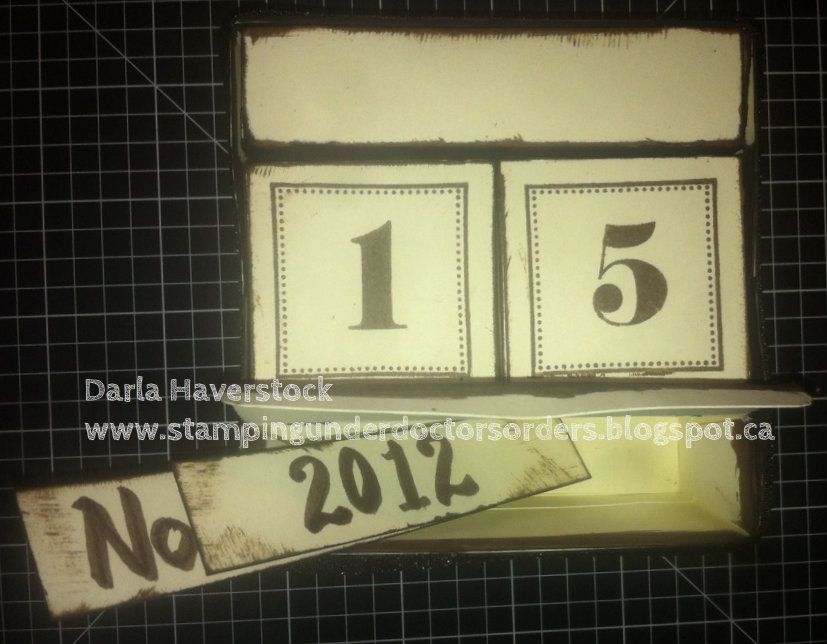
Now, since the project for this hop was to create an advent calender without using this cubby or to create something other than an advent with the cubby (which I'm planning on but haven't finished yet)... my actual project for today is a perpetual calendar that is also an advent calendar... confusing right?? I know.

See if some pictures help...


Make more sense now? If you can't tell I am absolutely horrible for either bringing Christmas things out on time or putting them away so if I make them fit any occasion then it's not weird to still have it on my desk in July. hahaha

Feel free to skip my ramble on how I made this and go directly to the next stop on our hop over at Michelle's blog My Creations With Michelle

Also, tomorrow is the LAST day to register for mine and Michelle's Christmas Card Making Day so make sure you contact one of us to register is you wanted to attend. It's going to be lots of fun! :)

Basically this is 2 cubes cut from the Artiste cartridge as well as 2 card boxes. I did have to alter the card boxes a bit after I cut them to make them fit this design the way I wanted it to. The cubes are 1.75" and the overall dimensions are approximately 3.75" x 3.75" x 1.8".

I cut a piece of cardstock 7.35" x 7.35" and scored around all 4 sides at 1.8". Then I folded up the sides and glued to make a frame and backing for my calendar. I am going to re-do this one and will use the chocolate cardstock for this piece instead of colonial white.

I stuck my card boxes on the inside of this outer frame creating an empty space in the middle for my cubes.

I cut blank pieces of colonial white to fit the fronts (what would normally be the tops) of the card boxes. When I re-do this I will be putting velcro on the backs of all the pieces for the years, months, my days until, Christmas etc... as well as on the tops of the card boxes to make them easy to take on and off to change them out. In the photos I just used repositionable adhesive, since I knew I was going to re-do it to change the outer frame colour I didn't want to waste my velcro.  I will also type out all the words on them too as it doesn't look that bad in real life but looking at the pictures of my handwriting on the computer I'm wishing I had type it.

The great part is that all the pieces that aren't in use can be stored in either the top or bottom card box. I think the bottom one in the one for myself will end up with post it notes in it. :)

I used the stamp set from the Advent WOTG to stamp the blocks and inked all my edges in chocolate ink.

The ribbon I used to wrap around the outside just to fancy it up a bit more was some old ribbon I had laying around so I have no idea what brand it is, sorry.

As I'm writing up this post I'm also thinking I might have some stamped and cut out holiday images attached to the Christmas countdown pieces just to make it a little more festive but truthfully I really like having some Christmas things around that aren't over the top with Red, Green and covered in glitter although I do like that stuff too don't get me wrong... just not on EVERYTHING!!


Your next stop on the Cross Canada Hop is Michelle S from My Creations With Michelle

Here is the entire lineup in case you get lost along the way. You will also find this list on Michelle's blog
  1. Darla - Caution: Crafting is Contagious
  2. Michelle S - My Creations With Michelle
  3. Sheri - Sheri Says Just Scrap It
  4. Michelle M - Twirl 'n Time
  5. Teresa - Country Crafting Mama

Thanks for hopping along with us - we hope we were able to inspire you to create your own Advent Calendar using some of the designs and products seen along the way. Join us again on December 15th when we showcase a 3D Christmas themed project from the New Artiste Cartridge.

Saturday, October 13, 2012

A Very Merry Christmas SOTM blog hop


Welcome to our October Stamp of the Month Blog Hop! This month Close to My Heart is offering a stamp set called "Very Merry Christmas". This set can be purchased exclusively through a Close to My Heart Independent Consultant for only $5 with a qualifying purchase of $50. (That’s a $17.95 value!)


In this hop, you will see projects featuring this fun stamp set from many talented crafty ladies!
Enjoy our blog hop - we hope we inspire you to create your “very” own Merry Christmas projects!

We are having a giveaway – that’s right blog candy for you hoppers! Carolyn of Nuts 4 Scrappin  is giving away a stamp set to one of our hoppers! She is giving away a stamp set called "Bonjour". You can see a picture of the stamp set on her blog. All you have to do to be eligible to win is to leave a comment on each blog and become a follower of Carolyn's blog.

If you have just hopped onto my blog, please start at the beginning at Lucy's blog – Love 2 Create. If you came from Lucy's blog – Love 2 Create then you are in the right place!


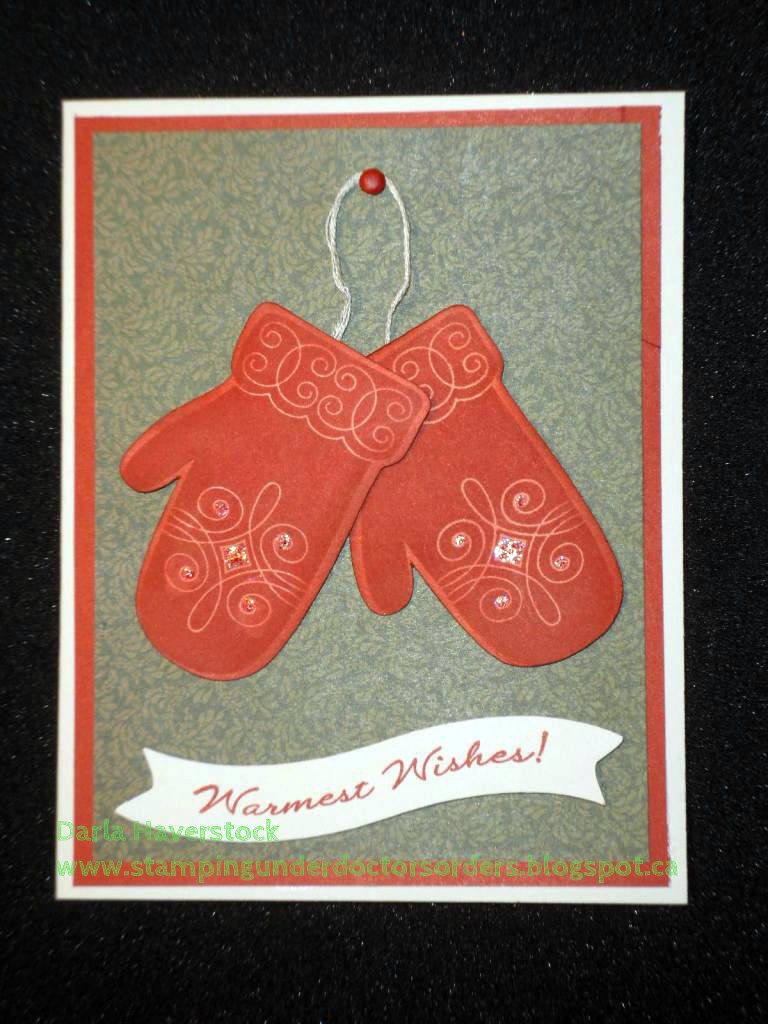
I actually felt a little guilty about how quickly my project came together for this hop. A quick couple cuts on the cricut with my Artiste cartridge... stamp, add a little extra ink on the mittens with a sponge dauber, stick the layer together and voila. Oh and of course a little bit of Stardust Glitz glitter gel to add a bit of sparkle to the mitten. Simple and easy card but I have to say I love the result.


Check it out:


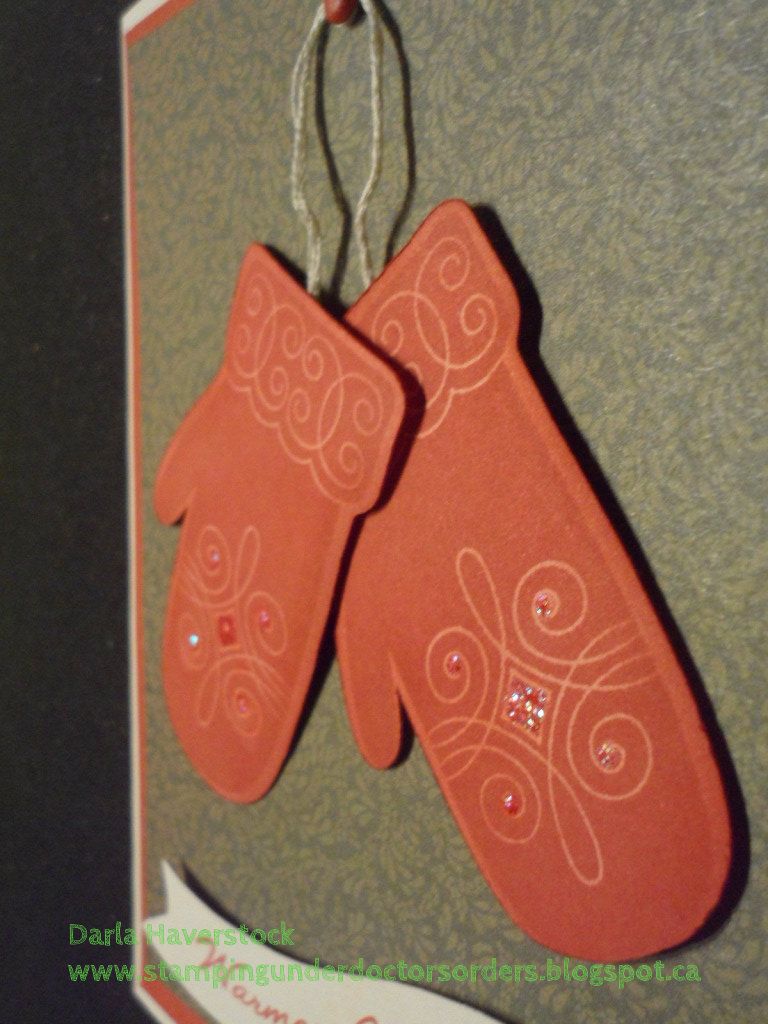
Oh, and a side shot to show the dimension added by using some 3D foam tape for the banner and mittens.

Details:
The cuts I used were all from the Artiste cartridge  They are the mitten which can be found on page 79 as well as a banner shape on page 58 that I did distort in Cricut Craft Room as I wanted it to be 3/4" x 3 1/2" but at 3/4" height it was only about 2 1/2" long so I used CCR to keep the height at 3/4" and stretch the length out.
The card base is colonial white, 2nd layer is Cranberry and the patterned paper is from the Pear and Partridge papers. I also used some colonial white embroidery floss and a cranberry brad. The ink is all of course.. cranberry ink. Mittens and banner on 3D foam tape and a little bit of Stardust Glitz glitter gel added to the mitten for some sparkle.


Your next stop on our Very Merry Christmas blog hops is Michelle  ~My Creations With Michelle

SIDE NOTE: Michelle (your next stop on this hop) and I are offering an all day, 12 card Christmas class on December 1st if you're local here in Halifax, Nova Scotia. 6 cards will be designed by myself and 6 by Michelle. Contact either one of us for more info.
If you're not local but still want to make the cards feel free to contact one of us as well as I'm sure we can arrange to put a little card kit together for you to make at home.

Products Used:


Here is the complete lineup in case you get lost along the way:

  1. Lucy ~ Love 2 Create
  2. Darla ~ Caution: Crafting is Contagious
  3. Michelle ~ My Creations With Michelle
  4. TinaGale ~ My Scrappy Ideas
  5. Jennifer ~ 4 Hearts Scrapbooking
  6. Carolyn  ~ Nuts 4 Scrappin'
  7. Stephanie  ~ The Quilted Scrapper
  8. Amanda ~ Scraps of Love
Thanks for hopping along with us - we hope we were able to inspire you to create your own "Very Merry Christmas" projects.

Saturday, September 15, 2012

September Art Philosophy Blog Hop


Welcome to our September Art Philosophy Blog Hop! Each month we will showcase our amazing Art Philosophy Cricut cartridge which can be purchased exclusively through a Close to My Heart Independent Consultant.

Since Halloween is just around the corner, this month we will be featuring projects for Halloween made using the Art Philosophy Cricut cartridge! Hope you don’t get too scared by the time you get to the end of our hop!

If you just happened to come to this blog, you should start at the beginning at Lucy's blog - Love 2 Create.


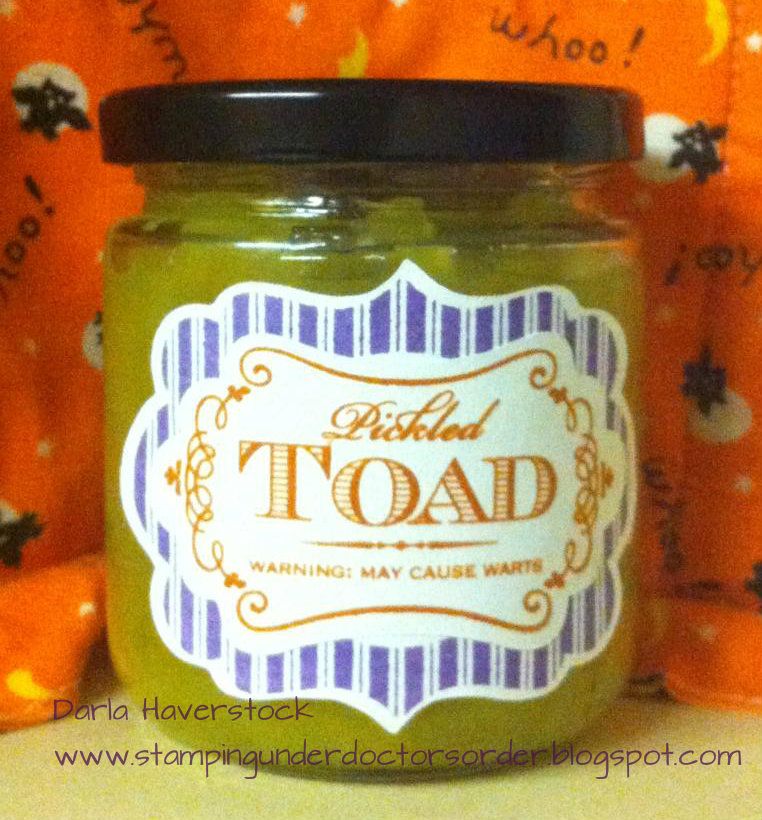
For this hop I made a couple projects.. the first was a set of labels for some homemade green tomato chow chow.  I just love these (the labels.. not the chow chow)!!

They turned out so cute and I think I'm going to label all the pickles and chow chow in our house with these since it's a bit of a running joke in our house as everyone else LOVES them and I can't stand the smell of them enough to even open the bottle to put some on the kids plates.

Since my family has such a lovely sense of humour, I get handed the bottle of whatever is on the table (pickles, mustard pickles, chow chow, etc) and asked if I would like some.  Let's see how appetizing they find them with their new labels.. LOL

I used D1527 - Perfect Fit Frames stamped in Gypsy ink on labels cut out using the Art Philosophy cartridge shape on page 67 as indicated on the stamp carrier sheet and C1509 - Magic Potions in Autumn Terracotta ink on labels cut out using the Artiste cartridge shape on page 36.


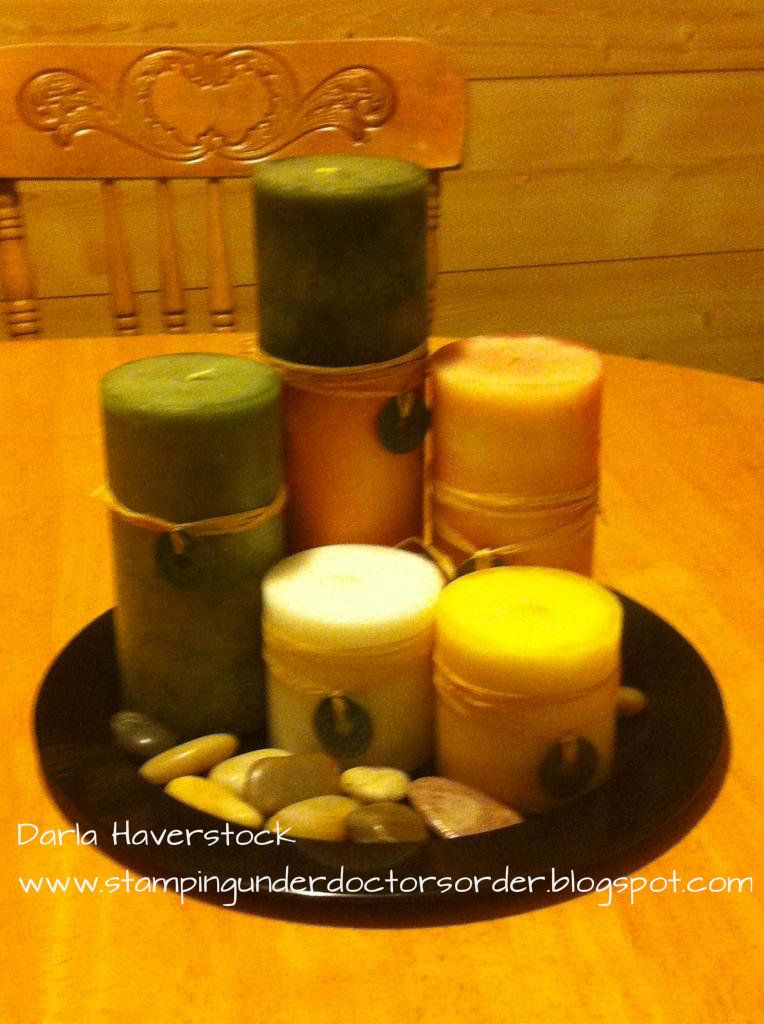
I also had this set of candles around that was gathering dust and thought the colours (although the picture really doesn't show this very well) were very Halloween like so I decided to add a border from the Art Philosophy cartridge on page 65 in chocolate card stock to make them Halloween themed. I'm not 100% satisfied with these and you may see these again some time with some more cuts added (I'm thinking spiders, skeletons... maybe a few 3D pumpkins around them). Either way I do like how they turned out. They definitely look a little more theme suited now anyways. :)

What do you think?

BEFORE:
 
AFTER:


The next stop on your spooky blog hop trail is Diana over at Diana's Free Moments


Here's the entire blog hop lineup in case you get spooked along the way:
  1. Lucy - Love 2 Create 
  2. Darla - Caution: Crafting is Contagious!
  3. Diana - Diana's Free Moments
  4. Stephanie - The Quilted Scrapper
  5. Julia - You Can Create
  6. Wendy Kessler - My Scrapbooking Blog
  7. Carolyn Mendoza - Crafting With Carolyn
  8. Kindred Hearts - It Makes Total Cents
  9. Rebecca - Stamp and Scrap Studio
  10. Maria Woodworth - Maria's Paper Craft Place
PRODUCTS USED:

Saturday, September 8, 2012

Fall Favorites SOTM Blog Hop


Welcome to our September Stamp of the Month Blog Hop! This month Close to My Heart is offering a stamp set called "Fall Favorites". This set can be purchased exclusively through a Close to My Heart Independent Consultant for only $5 with a qualifying purchase of $50.


In this hop, you will see projects featuring this fun stamp set from many talented crafty ladies! We hope you enjoy our blog hop today!

If you have just hopped onto my blog, please start at the beginning at Lucy's blog: Love 2 Create .   If you just came from Lucy's blog then you are on the right track. :)


My Project Details:

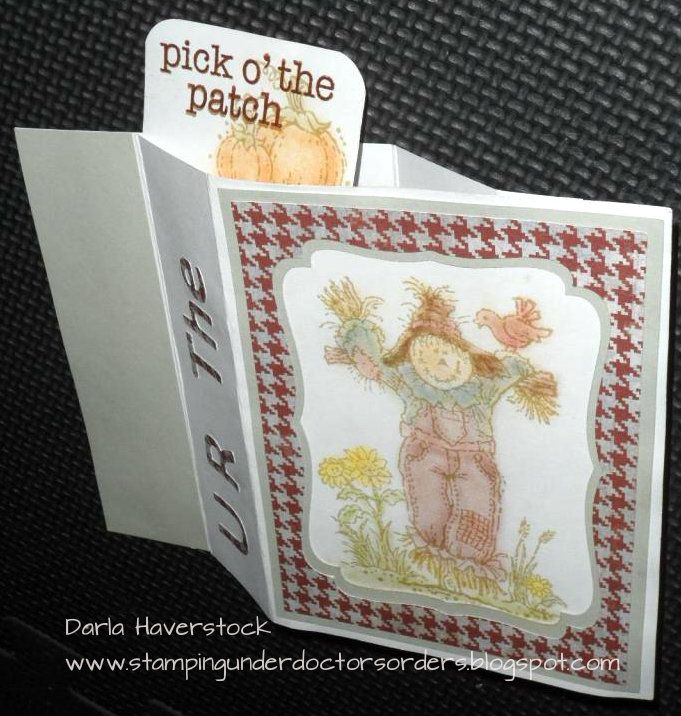
My mother-in-law sent a wonderful wiper card with Tinkerbell on it for my daughters 1st birthday, so when I sat down with this stamp set I decided I really wanted to try making a wiper card myself. :)


Now the big challenge I had was figuring out measurements since every tutorial I could find when I did a google search brought up measurements for making an A2 (4.25 x 5.5) card landscape and I needed it to be portrait for this card and when I kept the sides the same as the tutorials said it looked very strange and awkward so I had to play with this a lot. The sentiment I wanted to use also wouldn't fit on the wiper part so I changed the dimensions of that too and then inked part of my sentiment and stamped it and then inked the last part of my sentiment and stamped it below that.

The ink I used for the sentiment is Barn Red which coordinates perfectly with the Dakota B&T I used . I used one of the new colours "Cashmere"to stamp the scarecrow image and the pumpkin image on the wiper and then I wanted to colour it with my watercolour pencils but could not for the life of me find them in my messy craft area so I used chalks instead.

I cut the frames to make the opening reveling the card underneath where I stamped my image from the Art Philosophy cartridge in Cricut Craft Room (of course) but you could just use center point on your machine and cut the label shape first and then the rectangle using the same center point coordinates. The letters are cut out of the piece I cut out from the middle of the frame using the Artiste cartridge.

The card doesn't really "open" but when you pull the card front to the right and the back piece to the left the wiper piece pops up from the middle.

Here's how it looks as you "open" it.. (closed, half way and all the way).


Isn't the main image stamp just too cute?! I love that this set has a single bird, and the pumpkins as a separate image as well as some great fall words and sentiment. Love it!! You can get this fantastic stamp set "Fall Favourites" for just $5 with a $50 order plus you would also qualify to get the double stamp set "It's Your Day" for National Stamping Month (which you can see pictures of and a great blog hop full of ideas for in my previous post here) for $5... that is an absolutely incredible deal! :)
.


Your next stop on the Fall Favorites Stamp Set Blog Hop is  Shelly Mendenhall of Inky Wheeler's Artsy Musings


Here is a complete list of the blog hop in case you get lost along the way:

  1. Lucy :  Love 2 Create You came from here
  2. Darla : Caution: Crafting is Contagious! You are here
  3. Shelly Mendenhall : Inky Wheeler's Artsy Musings  Go here next
  4. Eva Friesen : For The Love Of Creating
  5. Judith Ashmore : My Blog Adventure
  6. Stephanie : The Quilted Scrapper
  7. Tina Gale : My Scrappy Ideas
  8. Maria Woodworth : Maria's Paper Craft Place
  9. Jennifer Kramer : 4 Hearts Scrapbooking
  10. Carolyn : Nuts 4 Scrappin'
  11. Madeline Morcelo : Inking From The Heart
  12. Theodora : Celebrate Crafts
  13. Laura W. :  Scrappinsweetie's Escape
  14. Michelle Stewart : My Creations With Michelle
PRODUCTS USED:

Saturday, August 25, 2012

August Artiste Blog Hop


Welcome to our August ARTISTE Blog Hop! Each month we will showcase a feature of the amazing ARTISTE Cricut cartridge which can be purchased exclusively through a Close to My Heart Independent Consultant (if you don't have one I'd love to help you out).

We're so excited to be doing this hop and we have a fabulous lineup with some very talented ladies. There will be lots of fun projects AND some blog candy!!!

This month we will be showcasing a different page from the Artiste cartridge! Did you know there are 700 images on this cartridge?? That's right -- 700!!!

If you just happened to come to this blog, you should start at the beginning at Lucy's blog - http://www.love2createitall.com.

If you want to take a look at the booklets that come with the Artiste cartridge here's the links for you:
Artiste handbook
Assembly Instructions

Well, we've been on vacation for the last 3 weeks (tomorrow is our last day, back to normal on Monday). We have done a lot of travelling and camping during our vacation which meant a very BORED 3 year old sat in the backseat prompting me to come up with more fun stuff for him to do while buckled in.

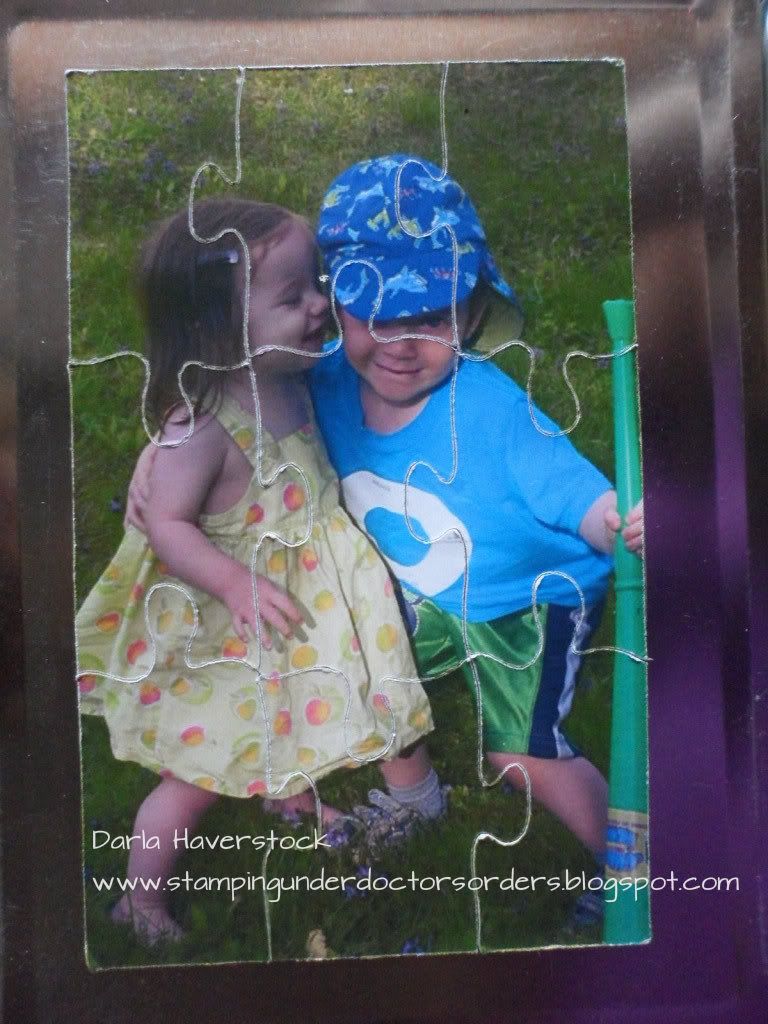
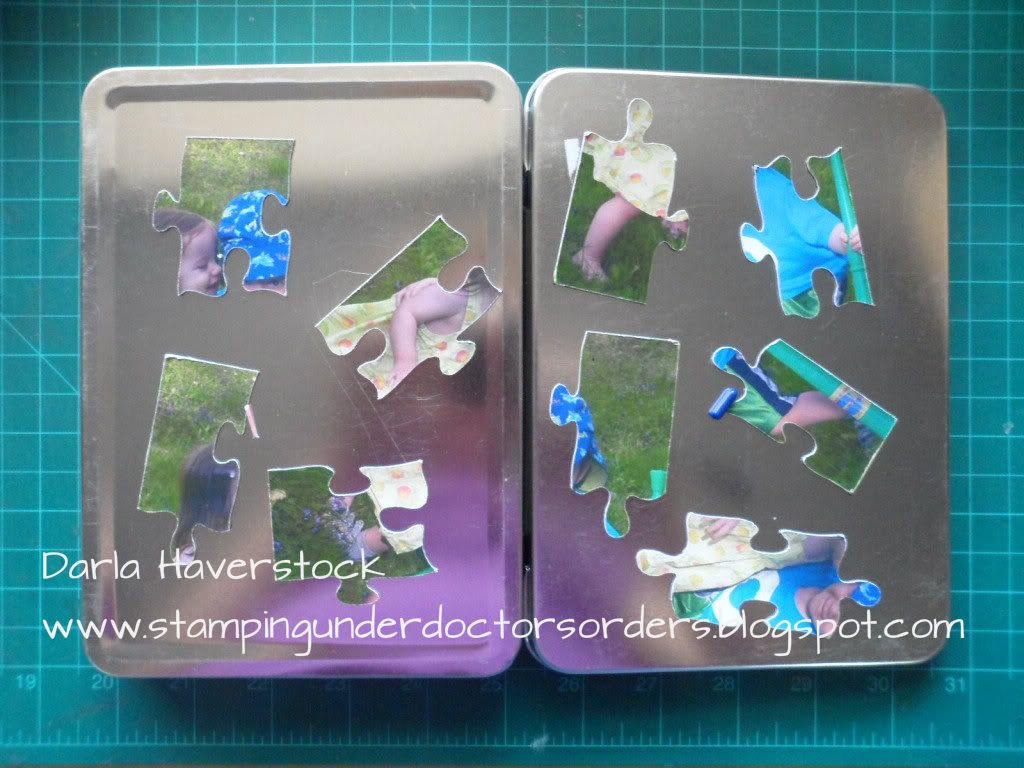
Besides the great mini-album cuts on the Artiste Cartridge and LOTS of other stuff there are a few puzzle cuts on there which of course got me wondering what I could make with that for my kids that wouldn't get destroyed...
Introducing my magnetic puzzles stored in a tin....

I had some metal containers I had picked up for 99 cents at a liquidation place as well as some magnetic sheets that have adhesive on top of them from the dollar store.

I printed off photos of my kids and stuck them to the magnetic sheets, cut it using my deep cut blade and the puzzle image on page 57 of the Artiste Cartridge (resized using Cricut Craft Room so I could pull it out of proportion and make it fit the picture better) and ta-da!!

You will see that the edges get a bit worn after handled by the kids so I might laminate the top next time... but other than that I am very happy with this project.


Thank you CTMH and my new Artiste cartridge for saving my sanity!!!!
The best part is that it stores in the tin and then you can open the tin up and use the outside of it to assemble the puzzle. I love toys that stay together.

I also posted a project using one of the 3D purses from the cartridge earlier this month here.

Now make sure you head over to Julia's Blog and see the eye candy she has for you!

Here is the list of all the talented consultants who are participating in this months blog hop:

  1. Lucy ~ http://www.love2createitall.com
  2. Darla ~ http://www.stampingunderdoctorsorders.blogspot.com <--- You are here
  3. Julia http://youcancreatectmh.blogspot.com/
  4. Theo www.celebratecrafts.com
  5. Tina Gale http://tiggersscrapplace.blogspot.com
  6. Stephanie http://www.quiltedscrapper.blogspot.com
  7. Mandy http://www.mandydesigns.blogspot.com
  8. Joanne http://josiesjoy.blogspot.com
  9. Laura W http://scrappinsweetiesescape.blogspot.com/
  10. Rebecca ~ http://blog.scrapprincess.com/
  11. Maria Woodworth - http://mariawoodworth.blogspot.com
  12. Judith Ashmore- www.grammiejudys.blogspot.com
  13. Lisa Woodward~http://mycraftyspaces.blogspot.com
  14. Laura Charko - http://koladesigns.wordpress.com/
  15. Jennifer Kramer- http://4heartsscrapbooking.blogspot.com/
  16. Eva Friesen ~ http://loveofcreating.blogspot.com/
Thanks so much for stopping by and hopping with us - we hope you LOVE all the projects we created!

    Friday, July 27, 2012

    July Art Philosophy Blog Hop

    Welcome to our July Art Philosophy Blog Hop! Each month we will showcase a feature of the amazing Art Philosophy Cricut cartridge which can be purchased exclusively through a Close to My Heart Independent Consultant.
    We're so excited to be doing this hop and we have a fabulous lineup with some very talented ladies. There will be lots of fun projects AND some blog candy!!!

    Lucy Kelleher, our hostess and fellow CTMH Consultant, will be giving away a stamp set! She is giving away a prior Stamp of the Month set that can no longer be purchased called "You Are ...". (This stamp set has a $17.95 retail value). You will find a picture of the stamp set on her blog. To enter to win, you will need to leave a comment on her blog and on every stop of the blog hop. If you also become a follower of Lucy's blog, she will give you another entry .

    This month we will be showcasing the "Card" feature of the cartridge. Did you know there are 100 different card shapes you can make with this cartridge? You heard me correctly -- 100!!! Now we won't be able to show you ALL 100 card options, but we will show you as many as we can.

    If you just happened to come to this blog, you should start at the beginning at Lucy's blog - http://www.love2createitall.com/.

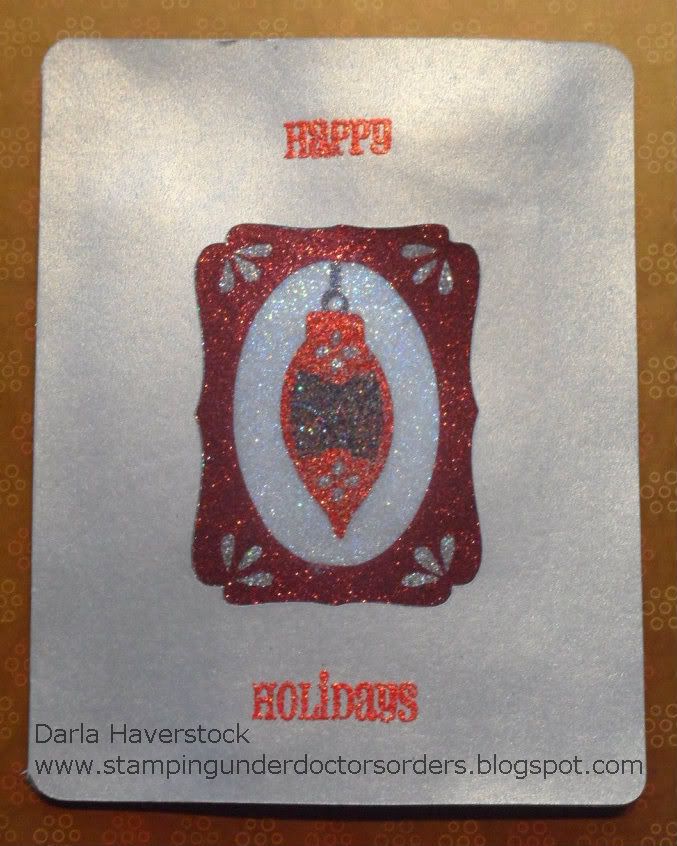
    My project today uses the card feature key on page 47 (without the shift key) which is the 3rd row down 7th key over (going left to right) of the white image keys on your keypad.

    First.. a close up of the glittery goodness!! :)


    Here's what the whole card looks like from the front:


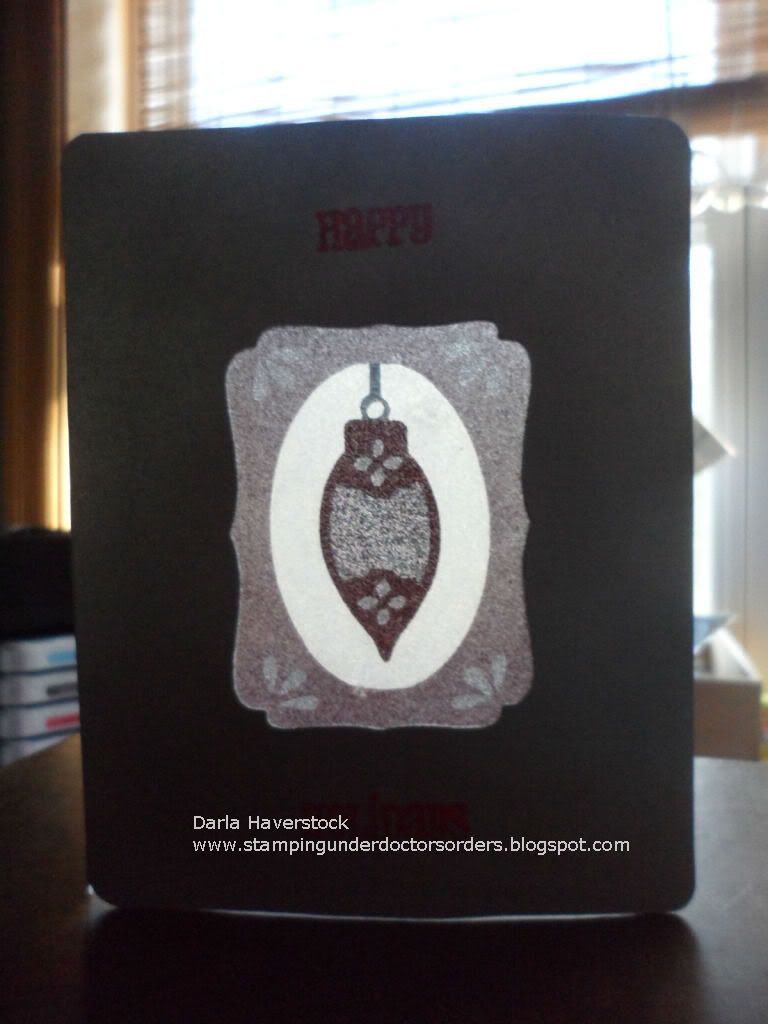
    Now.. just to show you that this really was the card shape which has a cutout window in the middle of the front panel and not just a plain card with this stuck on it (and because I thought the picture looked really neat)... here's a shot of my card open in front of a window so you can see that you can see through it. :)

    Here's how I achieved this look.
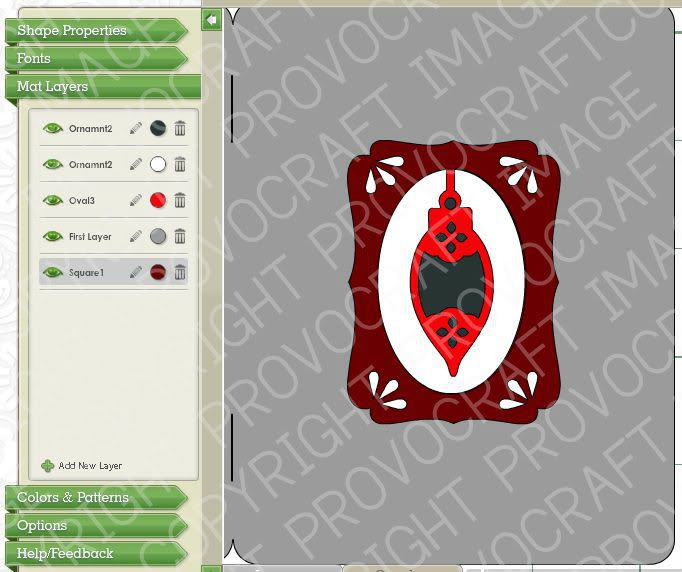
    First I made my file in Cricut Craft Room so all the pieces would line up and cut in the correct spot as well as I was able to play with the colours to decide which ones I wanted to use.

    Next I loaded my silver paper (the paper I used was Reflections cardstock from Michaels) and cut the card shape @ 5.5" using CCR. Then I took a piece of acetate which I had applied a piece of Scortape to first and with the mat still loaded in the machine i carefully lifted the cut card shape up on the side with the cutout and ligned up my piece of acetate with the acetate side on the mat and the tape backing facing up so that it would cut the pieces in middle of my acetate 9yes I could have just cut a bigger piece and put t in approximately the right spot since CCR shows you where on the mat it will cut but this way I knew exactly how much edge I would have on the acetate around my shape). I cut all oth the layers for the ornament and the label shape like the opening in the card front with my setting on 4 speed, 4 pressure, 4 blade depth and a mulitcut of 2 since the kind I used was BCT tape which has a very thick backing on the tape.

    Now I had my card shape cut from the silver card and a solid square of acetate with adhesive on it and all the pieces cut out of the tape backing.

    I removed the tape backing on the outer edge leaving all of the part you can see through the window cut opening of the card covered. and lined it up with my card from behind and stuck it on. now i just removed one section of backing at a time and applied my glitter to the exposed adhesive rubbing it on really well with my fingers and then using a shaving brush to brush away all the excess glitter.

    I used my Say it in Style stamps (which is no longer available as of August 1 so make sure you order ASAP if you want this amazing set of sentiments) to stamp the sentiment in versamark ink and heat emboss with red tinsel embossing powder.

    The next stop on your blog hop fun is Gloria Shirr so hop on over and see what wonderful project she has to share with you today! :)


    Here is the list of all the talented consultants who are participating in this months blog hop:

    1. Lucy ~ Love2Create
    2. Darla ~ Caution: Crafting is Contagious!
    3. Gloria Shirr - Purpleglo Creations
    4. Laura Wolff- Scrappinsweetie's Escape
    5. Eva-For the Love of Creating
    6. Danielle ~ Little Bit of Scrap
    7. Connie ~ Connie's Crafty Closet
    8. Wendy ~ My Scrapbooking Blog
    9. Joanne - Josie's Joy
    10. Laura Charko - Koala Designs
    11. Carolyn Heniges - Nuts 4 Scrappin'
    12. Kindred Hearts (Penny) - It Makes Total Cents
    13. Stephanie Feist- The Quilted Scrapper
    14. Julia Hammond You Can Create

    Thanks so much for stopping by and hopping with us - we hope you LOVE all the projects we created!


    Tuesday, July 17, 2012

    Sketch Challenge

    I took part of a sketch challenge today with MCCR.

    Today's sketch is:                                                    


    My take on it is:

    I created the whole thing in Cricut Craft Room first of course. I just love how I can plan out my whole card colours and all without using any paper or even taking any out. Here's a screen shot of it all laid out:


    The ducks and the onesie are using the free digital cartridge that you can use with CCR called Craft Room Basics and are 1" high.


    The card base is 5.5" high and it, the layer and label shape are all from the Art Philosophy cartridge from CTMH.

    The onesie and the label shape are both on foam tape for some added dimension

    The sentiment stamp as well as all the papers (Lucy B&T, Creme Brulee and Colonial White) are from the Lucy Workshop On The Go. I used cotton candy for my sentiment and sponged some creme brulee on the card base and label shape backing as well just to take the starkness away from it.


    Get widget