Showing posts with label 3d craft. Show all posts

Wednesday, April 16, 2014

My new venture and a teapot!

I just joined Steeped Tea Inc as their 3850th independent consultant in Canada on a March 27 and I am sooooo excited about it! 

Here's a photo of Michael and I while we waited for the very first tea from the consultant kit to steep. He insists that I must now wear my apron every time I make tea because that's what professional tea makers do. LOL


Their teas are divine, sales quotas are easily reached just by ordering the amount I personally drink and they have a fundraising program that is amazing (pays 40% to the fundraiser... Ask me for details) I get to have tea parties for my job and my kids love helping me do my job too! What could possibly be better?!?!

This past weekend I was at a Crop for the Cure which was an absolute blast!! The people were awesome, made great new friends, reconnected with some others and had an absolutely wonderful time!! I even won a trip to the spa (though I passed it on to someone else since I live 5 hours away from where the crop and the spa were). 

What does this have to do with my new venture???
Well, I taught 4 different classes while I was there but still managed to fit in a little crafting for myself as well including this awesome 3 D teapot from SVGcuts that I will be giving out with a tea sample in it to all of my hosts/hostesses as a thank you for hosting. 


I am in love with it!! 

I think I may mod podge them though to make them more durable oh and add some pearls around the edge of the lid and on the base. Thoughts??

Want one?? Book a party with me and you'll get one for your very own!! :) 
Even better is that you'll earn FREE delicious product when you host a party as well. Talk about a win win!!

Now I also have to share a few pictures of my business partners sharing this wonderful product with me because they are simply too adorable not to share with you (and yes I'm completely biased). 

Here's a picture of the very first cup of tea we made and you can see who claimed it! 

Of course Samantha decided to be the party hostess the next time and being the   hostess with the mostest (my dad is probably rolling his eyes at that bad grammar.. Sorry dad I had to!) she pulled out her tea set and even served us some plastic cookies and snacks. 


Okay so since this IS my paper crafting blog... Let me remind you again what this post has to so with paper.... 


It is made with White Daisy cardstock and Ariana patterned paper. :) You can find the cut file I used over at SVGcuts here

Want to see a few other things I made at the crop??? Come back!! I promise to share more over the next few days. Yeah, I know... Tease!! Already enough photos in this post though don't you think??

Happy sipping! Enjoy!

Saturday, October 27, 2012

The Artiste in 3D Blog Hop


Welcome to our The Artiste in 3D Blog Hop!  There are so many fun features  in our Artiste Cricut cartridge that we decided to showcase many of the 3D Objects


In this hop, you will see a variety of projects featuring the 3D Object key of the Artiste but don’t worry, you won’t need special glasses to see them!  (But we do hope our projects will “stand out” to you.)

If you have just hopped onto my blog, please start at the beginning at Lucy's blog – Love 2 Create.   If that's where you came from then you are in the right place!

For my project today I wanted to show how you could make some very quick but beautiful home decor.


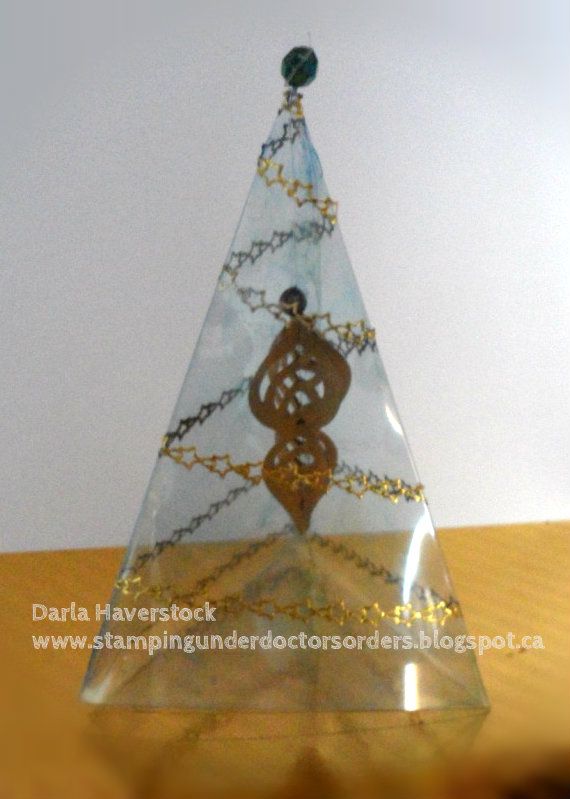
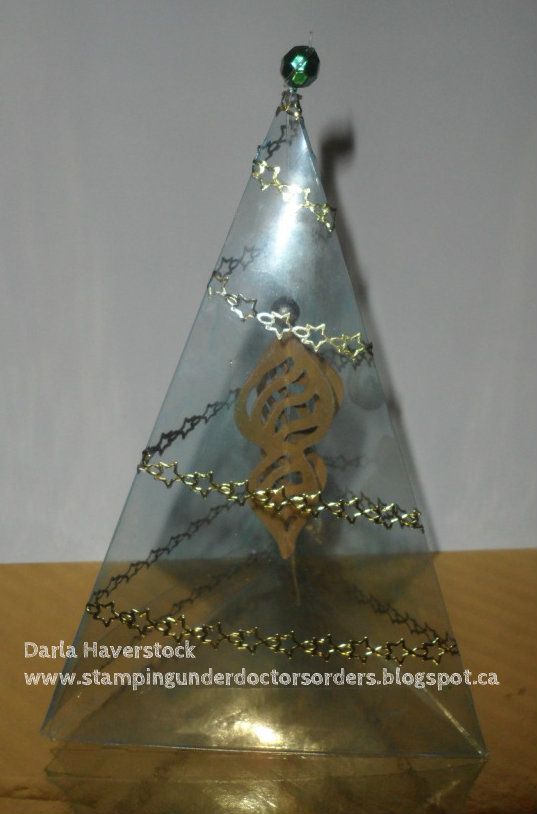
I cut the 3D object from page 53 from acetate at 5.25" as well as 2 of the shifted Accent 4 image on page 53 and 2 more of the same image with the flip function on from gold cardstock at 2". I folded all 4 of these ornaments down the center lengthwise and stuck them to each other back to back around in a circle matching up the right side of a regular cut with the left side of a flipped one. Before I glued the last one in place I took a piece of stretchy jewelry cord (you could also use fishing line, this is just what I happened to already have) and laid it into the middle of the cut then glued the last to sides together.

The garland is just some outline stickers I've had laying around for years. This could easily be substituted with absolutely anything including a nice stitch stamp or border stamp in gold staz-on, glitter glitz, viva decor pen.... you get the idea.

I used a needle to thread the other end of the cord up through a gold bead and then up through the top of the tree. I used another larger green bead on top and once I had my ornament hanging at the height I wanted I tied it off to this bead. I think I will actually use a gold bead on the top too for the next one. You may also notice a slight green tint to the plastic... there is a reason for that.. LOL I tried to photograph this except the clear plastic just did not want to take a nice photo so I grabbed some green alcohol ink and some alcohol and sprayed a mixture of the two into the inside of the tree (without the ornament of course) and wiped it around a bit just to give the plastic a hint of colour so it would photograph.

Here's a shot in slightly different lighting:

Products Used:

Your next stop on the Artiste in 3D blog hop is Stephanie - The Quilted Scrapper.

Here is the complete lineup in case you get lost along the way:

Thanks for hopping along with us - we hope we were able to inspire you to create your own 3D projects with the Artiste.

Saturday, September 22, 2012

September ARTISTE Blog Hop


Welcome to our September ARTISTE Blog Hop! Each month we are showcasing the amazing, exclusive ARTISTE Cricut cartridge which can be only purchased through a Close to My Heart Independent Consultant.

We don't want to scare you but Halloween is a little over a month away and we know you have to be thinking about what YOU are going to create for this spooky holiday! We decided to show you all the creative projects you can make using our exclusive Artiste Cricut cartridge. You will be hopping along our haunted trail of creativity - you never know what you will see next!

If you just happened to come to this blog, you should start at the beginning at Lucy's blog

Also, to help you get ready to start making your own Halloween projects Lucy has some blog candy for you! She is giving away a Moonlight Complements Dimensional Elements pack! That's two (2) sheets of Printed Dimensional Elements that you can use to create your own Halloween project! There is a picture of the blog candy on her blog. All you have to do to be eligible to win is to leave a comment on everyone's blog AND become a follower of Lucy's blog. (If you are already a follower, just let her know in your comment.)

Okay.. first I need to apologize. If you came to visit my blog earlier blogger apparently did not keep all the updates I did to my post so all you saw was a Christmas themed project. I'm sure you all had thought I lost my mind! 

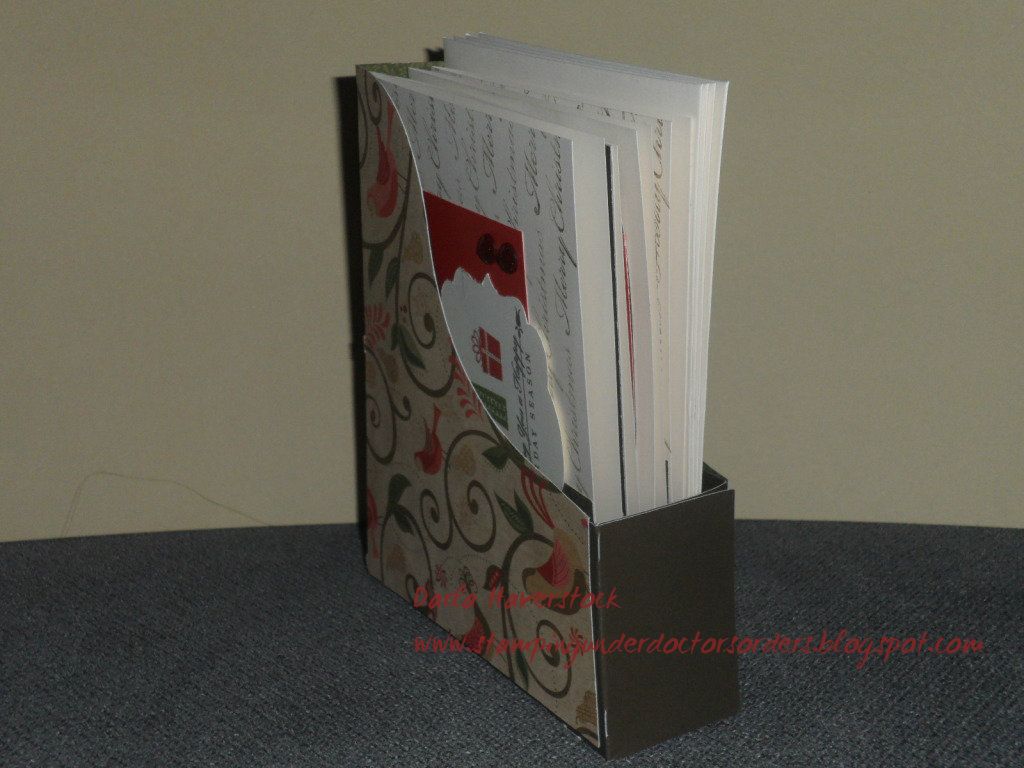
The truth is I was working away on my project for this hop and looking through the handbook I got excited to try the holder you will see below and I wanted a bunch of cards to put in it so I pulled out my Pear & Partridge Workshop On The Go Cardmaking Kit and got working on the cards. I also didn't like the plain squares so as you will see below I switched it out for a shape from the Artiste cartridge as well.

Now.. 2 days ago I was going through the hop write up and editing my post for you all when I realized that I had completely ignored the hop theme "Halloween" so a complete re-do was in order! I edited the whole thing and re-scheduled it to post but apparently blogger really liked my Chrsitmas project as it reverted the whole post back to that. Good new is now I'm going to show you both today instead of saving the Christmas one for tomorrow like I was going to had blogger cooperated. :)

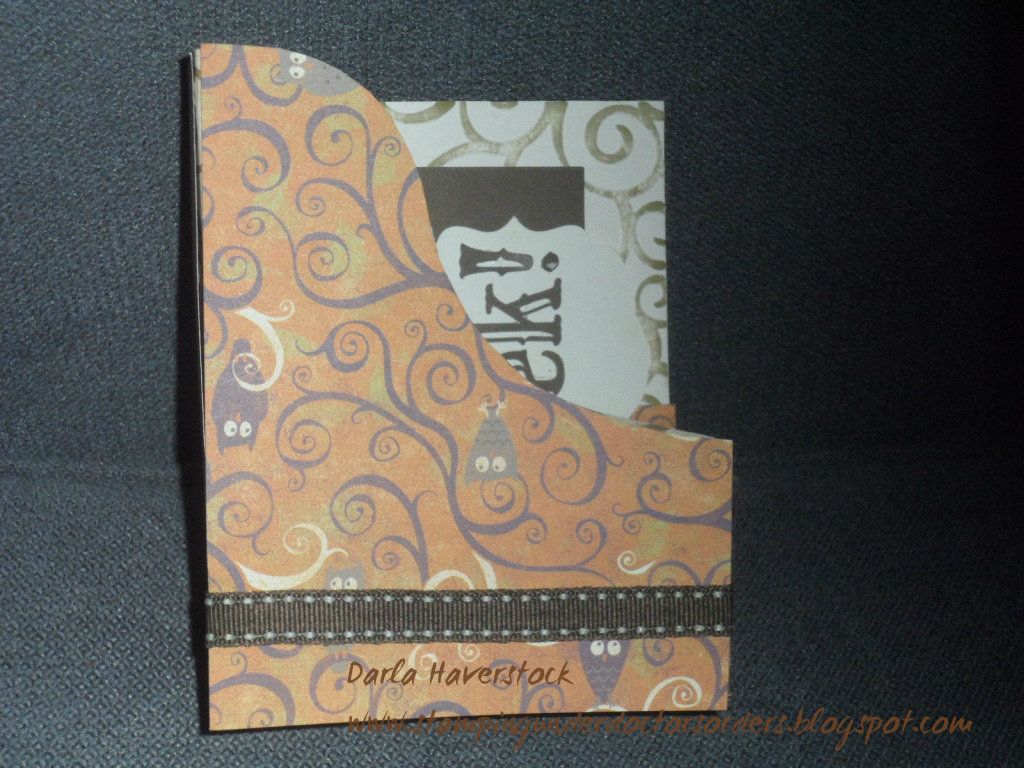
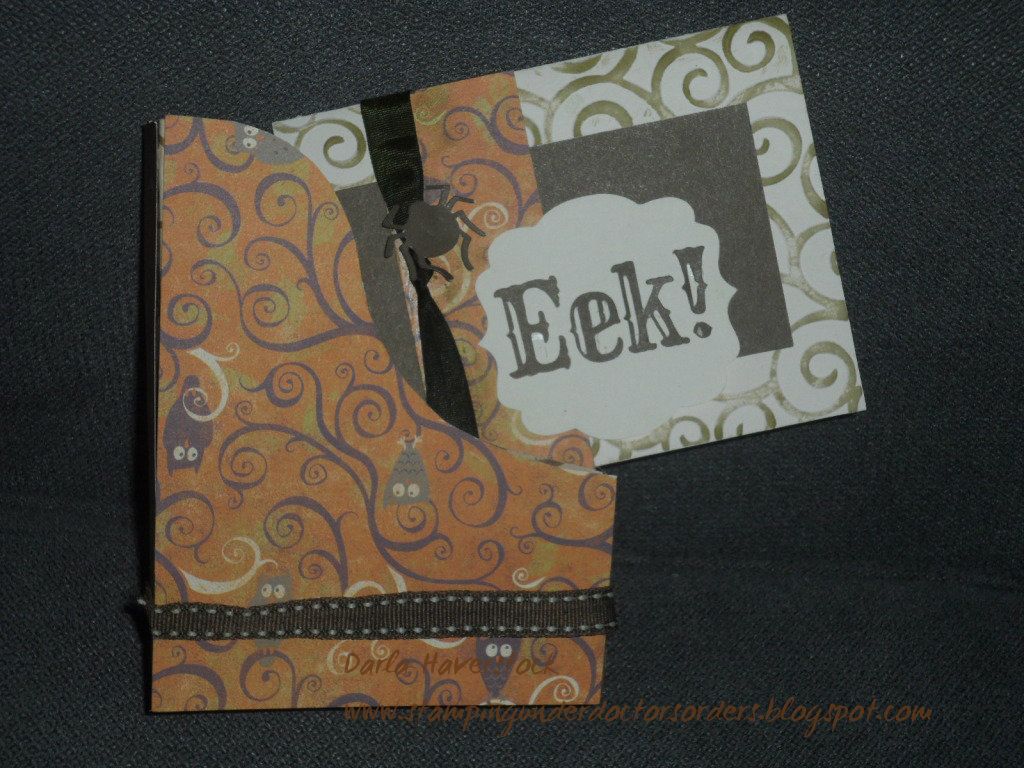
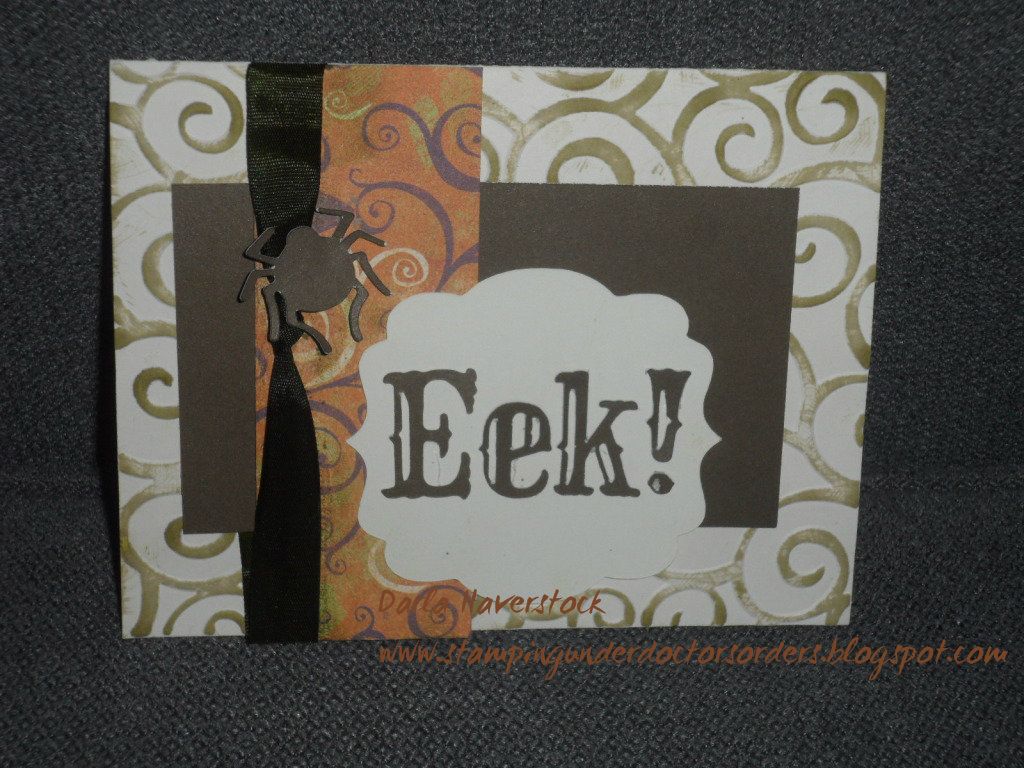
I decided I still wanted to use the same concept.. so I switched out the Pear & Partridge B&T for the Moonlight B&T. I embossed my card base and ran my cocoa ink pad over the embossing to highlight it and instead of using stamps I cut the phrase "Eek!" from page 76 of the Artiste handbook and I also added the spider (accent 4 with shift on page 77) cut from more of the same left over cocoa cardstock from the Pear & Partridge Workshop On The Go Cardmaking Kit, seriously I wonder how many more projects I can make from this kit?? I added some color ready seam binding that I died with the Olive stamp pad and eur"eek"a a Halloween themed project to share for you.

Here are some pictures of my Halloween theme card and holder set:


Now for more details on the shapes and to see what the Christmas themed one looks like and how easy it was to switch just scroll down and you can see my post that anyone that came this morning saw as well as you will find the hop lineup and your next stop at the end.

Let me know which one do you like best??

If you don't want to see the Christmas one and just want to be on your way to the next stop.. The next stop on the haunted trail is Diana - Dianas Free Moments and you're going to love what she has for you.

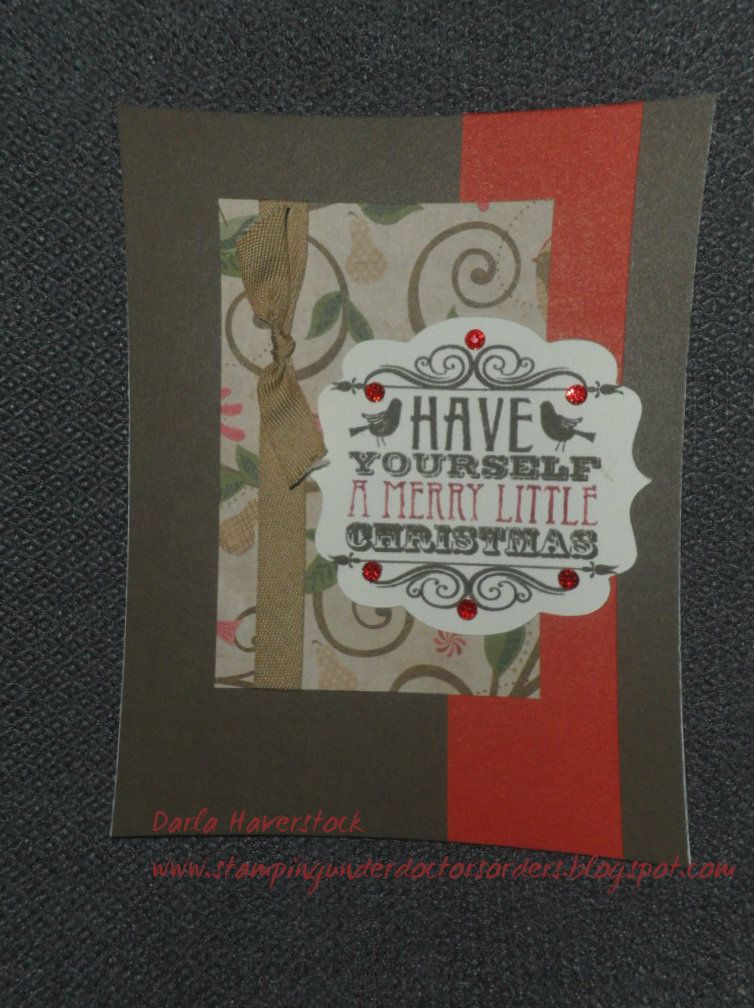
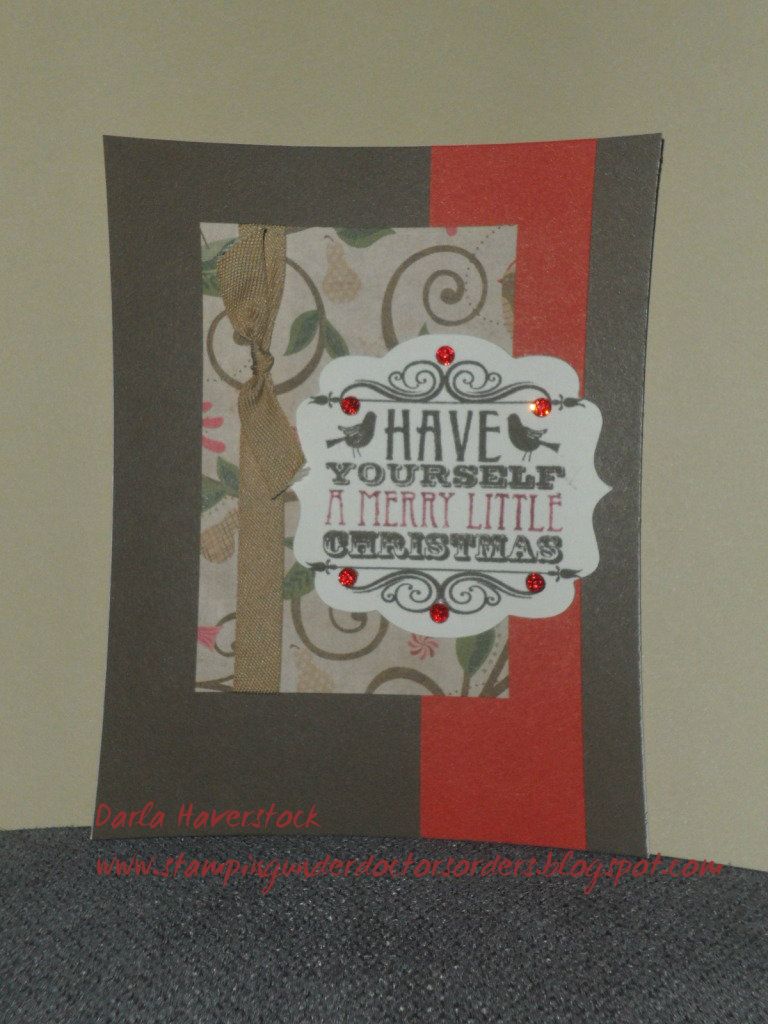
Today I used the Pear & Partridge Workshop On The Go Cardmaking Kit and essentially used the projects exactly as the workshop instructions that come in the kit say to.. except I found the plain squares for the focal images boring so I used the Accent 3 shape from page 61 of the Artiste Cricut Cartridge for 2 out of the 3 card designs in the kit.


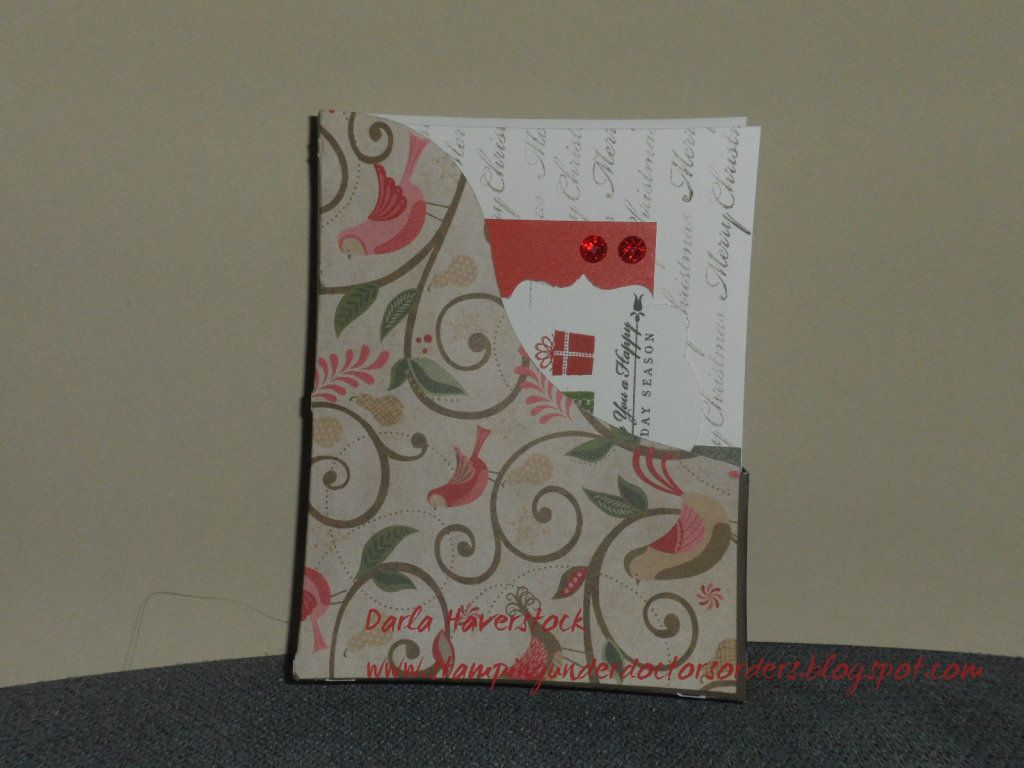
I also added a little holder for all the cards using the paper left in the package after making all 15 of these cards, yep... you heard me.. there was paper left over and actually still is a bit left after making the holder.


For the holder I cut the Accent 3 shape on page 47 of the Artiste Cartridge from my left over Pear & Partridge B&T from this kit and the Accent 3 with the shift key on page 47 of the Artiste Cartridge from the left over Cocoa cardstock from the kit. I think I will embellish the holder a bit more... maybe add some ribbon and bling! :) What do you think?

I used the Cranberry marker to ink the "A MERRY LITTLE" on this card instead of cutting out a seperate piece and masking it and inking in the cranberry ink I just found this went faster.

I just love the stamp set that came in the Pear & Partridge Cardmaking Kit as well. It's so cute and versatile! It has 6 sentiments (one being that lovely one with the birds and filigree on it to be used as a focal image), 3 different present, 3 different ornaments, the string for the ornament, 2 partridge birds and a branch. I can see myself grabbing this set a lot.


Products Used:


The next stop on the haunted trail is Diana - Dianas Free Moments

Here's the entire blog hop lineup in case you get spooked along the way:

  1. Lucy - Love 2 Create  Previous
  2. Darla - Caution Crafting is Contagious You are here
  3. Diana - Dianas Free Moments Go here next
  4. Carolyn - Nuts 4 Scrappin'
  5. Julia Hammond - You Can Create 
  6. Wendy Kessler - My Scrapbooking Blog
  7. Pam Stewart - I Candy Scraps
  8. Carolyn Mendoza - Crafting With Carolyn 
  9. Jennifer Kramer - 4 Hearts Scrapbooking 
  10. Maria Woodworth - Maria's Paper Craft Place 
  11. Kindred Hearts - It Makes TOTAL Cents
  12. Ginger Morriello - Ginger's Creative Cottage 

Thanks for stopping by for some Halloween fun -- hope we didn't scare the creativity out of you! Muah-ha-ha!

Saturday, September 15, 2012

September Art Philosophy Blog Hop


Welcome to our September Art Philosophy Blog Hop! Each month we will showcase our amazing Art Philosophy Cricut cartridge which can be purchased exclusively through a Close to My Heart Independent Consultant.

Since Halloween is just around the corner, this month we will be featuring projects for Halloween made using the Art Philosophy Cricut cartridge! Hope you don’t get too scared by the time you get to the end of our hop!

If you just happened to come to this blog, you should start at the beginning at Lucy's blog - Love 2 Create.


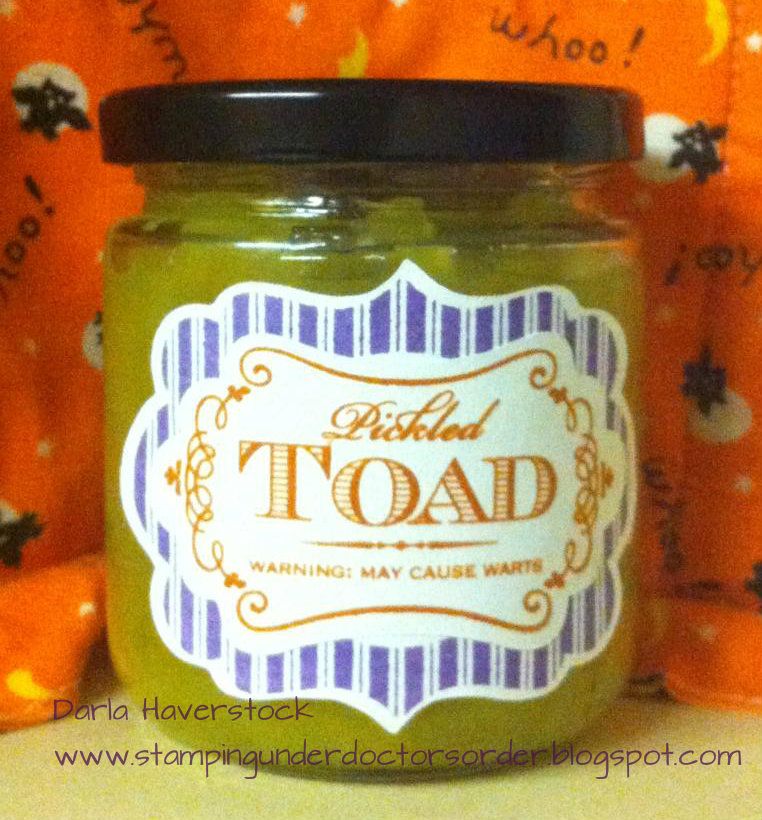
For this hop I made a couple projects.. the first was a set of labels for some homemade green tomato chow chow.  I just love these (the labels.. not the chow chow)!!

They turned out so cute and I think I'm going to label all the pickles and chow chow in our house with these since it's a bit of a running joke in our house as everyone else LOVES them and I can't stand the smell of them enough to even open the bottle to put some on the kids plates.

Since my family has such a lovely sense of humour, I get handed the bottle of whatever is on the table (pickles, mustard pickles, chow chow, etc) and asked if I would like some.  Let's see how appetizing they find them with their new labels.. LOL

I used D1527 - Perfect Fit Frames stamped in Gypsy ink on labels cut out using the Art Philosophy cartridge shape on page 67 as indicated on the stamp carrier sheet and C1509 - Magic Potions in Autumn Terracotta ink on labels cut out using the Artiste cartridge shape on page 36.


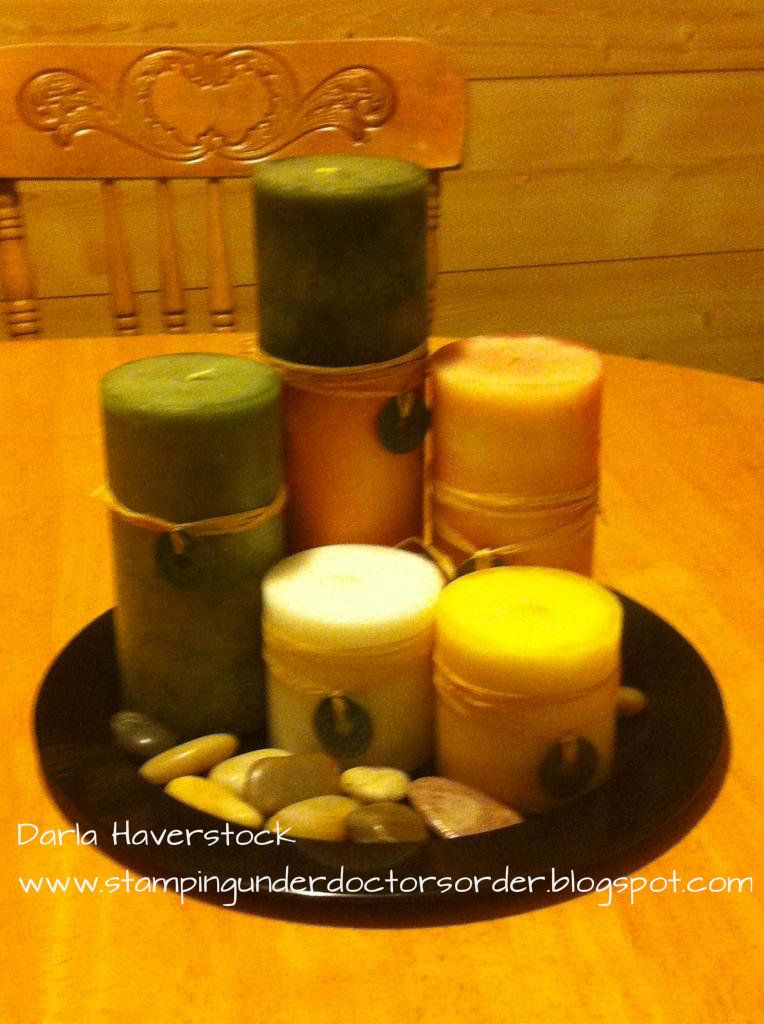
I also had this set of candles around that was gathering dust and thought the colours (although the picture really doesn't show this very well) were very Halloween like so I decided to add a border from the Art Philosophy cartridge on page 65 in chocolate card stock to make them Halloween themed. I'm not 100% satisfied with these and you may see these again some time with some more cuts added (I'm thinking spiders, skeletons... maybe a few 3D pumpkins around them). Either way I do like how they turned out. They definitely look a little more theme suited now anyways. :)

What do you think?

BEFORE:
 
AFTER:


The next stop on your spooky blog hop trail is Diana over at Diana's Free Moments


Here's the entire blog hop lineup in case you get spooked along the way:
  1. Lucy - Love 2 Create 
  2. Darla - Caution: Crafting is Contagious!
  3. Diana - Diana's Free Moments
  4. Stephanie - The Quilted Scrapper
  5. Julia - You Can Create
  6. Wendy Kessler - My Scrapbooking Blog
  7. Carolyn Mendoza - Crafting With Carolyn
  8. Kindred Hearts - It Makes Total Cents
  9. Rebecca - Stamp and Scrap Studio
  10. Maria Woodworth - Maria's Paper Craft Place
PRODUCTS USED:

Saturday, August 25, 2012

August Artiste Blog Hop


Welcome to our August ARTISTE Blog Hop! Each month we will showcase a feature of the amazing ARTISTE Cricut cartridge which can be purchased exclusively through a Close to My Heart Independent Consultant (if you don't have one I'd love to help you out).

We're so excited to be doing this hop and we have a fabulous lineup with some very talented ladies. There will be lots of fun projects AND some blog candy!!!

This month we will be showcasing a different page from the Artiste cartridge! Did you know there are 700 images on this cartridge?? That's right -- 700!!!

If you just happened to come to this blog, you should start at the beginning at Lucy's blog - http://www.love2createitall.com.

If you want to take a look at the booklets that come with the Artiste cartridge here's the links for you:
Artiste handbook
Assembly Instructions

Well, we've been on vacation for the last 3 weeks (tomorrow is our last day, back to normal on Monday). We have done a lot of travelling and camping during our vacation which meant a very BORED 3 year old sat in the backseat prompting me to come up with more fun stuff for him to do while buckled in.

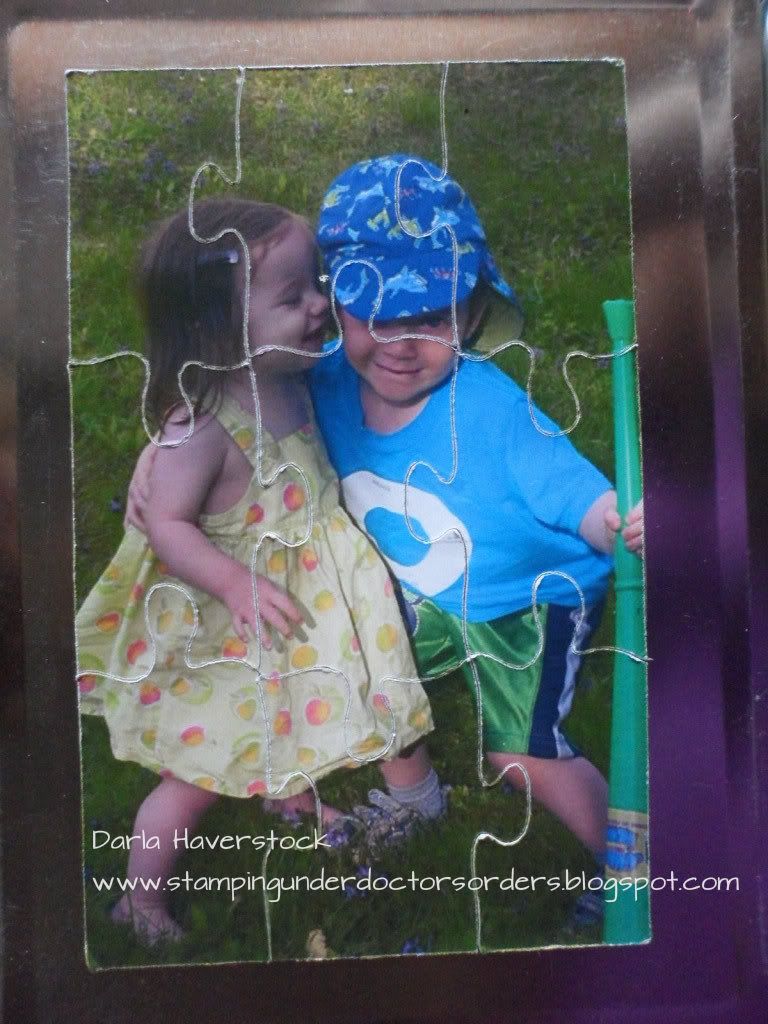
Besides the great mini-album cuts on the Artiste Cartridge and LOTS of other stuff there are a few puzzle cuts on there which of course got me wondering what I could make with that for my kids that wouldn't get destroyed...
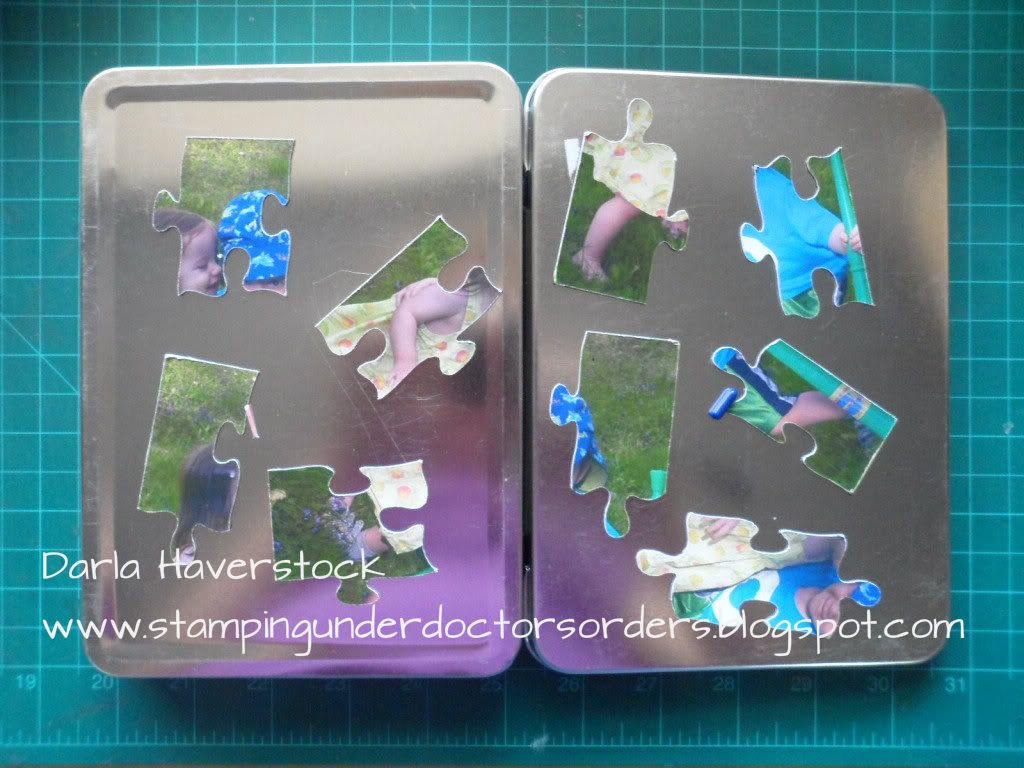
Introducing my magnetic puzzles stored in a tin....

I had some metal containers I had picked up for 99 cents at a liquidation place as well as some magnetic sheets that have adhesive on top of them from the dollar store.

I printed off photos of my kids and stuck them to the magnetic sheets, cut it using my deep cut blade and the puzzle image on page 57 of the Artiste Cartridge (resized using Cricut Craft Room so I could pull it out of proportion and make it fit the picture better) and ta-da!!

You will see that the edges get a bit worn after handled by the kids so I might laminate the top next time... but other than that I am very happy with this project.


Thank you CTMH and my new Artiste cartridge for saving my sanity!!!!
The best part is that it stores in the tin and then you can open the tin up and use the outside of it to assemble the puzzle. I love toys that stay together.

I also posted a project using one of the 3D purses from the cartridge earlier this month here.

Now make sure you head over to Julia's Blog and see the eye candy she has for you!

Here is the list of all the talented consultants who are participating in this months blog hop:

  1. Lucy ~ http://www.love2createitall.com
  2. Darla ~ http://www.stampingunderdoctorsorders.blogspot.com <--- You are here
  3. Julia http://youcancreatectmh.blogspot.com/
  4. Theo www.celebratecrafts.com
  5. Tina Gale http://tiggersscrapplace.blogspot.com
  6. Stephanie http://www.quiltedscrapper.blogspot.com
  7. Mandy http://www.mandydesigns.blogspot.com
  8. Joanne http://josiesjoy.blogspot.com
  9. Laura W http://scrappinsweetiesescape.blogspot.com/
  10. Rebecca ~ http://blog.scrapprincess.com/
  11. Maria Woodworth - http://mariawoodworth.blogspot.com
  12. Judith Ashmore- www.grammiejudys.blogspot.com
  13. Lisa Woodward~http://mycraftyspaces.blogspot.com
  14. Laura Charko - http://koladesigns.wordpress.com/
  15. Jennifer Kramer- http://4heartsscrapbooking.blogspot.com/
  16. Eva Friesen ~ http://loveofcreating.blogspot.com/
Thanks so much for stopping by and hopping with us - we hope you LOVE all the projects we created!

    Thursday, February 9, 2012

    Valentines Décor and Gifts Blog Hop

    Hi and welcome to the Valentine's Décor and Gifts Blog Hop.

    You should have arrived here from the lovely Sylvia Solorio: http://bellascrapbookdesigns.blogspot.com , however if you happened here by chance you're in luck! There will be 20 stops full of great ideas, so grab a beverage and head over to the hostess' blog. Staci's blog is at http://preciousmem.blogspot.com/. The sponsor for this hop is Designs on Cloud 9 at http://designsoncloud9.com/ and she has offered us a $20 gift voucher for the GRAND prize. Head over to her Facebook page at https://www.facebook.com/pages/Designs-on-Cloud-9/189551027737837 and show her some love. One lucky person who comments on this hop will be the winner of this generous prize. (One person from each stop will be chosen at random and we will then hold a random draw with those 20 people and one lucky person will win the grand prize).


    For my project today I am sharing a bottle cap pendant I made (yes you read that right.. bottle cap). I used the CTMH Art Philosophy cricut cartridge for the roses and am slowly discovering a love of quilling as well so thought I'd do some quilled leaves on it.

    I am also sharing the packaging I made for it which was also cut from the CTMH Art Philosophy cricut cartridge and the ribbon is from May Art. I am gifting a few of these for Valentine's day this year as well as making them with one of my cricut classes I teach.

    Hope you enjoy and if you like what you see please come back and join me next week as I will be posting to my blog as well as the Creating with Art Philosophy facebook group (for my guest designer spot this month... yay!!) some cricut tutorials and projects!
    Instructions are below.


    Art Philosophy cut     Page Number        Special Key        Keypad (row-column)       Size
    flower                          70                                 font                    5-10                              1"
    favour box                    22                                font layeer         1-2                                 6.5"
    You will also need (3) 1/8" strips 3 1/2" long of green cardstock.

    Close To My Heart items used
    Art Philosophy Cricut cartridge z1686
    Liquid Glass z679
    Tweezers z1382

    Other materials used:
    bottle cap
    hand drill or nail
    jump ring found in jewellery supplies OR magnet
    black paint (optional)
    sealer (optional)
    magnet

    Assemble roses (follow this video if you need help assembling) http://youtu.be/5qTp3zPKeyM
    Roll green strips into coils and glue finishing end onto the coil to hold closed.
    Pinch edges of each green coil to form into leaves.

    Use pliers to turn edge of bottle cap backwards.
    Use either a hand drill or a small nail to put a hole in the edge if using as a pendant.
    Paint blottle cap black.

    Fill cap with liquid glass.
    Place roses and leaves how you'd like them on top of the liquid glass.
    Let dry
    Attach jumpring and hand on jewellery cord or chain for pendant or magnet to the back


    Now head on over to Kimberly Pate: http://scrappingrookie.blogspot.com and see her wonderful project.

    Also, I am a guest designer for INSIDE THE CRAFTERS STUDIO this month over at the facebook group Creating with Art Philosophy. I will be posting at least one project a week on Fridays there, and then will post it to my blog at a later date. Next month I will post it to my yahoo group as well but if you want to be first to see it you need to join us on facebook here at CreatingwithArtPhilosophy


    In case you get lost along the way here's the hop line up:

    Staci: http://preciousmem.blogspot.com
    Ashley Glamourous: http://theglamoroussideofscrapping.blogspot.com
    Lisa Peters: http://handmadewithlove-lisa.blogspot.com/
    Audrey Dickinson: http://scrappyemt.blogspot.com
    Karin Adamczyk : http://scrappercreations.blogspot.com
    Anita Meadows Cannon:~ http://www.anitaandbugs.blogspot.com
    Lucy Kelleher: http://love2createitall.blogspot.com
    Michele Eickholt: http://chelescrafts.blogspot.com/
    Kari Sanchez: http://purplefuntastickcreations.blogspot.com/

    Sylvia Solorio: http://bellascrapbookdesigns.blogspot.com <---- YOU CAME FROM HERE
    Darla Haverstock: http://stampingunderdoctorsorders.blogspot.com/ <---- YOU ARE HERE
    Kimberly Pate: http://scrappingrookie.blogspot.com  <------ GO HERE NEXT

    Liz Mullen: http://scrapiliciouslife.blogspot.com
    Lisa Marie Lam:http://craftylam.blogspot.com
    Janet Nagai: http://createatdreamscrapbooks.blogspot.com
    Dena Jones: http://missdjones.blogspot.com/
    Daisy Collins: http://tsunamirosedesigns.blogspot.com
    Amanda Youlkis: http://a-prata-design.blogspot.com/
    Nancie Brungard: http://alittlepieceofmebynancie.blogspot.com/
    Tricia Colon : http://www.mycrazybubble.blogspot.com/

    Thursday, May 19, 2011

    Legoman placecards

    EDITING THIS TO ADD: Thanks to an online friend from many different yahoo groups we belong in together Trisha this is also now available in SVG and PDF. :)

    These are the placecards I made for the wedding I'm standing in for my friend in Friday. The wedding is Lego and concert themed. The tables instead of numbers are bands and she did scrapbook pages of concerts they've been to so instead of sitting at table 9 you sit at table metallica and it's a scrapbook page with pictures of them at the concert and a little write up about it.


    I made 88 in total and there are 7 different Legoman pictures. The top of the block is embossed with an embossing folder I made from a piece of cereal box. She's putting a couple little Lego block candies in each box as well.


    Very happy with how they turned out!!

    I have the file in WPC, DXF, KNK and .STUDIO so far...

    Please do NOT share this file without my permission, however feel free to send anyone here to my blog to download it for themselves. For personal use ONLY!!!!!!

    I may be able to convert to another format if you want it... just ask and I'll try.


    Please do NOT share this file without my permission, however feel free to send anyone here to my blog to download it for themselves. For personal use ONLY!!!!!!

    Please do NOT share this file without my permission, however feel free to send anyone here to my blog to download it for themselves. For personal use ONLY!!!!!!


    Saturday, April 9, 2011

    Easter Eggstravaganza Blog Hop

    Welcome to my Blog and the Easter Eggstravaganza Blog Hop! If you've come from visiting Kacee - http://youhadmeatscrap.blogspot.com/ , you're in the right place. If you were just looking at my blog and want to play along with our blog hopping fun, you can start at the beginning at http://nadiasbeautifulmess.blogspot.com/. This blog hop is all about creating something sweet for your Easter celebrations. We hope you find inspirations and plenty of ideas to spice up your holiday :)

    Anyone that knows me knows that I am not a baker or cook of any sort for that matter so..... a paper cupcake it is. I kept the colours very Easter like (there was supposed to be more Easter themed stuff for this post but well... more on that later), although with this sentiment it could really be used for all sorts of things. Most was done with my craft robo cutter (exceptions of the sentiment - Gina K. Designs, and the punched border - Fiskars oh and the image was coloured in with my memento markers although the image itself was drawn with my craft robo sketch pen). The designs are not my originals but are from the Silhouette online store silhouetteonlinestore.com .

    I have to tell you though that I did TRY to bake real cupcakes with my 2 year old this week for the hop.... but they didn't "puff" up properly (probably because he kept eating the batter so they weren't as full as they should've been to begin with LOL) and then we tried a batch of cookies.... but we had a potty emergency and they got just a little too close to burnt for me to want to take a picture and post. The cupcakes were going to be those really cute ones with the little nests on top made of aero bar pieces and mini eggs.

    We also decorated some real eggs that I was going to place around the project as decoration however.... well... lets just say I didn't think smashed egg shells in different colours would have the same effect! Also, my DH had a nail bounce through the side of the pieces of wood he was nailing together for our new linen closet he's making and through 1 finger into the bone of the next so after a full day in emerg having xrays taken and then having them yank it out and what have you I just didn't have time to make new ones to replace the smashed egg shells with.  He is just fine by the way although his pride is very hurt and he's mad at himself more than anything. He was determined to finish the project this weekend and now will not be using his hand at all this weekend.

    Well.. that's enough babble from me.... here's my project: (make sure you check out ALL the stops on the hop... you might find some candy along the way )


     Here's one of the cupcake out of the wrapper.


    I hope you enjoyed my project. Thank you for visiting my blog. Your next stop is Amber - http://pixiperfectcreations.blogspot.com/ . Below is a list of all blog participants in case you get lost:

    Nadia - http://nadiasbeautifulmess.blogspot.com/


    Giselle - http://crossmyheartpapercrafts.blogspot.com/

    Donna - http://donnasdreamworks.blogspot.com/

    Yolonda - http://www.craftyscentiments.blogspot.com/

    Jennifer - http://www.craftycardgallery.blogspot.com/

    Kim - http://rickettscricuts.blogspot.com/

    Damaris - http://www.latinnydoll.blogspot.com/

    Melanie - http://inlovewithabug.blogspot.com/

    Jazmin - http://JazzysCards.blogspot.com/

    Monica (Stampin Daisies) - http://www.stampindaisies.com/

    Gabriela - http://www.sheinksalot.blogspot.com/

    Kacee - http://youhadmeatscrap.blogspot.com/

    Darla - http://www.stampingunderdoctorsorders.blogspot.com/   <-----YOU ARE HERE!!

    Amber - http://pixiperfectcreations.blogspot.com/

    Sylvia - http://www.bellascrapbookdesigns.blogspot.com/

    Monica F- http://simplycricutting.blogspot.com/

    Rebecca - http://www.creationswithbecka.blogspot.com/

    Carrie - http://paperglitterstamps.blogspot.com/

    Patricia - http://creativediva98.blogspot.com/

    Friday, May 21, 2010

    Mother's day box

    I made this box to put my mom's mother's day gift in. It was very easy using a template from My Time Made Easy. I did have to cut 2 more pieces to increase the height and stuck it inside and then used the ribbon to cover up the seam. I could have just changed the cut file before hand but since I didn't I decided waste not want not and used what I already had cut and added to it. The top was much easier to assemble than it looks. I was very nervous about it but it went together so easy!!!!

    The rose on top is made from the rambling rose cut file from MTME as well. Lauren has a video on her blog on how to assembe the rose too hers turned ouit much better than mine but since this was my first attempt I was happy with it. Very easy and was a big hit with mom! Looks great!! The leaves are a MS punch, and 1 came unglued in transport and was lost so there are only 2 on it now instead of the 3 I originally put there. haha oh well.

    I also gave the whole top rose and all a little spritz with some glimmer mist for some extra sparkle.


    Get widget