Thursday, April 4, 2013

Music Teachers Appreciation

I have another teacher appreciation card over on the Card A Day Blog today.

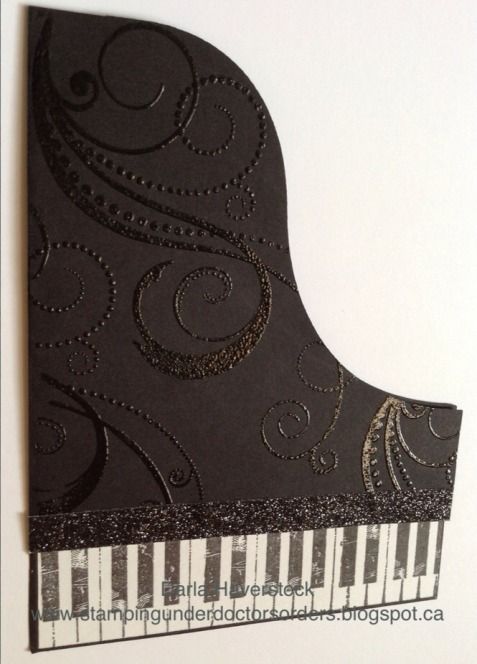
Although this card could really be used for anything just by what you write inside, I originally made this for a friend to give to her sons piano teacher after seeing a piano card made on Studio Wow blog. I have since decided to make this for a few of my musical friends for their birthdays this year as well.

This will also be one of the card designs available to make at my drop-in Card Making day this Saturday April 6 (message me for more info if you're in my area and interested in coming).


The piano keys are from Sweet Music and the swirl pattern which is heat embossed in black is from the Love Life stamp set. I added a strip of black shimmer trim to the front to finish it off.

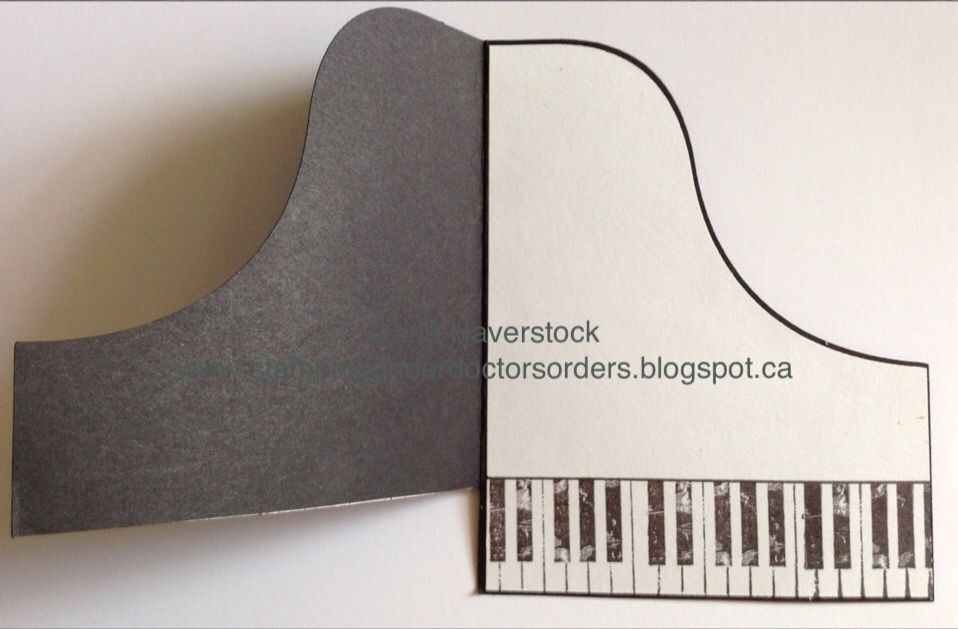
The shape of this card could easily be hand cut from a folded A2 card but I used Cricut Craft Room and the Artiste cartridge (sized the whole thing to be 8.5" wide and 5.5" high, hid the original tick marks for folding and placed a 1" x 4.25" rectangle to cut off the bottom of the card so the keys would show through from the inside). I cut the same shape out of white paper without the rectangle cutout and chopped it in half to get white pieces for the insides of 2 cards at once. 


Here's a picture of the inside and how it looks opened which is intentionally left blank so she could write a personal message to the teacher. 


Products Used

Tuesday, April 2, 2013

Creating Smiles


The theme over at the Card A Day Blog today  is Teacher Appreciation (which is the other place you will see this card posted today). :)

Those of you that know me personally (or actually read all my rambling on my blog posts) know I have a son who is 4 and attends preschool once a week.
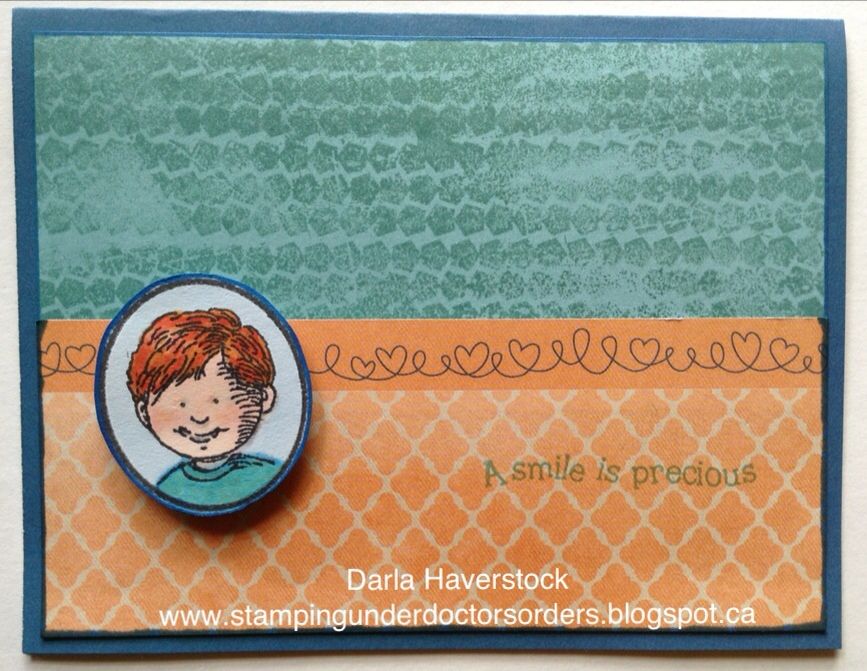
For my Teacher Appreciation card I really wanted to make it about the real reason we appreciate them the most in our house and that is for the huge smile on Michael's face when we tell him it's preschool day and again when we pick him up.

It's the enjoyment they put into everything they teach them that makes those smiles happen and for that we are very appreciative!

I also tried to make this personalized by colouring the picture as close to Michael as possible. For the record... red hair is really hard to colour!!! Those that know Michael, how did I do?

The inside reads.. "Thank you for helping create them!"


The paper on the top half is Crystal Blue stamped with Juniper ink and the Fast and Furious stamp set. The bottom half is the Claire B&T paper with the zip strip still on it to create the center piece. The card base in Pacifica cardstock. The sentiment is stamped in Juniper ink as well. The stamp set I used is an Operation Smile stamp set that consultant can order. It has the CUTEST kid faces on it as well as the oval frame and some sentiments like the one I used here. The oval with the image is popped up on foam tape to add some dimension.

By the way, if you were ever thinking of signing up as a consultant to take advantage of all the consultant benefits (like being able to order this great Operation Smile stamp set) this is the month to do it! This month when you sign up as a new consultant you get 4 stamp of the month sets free (April, May, June and July). These D-size stamp sets are a great way for a new Consultant to create artwork, bring to Gatherings, and show off to everyone to kick start their business. Check out the details here and please contact me if I can offer any assistance or information to help you decide if you need it.

Products Used:

Wednesday, March 27, 2013

Thank you Michelle

I just wanted to share the wonderful handmade birthday card I received from my friend and fellow CTMH consultant Michelle. I can't really share many details for you since I honestly didn't ask. I did make my best guess below and I'm sure she will let me know as soon as she sees this in the morning if I'm right or not. ;)


My best guess at what she used is edit: she has confirmed this is what she used :

Tuesday, March 26, 2013

Tinkerbell Happy Birthday

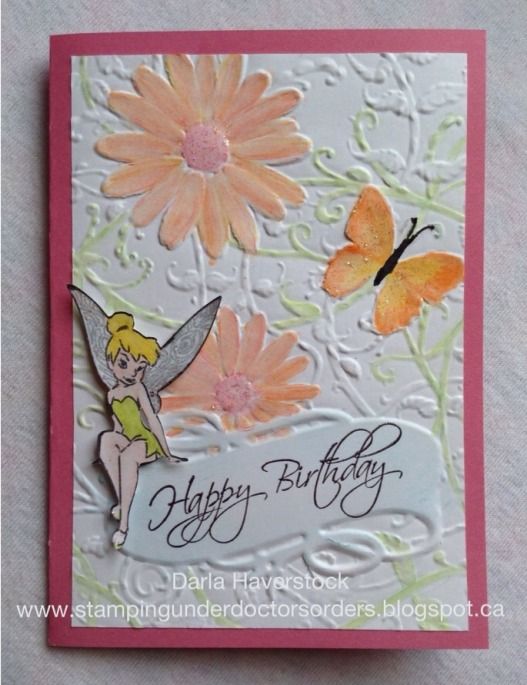
I can't seem to get enough of these new folders so of course I have another card for you today for a girls birthday card using the same folder as I used here . We had a birthday party to go to for my 4 year old cousin that I used to babysit through the day. She is into Tinkerbell of course so....


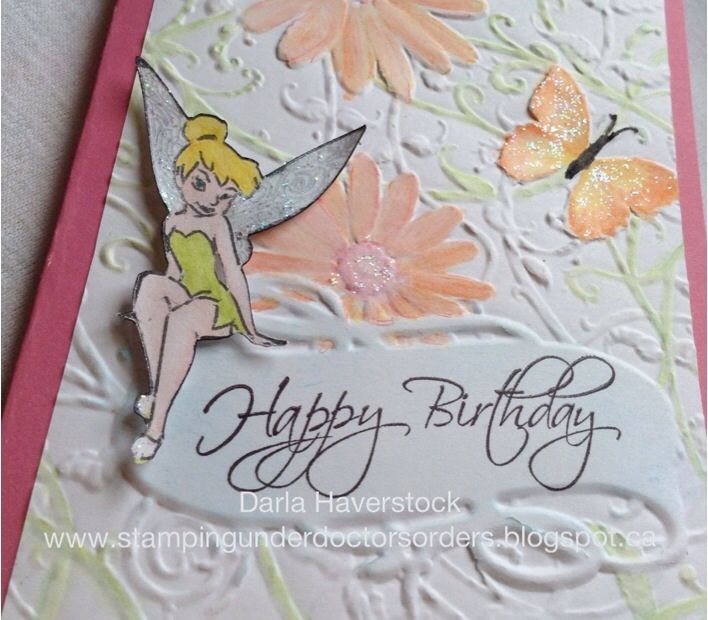
This one was coloured with the watercolour pencils. Tinkerbell is drawn on the cricut (Tinkerbell & Friends cartridge) using the cricut gel pens (once in silver using the filigree creative feature, again in black using just the image button) and then cut out using the blackout feature, coloured with the watercolour pencils as well and popped up on foam tape. A little glitz glitter gel on the butterfly, flower centers and Tinks' wings and shoes. The sentiment is from For Every Occasion. The card base for this one is Cotton Candy..

A close up to see the dimension..


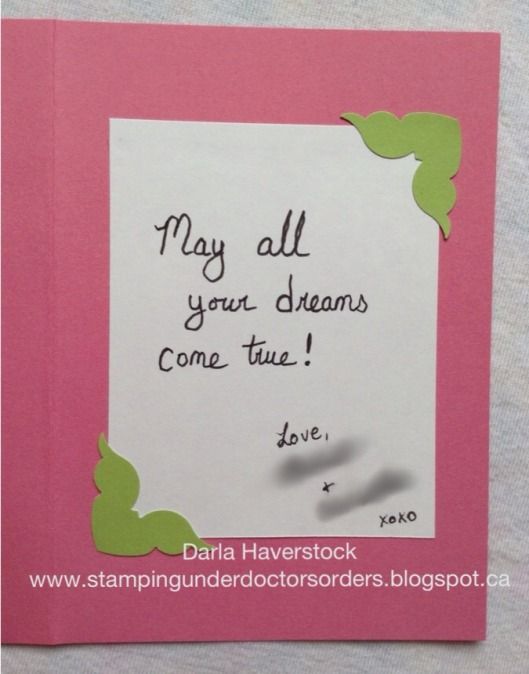
Of course I just have to show you the inside of this one because our Pear cardstock is the perfect colour for Tinkerbell.

Products Used:


Edited to add:

I have a YouTube video on using the markers you can watch here http://youtu.be/nSDE1TdCs8U

The gel pens work the same way. It's just a matter of making sure both the image you choose to draw and the one you choose to cut "cut" in the same spot. 

For tinker bell:

- I loaded my paper in the top right of my mat and pressed load mat. 
- put my silver gel pen in and chose my size (3" for Tink I used on my card)
- set speed and pressure to what is written on the side of the gel pen
- select the image (I used the filigree feature of Tink to get the swirls on her wings) and press cut
- once its done drawing with the silver I pressed load mat again to bring it back to the same starting position
- replaced silver pen with black
- chose the main image (no creative feature) so it would draw all the details (eyes, nose, mouth, etc) 
- press cut
- press load mat again to return to starting position
- take pen out and insert blade
- change speed and pressure to the correct settings for the paper I was using
- choose the blackout feature so it only cuts the outline
- press cut

Monday, March 25, 2013

Thinking of you

I have this card over on the Card A Day Blog today. The theme this week on the blog is "Thinking of you". Unfortunately I have had to make one of these very recently as a very good friend and mentor to me has recently been diagnosed with breast cancer. She hadn't met with the surgeon yet when I made this card for her although she has now and goes for her surgery April 4. All positive thoughts, prayers etc would be very much appreciated. 


The person I made this for is like a mother to me and is the person that is most responsible for my love of all things crafty. She babysat me after school a couple days a week and we used to pick a craft to explore every month (if we really liked it we explored it longer). We did things like origiami, flower pressing, silk screening, making our own stamps from everything  from shoe insoles to erasers (you can see a wedding invitations I made with a stamp I made from an eraser using the technique I learned with her when I was about 10 years old or so here). We are both very similar in that we like to come up with new techniques, perfect it and then move on to the next one. I still enjoy going out to play in her art studio and she enjoys coming to mine now too. 

I also brought out my beloved cuttlebug for her (since I have upgraded to the eBosser) at the same time as this card I made for her which I made sure I used embossing on to show her what she could do with the cuttlebug. She does LOTS of dry embossing herself but does it all by hand with a stylus so I really think she will love this new to her tool. 

The embossing folder I used is one of the new 3D ones from spellbinders and I have to say I am just loving these and can't get enough of them!! This card only used a small section of this folder.

Come back tomorrow to see a Tinkerbell birthday card I made using this same embossing folder... I promise I'll even show you the entire embossing folder on that one. ;)

I used the Close To My Heart watercolour pencils on the embossing to make it pop and one of the clear buttons which you can find in the While Supplies Last section for the center of the large flower. A little bit of glitz glitter gel on the butterfly wings and voila!

Products Used:

Monday, March 18, 2013

You're GREAT

I have another card over at the Card a Day Blog today. Head on over there to see some fantastic inspiration posted EVERY day and also go enter a card in the monthly contest over there.


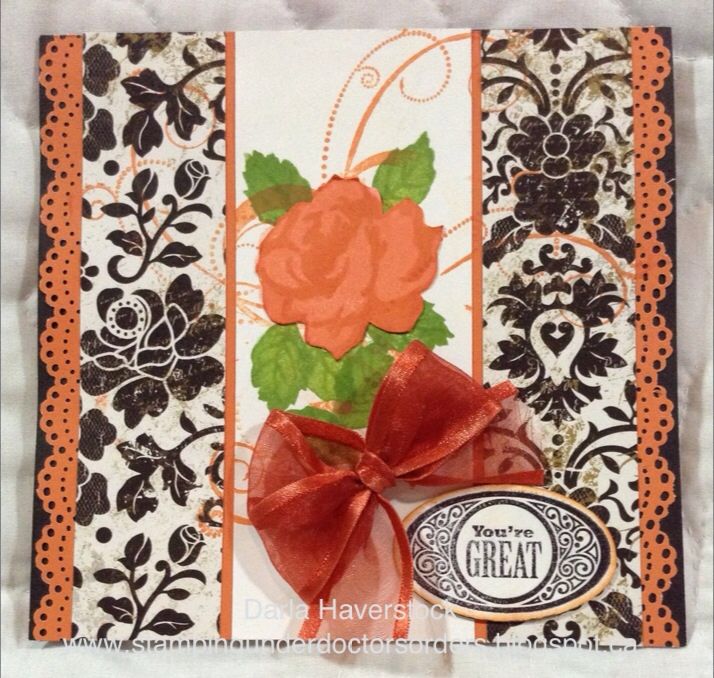
I did this card in sunset cardstock and ink because orange is the favourite colour of a friend of mine who this card was for to celebrate her new job. The patterned paper is the For Always paper pack which I am in LOVE with. The flower and leaves is from the Stamp of the Month set this month "Floral Happiness", the swirls are from "Love Life" and the You're GREAT sentiment is from "Casual Expressions". The ribbon is from my stash and the edges of the sunset are punched with a lace doily Martha Stewart punch which could easily be substituted with a border from either Art Philosophy or Artiste cricut cartridges. 

I wasn't 100% happy with it for anyone other than someone who likes orange mostly because orange is NOT my favourite colour. :)

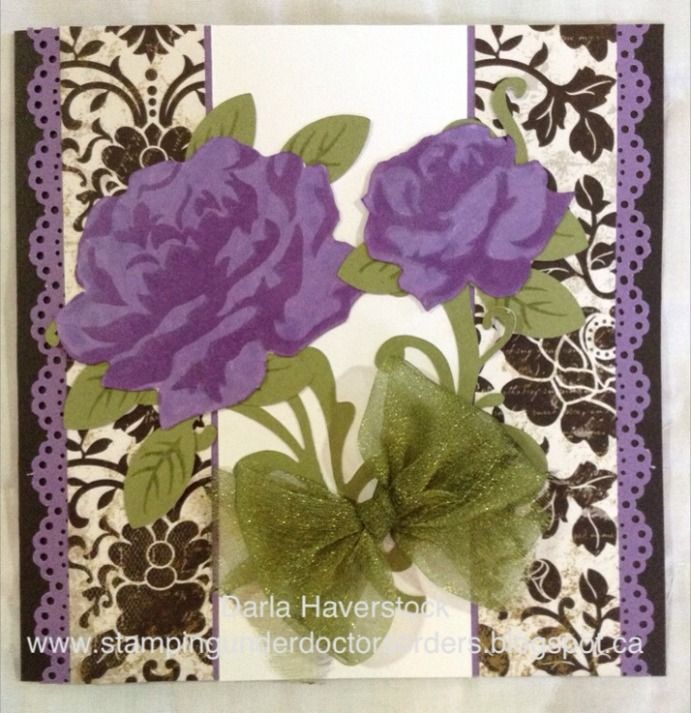
so.... I re worked the card with Gypsy and it will be a birthday card for the Spring Fling card class this Saturday March 23rd. There are still a few spots left if you're interested let me know. 


PRODUCTS USED:

Saturday, March 9, 2013

Floral Happiness


Welcome to our March Stamp of the Month Blog Hop! This month's stamp from Close to My Heart is "Floral Happiness" and is available exclusively through your Close to My Heart consultant from March 1 - 31, 2013. You can purchase this stamp set for only $5 with a qualifying purchase.


If you have just hopped onto my blog, please start at the beginning at Lucy's blog – Love 2 Create. If you came from Lucy's blog – Love 2 Create then you are in the right place!


Today I decided I wanted to make a candle set for my mom for mother's day. Shhhhhhh!!!!! :)

Her favourite colours are purple, orange and green so I used goldrush and autumn terracotta ink for the large roses and Gypsy ink stamped in 1st and 2nd generation for the smaller roses. The leaves are sweet leaf and pear for the veins.

I stamped the images on a piece of tissue paper (I had some with flecks of glitter through it that I thought would be pretty but I think I will redo this with plain tissue as the glitter flakes are just too big for my liking). I then wrapped the stamped paper around my candle and then wrapped wax paper around that and heated with my heat embossing tool until the tissue paper was embedded into the candle... it is porous enough to let the wax of the candle right through it so it ends up inside the candle a little bit, the wax paper on the outside is just to keep the surface of the candle smooth and to hold the tissue paper in place nicely while you hold it so you don't get your fingerprints all in the wax.


Your next stop on our "Floral Happiness" hop is Amber ~ Scrapper's Therapy.

Products Used:

Here's the entire blog hop lineup in case you get lost along the way:
  1. Lucy ~ Love 2 Create 
  2. Darla ~ Caution: Crafting is Contagious 
  3. Amber ~ Scrapper's Therapy
  4. Jennifer ~ 4 Hearts Scrapbooking 
  5. Priscilla ~ Priscilla's Paperie
  6. Theo ~ Celebrate Crafts
  7. Traci ~ Paper Crafting 101
  8. Jane ~ Jane's Scrap Shack
  9. Michelle ~ My Creations with Michelle 


Thanks for hopping along with us - we hope we were able to inspire you.


Get widget