Showing posts with label Father's Day. Show all posts

Sunday, June 16, 2013

Happy Father's Day

Happy Father's Day to all the wonderful Dads out there today!

Remember the Father's Day card I posted HERE? Remember I promised I'd show you the inside once we gave it to my amazing hubby and father of our two wonderful children? Well, it's Father's Day so we have given it to him of course. :)

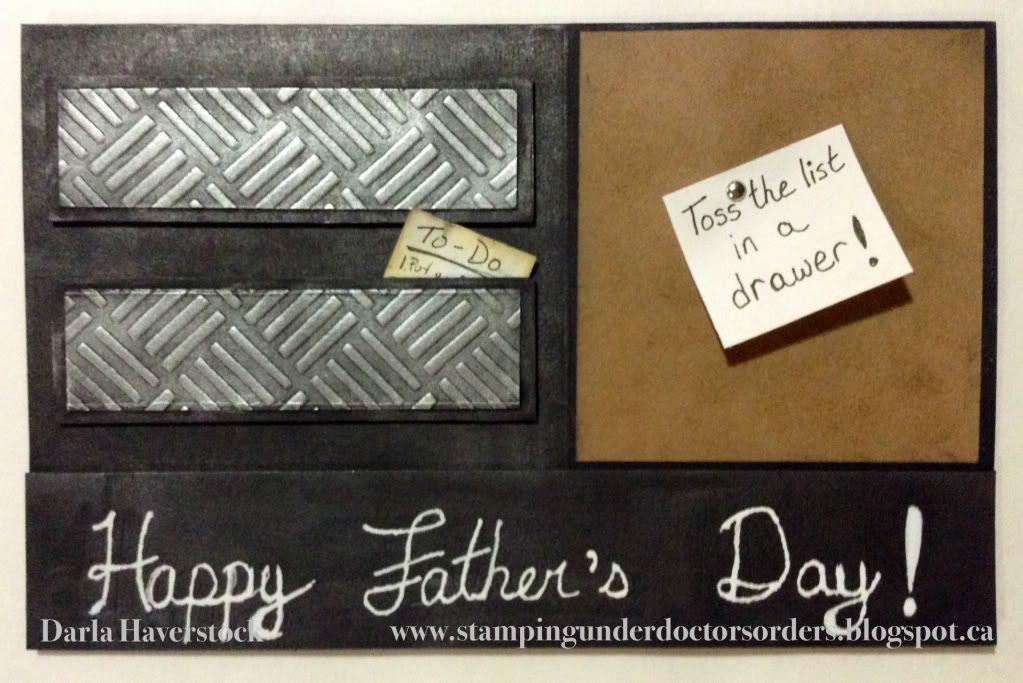
First a reminder what the outside was..
Now here's the awesome inside...
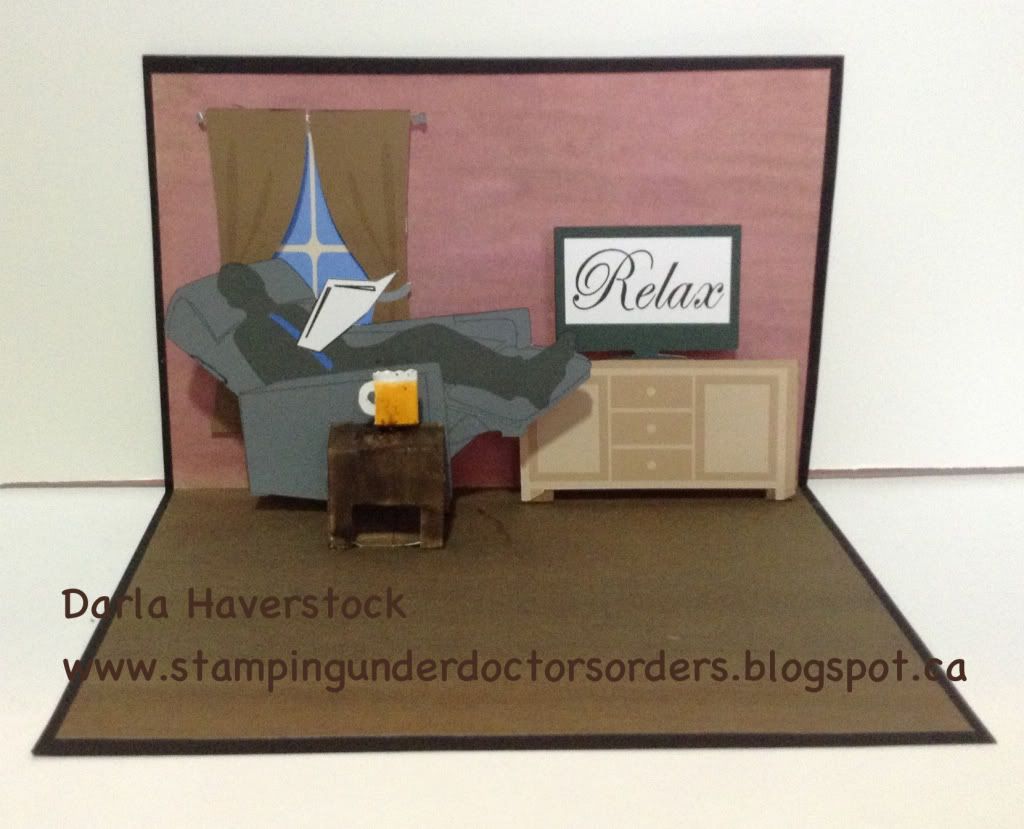
All the cuts are done with my new Silhouette Cameo and purchased in 2 different files from the Silhouette Online Store. They were designed as cuts to be layered but I simply layered them on my screen and filled them with the colours I wanted then I just set my cut settings to cut the outline only. I used simple boxes behind the pieces to make them pop up (I forgot to take a side view photo for you of that but I promise to sneak the card back later today to grab one for you and will add it to the post). 

The table is just a pop-up cube with the front part cut away to form the table legs. The little beer glass is a piece of white card that I scored every 1/8" to make it look like a beer glass and then coloured the bottom part with my honey alcohol marker for the beer. I cut a "C" and attached it for the handle. 

The floor and wall is a piece of cardstock that is coloured with distress stains (Walnut and Victorian Velvet). These colours are very similar to the actual colours of our living room. 

I also just have to share a picture of hubby in his shirt that Michael made him at preschool. He's such a good daddy that he actually washed it last night so he could wear it again today. 


Big kudos to our sons amazing preschool as well! They always do the most amazing things with the kids for the parents. I received an awesome tote bag filled with handmade keepsakes for Mother's Day (yes I know I haven't shared that but I was very ill the day they had the get together at preschool and so I did not receive mine until the following week when Michael went back which I figured was too late to share with you then) and they had a great day for the Father's on Friday with an indoor picnic (it was raining), fun games like giving Daddy a shave with shaving cream and a Popsicle stick razor, potato sack race (which they ventured out in the rain for) and more.

Tuesday, May 14, 2013

Father’s Day Card

I have this fun card on the Card a Day Blog today.

My husband and my Dad are both very handy and spend lots of time building things or fixing things for people (including me). Their to-do lists often get very very long and both are kind hearted enough to put their to-do lists before themselves (most of the time).

I decided to use the concept of putting away the to-do list as the starting point, added in the current sketch for this week from my new co-hosted sketch challenge blog Atlantic Hearts Sketch Challenge (hint hint wink wink… go check it out!!) and voila!


Now, as much as I’d love to show you the inside of this card I can’t… for 2 reasons…
  1. My husband and my Dad both read my blog and although I’m not sure who’s card this will be I want at least part of it to be a surprise
  2. It’s not finished yet.. sssshhhhhh…. I have big BIG plans for it though and I promise to share it with you again after I give it to them.
Winking smile

DIRECTIONS:

This card is actually a full letter sized sheet of paper (8.5” x 11”) folded in half so it’s a large card.
The bottom piece is 1.25” x 8.5” and is supposed to be the workbench in the garage. The corkboard piece which is really just a piece of Kraft cardstock that I sponged some Desert Sand ink on and distressed the edges with Chocolate a little bit is 3.5” x 3.75”. The drawers are 1.25” x 4.25” and the raised panel on the drawers are 1” x 4”.

I used one of my home made embossing folders to emboss the drawer panels.
*I make my home made embossing folders 5 different ways but this particular one is a cut from the Paper Lace 2 cricut cartridge and is cut out of stencil plastic. To use this type I just use the same sandwich as you would use to emboss a spellbinder die plus an extra piece of thick cardstock for a shim.
I brushed all of the black cardstock with some Gunmetal and Pewter metallic rub-ons (it's like a wax paste and s awesome for this type of project). I then took my silver Encore ink pad and lightly brushed it directly on the drawer fronts to ink the raised embossing.

I made a quick to-do list (which by the way is an actual to-do list here of my husbands that I re-wrote small and then chopped most of it off to make it fit behind the drawer). My post it note is just a scrap of white I had laying on my desk and my thumb tack is a tiny silver brad.

They don’t make sentiments this large for cards and I didn’t feel like piecing all the individual letters to spell it out. I couldn’t print it since it’s black cardstock and you can’t print white (unless you have a very high end printing company printer that actually has white ink in it). All this to tell you I hand wrote all the sentiments for this one. hahaha

  
Get widget