

Today we will show you how to Make It From Your Heart! Jeanette Lynton has created a brand NEW “how-to” program to not only guide you but also inspire you to create beautiful artwork. This amazing publication has so many different pattern blueprints that you can interpret in ANY WAY you want!

Through our blog hop, we hope to inspire you to use your own artistic instincts to interpret and create your own artwork. Each of our crafty consultants has chosen a different page of this book to create two projects for you – that’s right two projects with the SAME pattern! One project will follow the blueprint pattern as laid out. The second project will use the pattern “with a twist” to show you how versatile the patterns are.
We are having a giveaway – that’s right blog candy for you hoppers! Lucy of Love 2 Create will be giving away a copy of the Make It From Your Heart – Volume 1. All you have to do to be eligible to win is to leave a comment on each blog.
If you just happened to come to this blog, you should begin your hop at the beginning at Lucy's blog
Before I even get to my project can I just say for the record that I love our new how-to book! It's very economical at only $7.95 with TONS of inspiration in it!!
My project today uses pattern number 19 on page 42 of the new how-to book Make It From Your Heart - Volume 1..
The next stop to making it from your heart is Michelle ~ My Creations with Michelle.
Products Used:
Here is the list of all the talented consultants who are participating in this months blog hop:

Through our blog hop, we hope to inspire you to use your own artistic instincts to interpret and create your own artwork. Each of our crafty consultants has chosen a different page of this book to create two projects for you – that’s right two projects with the SAME pattern! One project will follow the blueprint pattern as laid out. The second project will use the pattern “with a twist” to show you how versatile the patterns are.
We are having a giveaway – that’s right blog candy for you hoppers! Lucy of Love 2 Create will be giving away a copy of the Make It From Your Heart – Volume 1. All you have to do to be eligible to win is to leave a comment on each blog.
If you just happened to come to this blog, you should begin your hop at the beginning at Lucy's blog
Before I even get to my project can I just say for the record that I love our new how-to book! It's very economical at only $7.95 with TONS of inspiration in it!!
My project today uses pattern number 19 on page 42 of the new how-to book Make It From Your Heart - Volume 1..
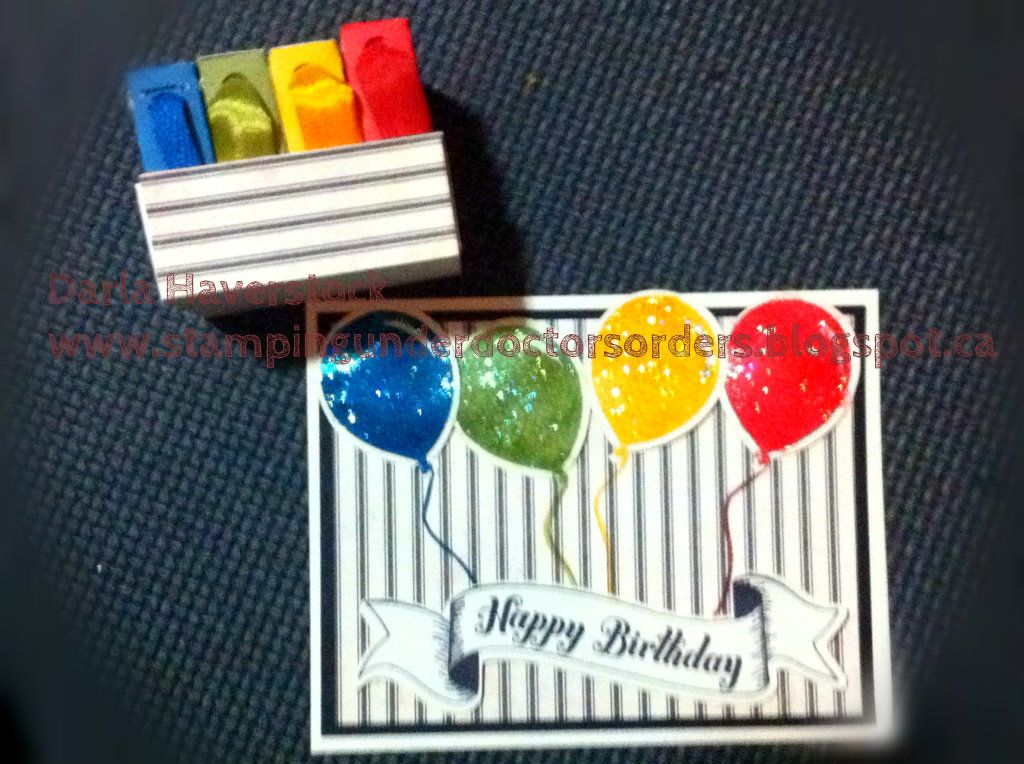
I saw the vertical stripes that are in this pattern as well as the smaller squares on each stripe and decided to make this card and some cute little ribbon boxes and caddy.
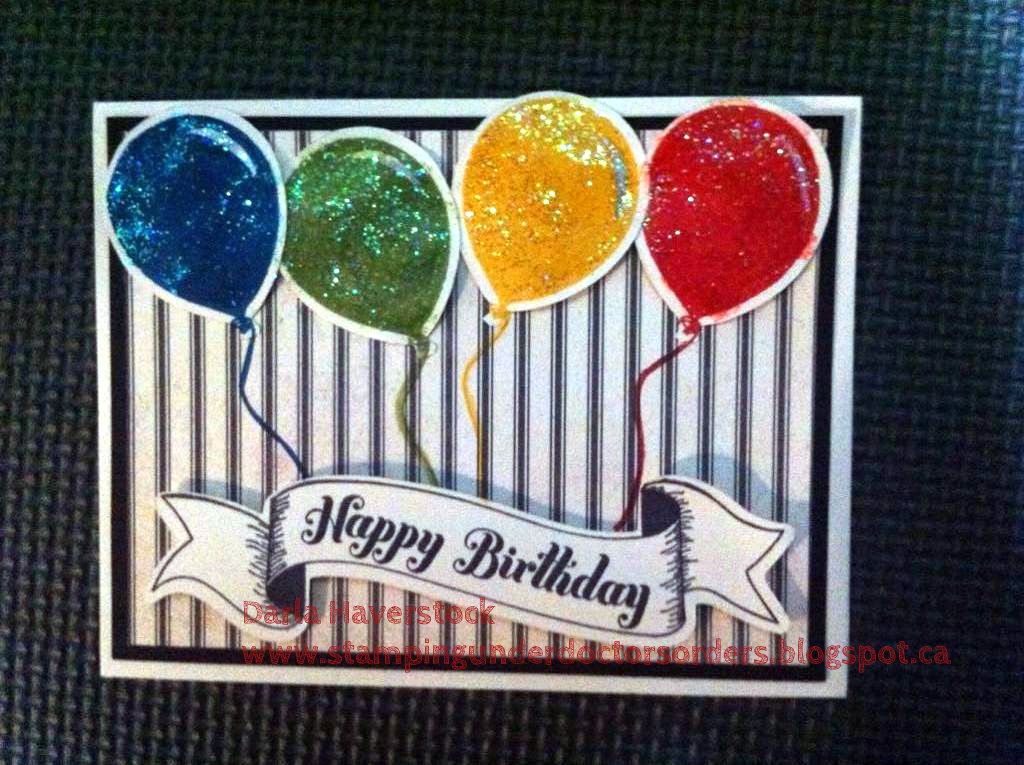
The card is made using the stamps that come bundled with the Artiste cartridge, which made it super easy to put together. I just cut out the shapes from colonial white cardstock as directed on the carrier sheet of the stamp set (love that it now includes the page # from the handbook) and stamped them accordingly. I stamped the balloons in Pacifica, Olive, Honey and Cranberry ink and after popping them up on foam tape in the middle and sticking the edges of the balloons flat down I then added some Stardust Glitz Glitter Gel. I stamped the strings directly on the card overlapping onto the balloon shape in the same colours. The Happy Birthday banner is in Black to coordinate with the stripes on the moonlight patterned paper. The banner is also on foam tape.
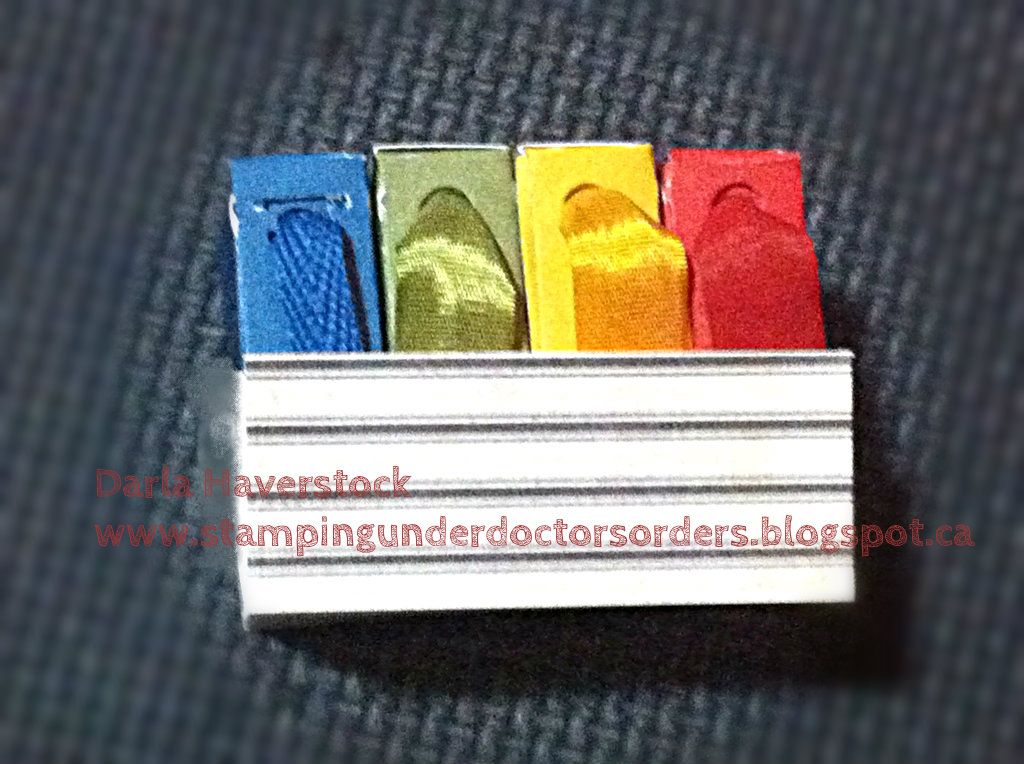
I love our colour ready seam binding and as I collect re-inkers I plan to order a roll of seam binding for each and ink them up in all the colours. As you can see I don't have any pacifica reinker yet and although you can just ink it with a stamp pad I actually had some twill ribbon left from the pacifica mini-medley assortment so I put that in. I also used our new alcohol markers on the olive one just to see how it would turn out and I absolutely love how fast it dries using the alcohol marker. I wouldn't do a whole roll this way since you'll use up your markers quickly doing it that way but if you want some for a project right away and don't have time to let the ink dry overnight (which is what I would recommend if using reinker or even a stamp pad) the alcohol markers work wonderfully!
Since I removed the seam binding from the roll to dye it and can never manage to get it back on the roll the same way I thought it would be cute and a great way to store them all by making some boxes in the same colour paper.
I cut the lid for the tall box on page 40 of the Artiste cartridge (shift + 3D Object + 1st row far right of the white keys or 1-10 for those that know my numbering system) at 3.5" for the top of each box and 3.4" for the bottom of each box in the various colours of cardstock and then turned Real Dial Size on and cut one at 5.5" in colonial white as a holder for all the boxes. Then I assembled the box tops and bottoms and used a hole punch to punch a hole in the same spot on the side of both top and bottom I rolled up some ribbon and put it in the box and fed the end through the bottom part first and then the top and then closed up the box. I cut a strip of the moonlight patterned paper for the front panel of my box to coordinate with my card so it could be used as a gift set (although this particular set is just my test run of how this will work for my own craft room).
I cut the lid for the tall box on page 40 of the Artiste cartridge (shift + 3D Object + 1st row far right of the white keys or 1-10 for those that know my numbering system) at 3.5" for the top of each box and 3.4" for the bottom of each box in the various colours of cardstock and then turned Real Dial Size on and cut one at 5.5" in colonial white as a holder for all the boxes. Then I assembled the box tops and bottoms and used a hole punch to punch a hole in the same spot on the side of both top and bottom I rolled up some ribbon and put it in the box and fed the end through the bottom part first and then the top and then closed up the box. I cut a strip of the moonlight patterned paper for the front panel of my box to coordinate with my card so it could be used as a gift set (although this particular set is just my test run of how this will work for my own craft room).
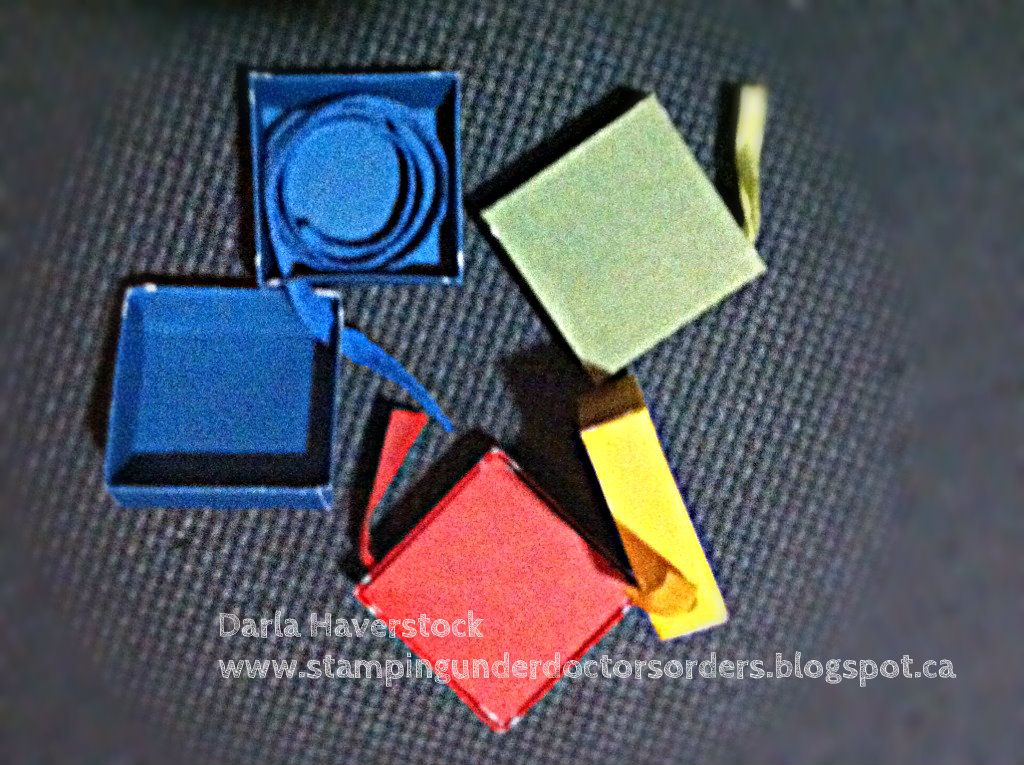
Here's a photo of the ribbon boxes in different views including one opened up so you can see how I fed the ribbon through the holes
.
The next stop to making it from your heart is Michelle ~ My Creations with Michelle.
Products Used:
Here is the list of all the talented consultants who are participating in this months blog hop:
- Lucy ~ Love 2 Create
- Darla ~ Caution: Crafting is Contagious
- Michelle ~ My Creations with Michelle
- Maria ~ Maria's Paper Craft Place
- Theodora ~ Celebrate Crafts
- Bethany ~ Stamping at Home
- Stephanie ~ Quilted Scrapper
- Wendy ~ My Scrapbooking Blog

Darla, I love the card, can't wait to scraplift your design....and I really like the ribbon holder, great way to make it into something that all consultants can use.....
ReplyDeleteI like the sparkly ballloons.
ReplyDeleteLove the ribbon holders! The card is great too!
ReplyDeleteVery Creative!
ReplyDeleteWhat a great idea for the ribbon holder! The balloon card is super cute and that Idea book seems like a good thing to have!
ReplyDeleteTeresa
www.createenjoyshare.blogspot.com
Sweet card and I love the ribbon box idea!
ReplyDeleteoooo...i could swoon for the birthday banner. Thanks for sharing, and for the tips, too. i am a new follower
ReplyDeleteMarianne Barkman
marianneDOTwanhamATgmailDOTcom
awesome job!!! just signed up as your newest follower so I don't miss any projects in the future. would love to have you visit my blog.
ReplyDeleterobin
http://cutonedesignsbyrobin.blogspot.com
awesome card. new follower.
ReplyDeleteThank you,
Karen
www.karenscreativeramblings.blogspot.com
Great job Darla -- love the colors! Thanks for the inspiration :)
ReplyDeleteLucy
http://love2createitall.com
awesome project. I am a new follower and on the blog hop.
ReplyDeleteadventureofthecreativemind.blogspot.com
morentin1326@aol.com
Love both projects!
ReplyDelete