Saturday, January 19, 2013

It's Your Birthday


Welcome to our January Art Philosophy Blog Hop! We are starting a new year of blog hops for you all featuring Close to My Heart's exclusive Art Philosophy Cricut cartridge.  The Art Philosophy Cricut cartridge is available exclusively through a Close to My Heart consultant.

This month we are featuring a "birthday" theme for you.  In this hop, you will see projects featuring this versatile cartridge from many talented crafty ladies!  Enjoy our blog hop!  

If you have just hopped onto my blog, please start at the beginning at Lucy's blog – Love 2 Create.   If you came from Lucy's blog – Love 2 Create then you are in the right place!

For my project today I decided I really wanted to make some cute little cupcake earrings for my cousin as a late birthday present (though I might just hang on to them instead for her daughters first birthday as a congrats on making it through the first year present). She absolutely loves cupcakes and even decorated her daughters bedroom in them (which is why I'm really contemplating saving them for that instead).

Before I show you the pictures though I have to tell you that they aren''t 100% completed as I realized at the very last minute as I was about to put them on the earring hooks to take a photo that I am all out of earring hooks!! GASP... I know. :( So... instead I put them on a few jump rings so you could see how they "will" hang and hopefully you can just imagine them hanging from earring hooks in someones ear. I will be changing the colour of these jump rings to match the colour of the cupcakes better too. :)


I cut these using the cupcake shape on page 70 at 2 1/2" from shrink plastic. I them used mushroom and mountain rose alcohol ink to colour them and then took my alcohol marker blender to draw some swirls through the icing and some lines on the bottom. Hole punched them where I wanted the hook to go and then shrunk them down. They are now approximately 1'. I put a bit of glitter gel on the cupcake icing and a sealer all over (liquid glass works perfect for this but I just sprayed them to save time).


Your next stop on our birthday hop is Jennifer over at 4 Hearts Scrapbooking.

Here is the complete lineup in case you get lost along the way:

  1. Lucy ~ Love 2 Create 
  2. Darla ~ Caution: Stamping is Contagious 
  3. Jennifer ~ 4 Hearts Scrapbooking
  4. Priscilla ~ Priscilla's Paperie 
  5. Kindred Hearts ~ It Makes Total Cents 
  6. Theodora ~ Celebrate Crafts
  7. Stephanie ~ The Quilted Scrapper 
  8. Traci ~ Paper Crafting 101

Thanks for hopping along with us - we hope we were able to inspire you.

Wednesday, January 16, 2013

Thank You

Today I have a card over at the Card A Day blog.

I had every intention to share a detailed, intricate and time consuming card for my post, however when I saw the theme "Thank You" I knew I just had to share this instead.

Many people in my life (past and present) have battled with cancer. Anyone that has ever been around anyone battling cancer knows that you always feel so helpless whether you are the one fighting, a friend of or family of.... I decided I would do what I knew I "could" do. Our cancer center has what is called a "Sunshine Room". This is a place where cancer patients and caregivers of those patients can go to relax, receive complementary therapies and chat with counsellors or other various services offered. You can read more about it here. One of the things a few of my friends that battled often asked for were thank you cards as they didn't have the energy/money to go and get thank you cards for the many people who often step in to help in some small or large way for them. I thought it would be nice to make a whole pile of simple thank you cards and give them to the Sunshine Room for patients and caregivers to take for their use as needed/wanted.

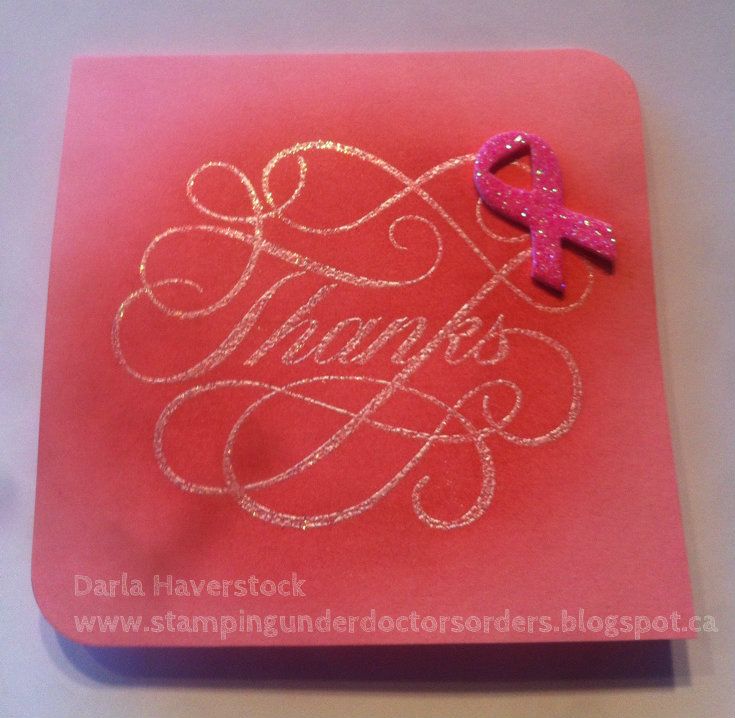
Here is the first of many....


The picture does not do this card justice. The "Thanks" stamp is stamped in versamark and embossed with Ranger "Bridal" embossing tinsel so it is very glittery. I used my cotton candy ink and a sponge dauber to go over the embossed area to really make it stand out. I picked up hundreds of the little pink ribbons which are craft foam covered in glitter and will be making my own in other colours for the other various cancer colours. I finished it off by simply rounding 2 of the corners to make is just a little bit different. The card itself measures 3 1/2" square so it's not very big and won't require a huge message to be written inside to fill the space. 

I hope you like my card today, and maybe even feel so inclined to make a few yourself as most cancer centers will accept cards. 


Tuesday, January 15, 2013

January Cross Canada Hop

Welcome to the first Blog Hop of 2013. Our January Hop is featuring a “Consultants Choice”, so each consultant has a unique project to share with you. I hope that you will take the time to leave comments on our posts, as we love to get feedback from our viewers....whether it was something that you really liked or some new technique that was used that you would like to learn how to do....by leaving us comments, we get to hear what you like, and what you want to see. Thank you… now on to our hop!

If you have just hopped onto my blog, you can start here as this is a circular hop, but if you want to follow us across Canada then please start at the beginning and join Michelle S at  My Creations With  Michelle  If you came from  My Creations With  Michelle then you are in the right place!


For my project I decided to make a card (I know you're all shocked right?? LOL) using a stamp set that has become one of my favourites but will be retiring at the end of this month with the release of the new Spring/Summer idea book "Perfect Day". If you're wondering what other goodies are retiring at the end of the month please check the "Retiring CTMH" tab at the top of my page, currently I have only listed the stamp sets but I promise I will have the rest of the list up by the beginning of next week.

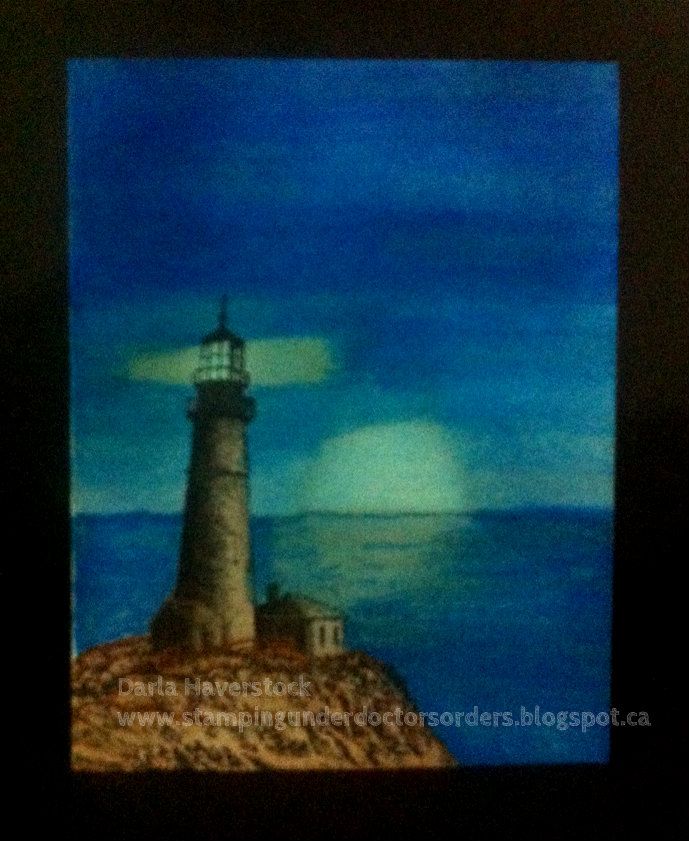
Here is a picture of my card.

I decided not to add a sentiment or anything to the front just yet and left it blank so I could keep this card in my stash for a later occasion as I think this card could easily be used for anything from a sympathy to a thank you card. I also haven't decided whether to leave it like this with the image consuming the entire card front or cut the card front off and mat it with a layer or two... What do you think?

I used my new promarkers of course to colour this but you could use anything to colour this stamp. It looks beautiful in watercolour pencil, chalk, paint or even left blank! A lot of the shading in this set is already there in the stamped image so all the guess work of where to shade is taken care of for you.

The colours I used were: buttercup, warm grey 1, warm grey 2, warm grey 3, warm grey 4, warm grey 5, arctic blue, sky blue, powder blue, azure, true blue, midnight blue, cocoa and cinammon. I could have gotten away with a few less blues but I "oops'd" and had to fix it, plus I am very new to this so just figuring it all out myself.

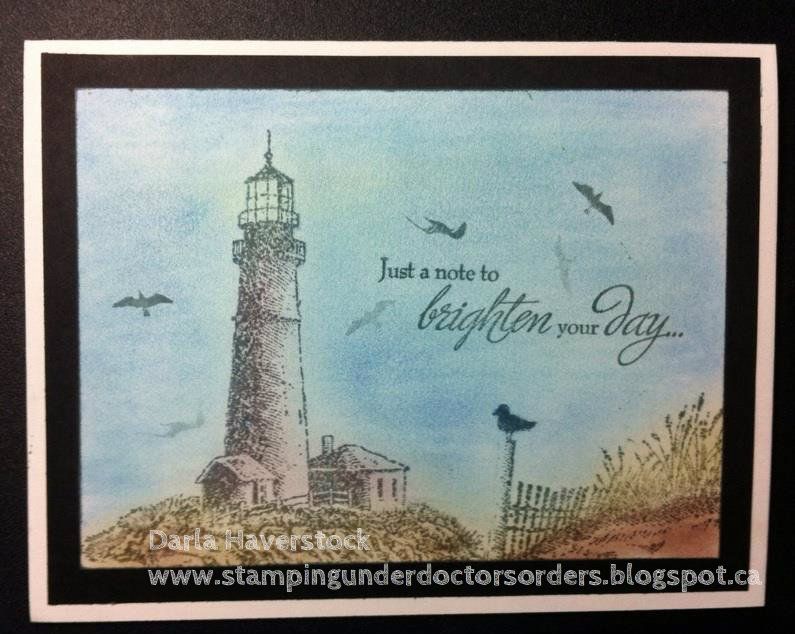
Here is a picture of a card that I haven't shared here yet done with this same stamp set but coloured with chalk. I did this very quickly the day I received this set... took literally about 10 minutes (mind you I really could have taken the time to line my fence up on the stamp on the right side so it was straight, but I was too excited to play with this set). . 


Side note: I have been using my new promarkers a lot lately (and you can expect to see more and more things done with them as I am truly enjoying them) and have been trying them out on various cardstocks to see what I like and I have to say that our CTMH paper does wonderfully with these alcohol markers (and other including the CTMH ones of course). 

Your next stop on the Cross Canada Hop is Suzette Crop Paper Scissors.

If you get lost along the way, you can head to Michelle S Blog - My Creations With  Michelle as she has the complete blog list.

Thanks for hopping along with us - we hope we were able to inspire you to create your own projects using some of the designs and paper seen along the way. Join us again in February when we will be featuring a 2 page layout.

Products Used:

Saturday, January 12, 2013

"Happy Valentine's" Day!


Welcome to our January Stamp of the Month Blog Hop! We are starting a new year of blog hops for you all featuring Close to My Heart's Stamp of the Month.

This month Close to My Heart is offering a stamp set called "Happy Valentine's" throughout the month of January.  This versatile set can be purchased exclusively through a Close to My Heart Independent Consultant for only $5 with a qualifying purchase of $50.  (That’s a $17.95 value!)

This set is just so pretty and has 4 different sentiments included!


In this hop, you will see projects featuring this beautiful stamp set from many talented crafty ladies!  Enjoy  our blog hop!  

If you have just hopped onto my blog, please start at the beginning at Lucy's blog – Love 2 Create.   If you came from there then you are in the right place!

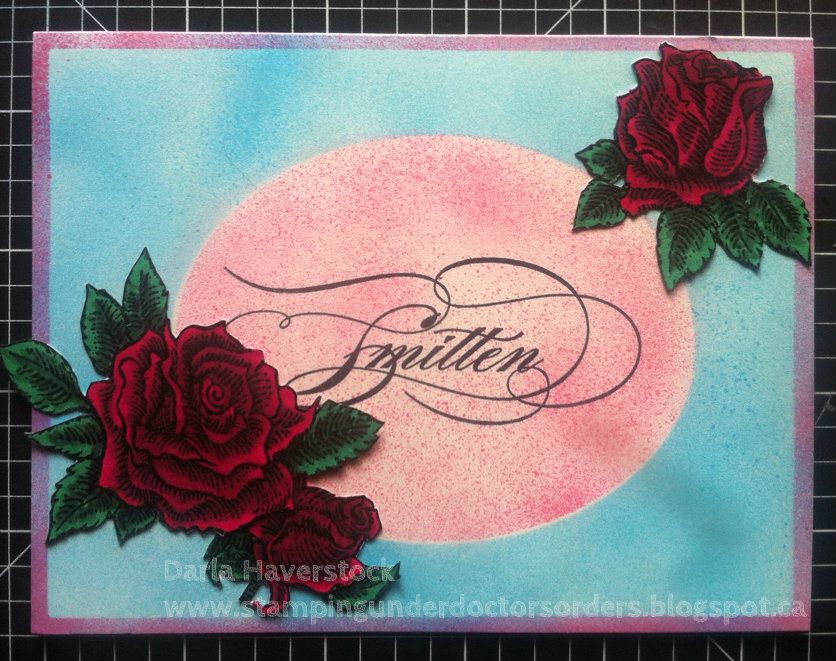
I had so much fun colouring this image. I now have enough coloured in various colours to make MANY cards. :)
Of course it sure helps that I got the entire set of promarkers for Christmas as well as the airbrush system for it.

I only used the largest set of flowers on my card and just cut it apart to position them all where I wanted.


Your next stop on our Valentine's hop is Jennifer ~ 4 Hearts Scrapbooking .

Here is the complete lineup in case you get lost along the way:

  1. Lucy ~ Love 2 Create 
  2. Darla ~ Caution: Stamping is Contagious
  3. Jennifer ~ 4 Hearts Scrapbooking      
  4. Priscilla ~ Priscilla's Paperie
  5. Theodora ~ Celebrate Crafts 
  6. Stephanie ~ The Quilted Scrapper
  7. Cat ~ Cat Scrapbooking  
  8. Donna ~ Diary of a Scrapbook Addict   
  9. Michelle ~ My Creations with Michelle   


Thanks for hopping along with us - we hope we were able to inspire you.

Saturday, December 22, 2012

Anything Goes with the Artiste


Welcome to our "Anything Goes with the Artiste" Blog Hop where we are showcasing the exclusive Artiste Cricut cartridge which can be purchased exclusively through a Close to My Heart Independent Consultant. This will be our last Artiste blog hop for 2012.


Our "theme" for this hop was to create anything we wanted with the Artiste Cricut cartridge. And honestly, you can pretty much create anything and everything with the Artiste so this was not a difficult thing to do.

If you just happened to come to this blog, you should start at the beginning at Lucy's blog - Love 2 Create . If you came here from Lucy's blog - Love 2 Create, then you're in the right place!


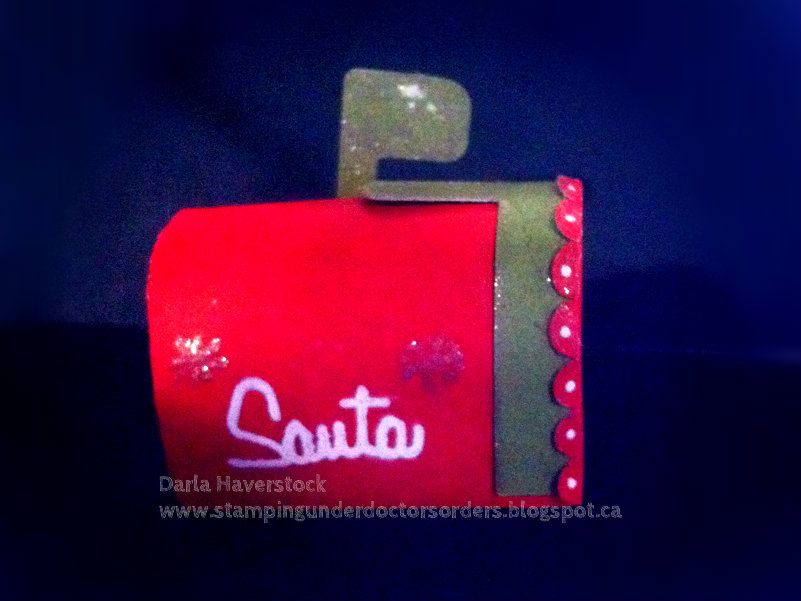
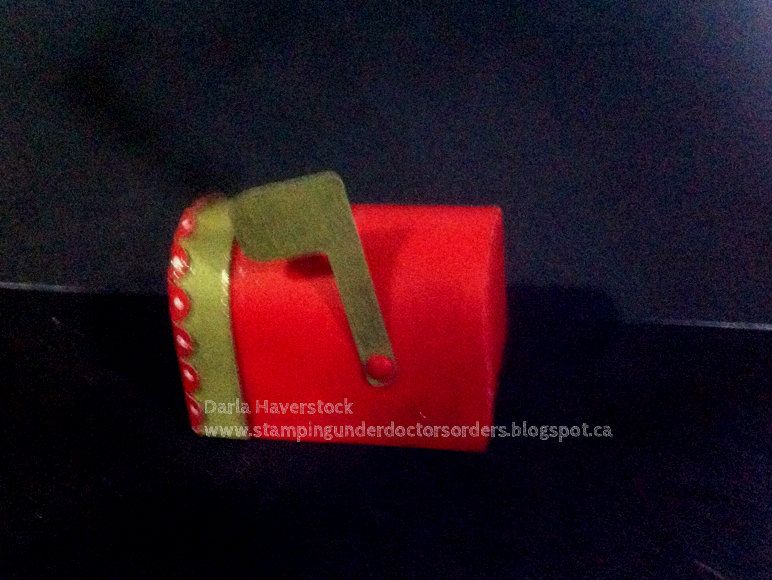
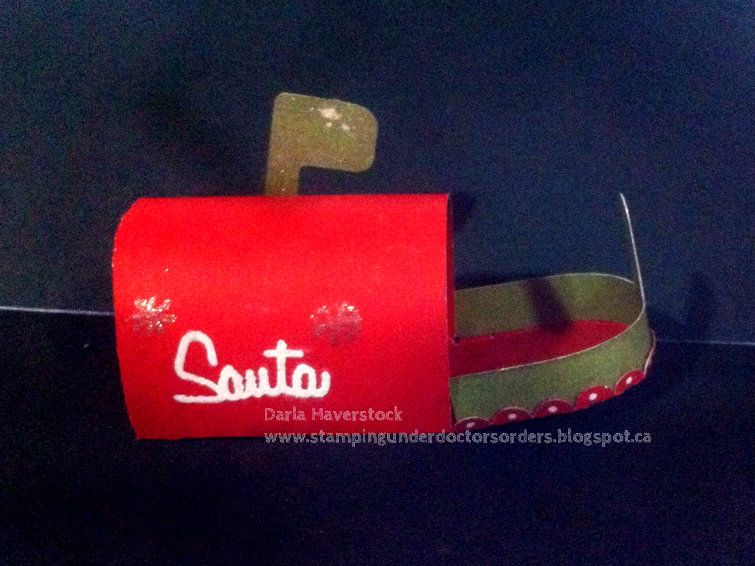
Here is my project found on page 51 of the Artiste Cricut cartridge handbook. I cut it at 1.5" and had every intention to put it on a little post and have it by our Elf on the Shelf this morning to collect letters to take back to Santa. There was actually supposed to be a larger mailbox to accept their letters and then I was going to scan them while they were sleeping and shrink them down to fit in the little one for our elf to be able to deliver and then the following morning there would be a little letter back which would be a QR code which when scanned would take them to a hidden webpage with their greeting and letter back from Santa... unfortunately my son is sick now and wants his mommy (as well as I want to and need to attend to him) so the idea was discarded and I will just turn this into an ornament or let him play with it... we'll see. I'll hang onto the idea though for next year. :)


and another view of it open:


I'm off to tend to my little guy but if you want more details by all means ask and I will answer as soon as I can. I will come back after he's feeling better and add the details too.

The next stop on your blog hop fun is 

  • Diana ~ Diana's Free Moments
  • .


    Here's the entire blog hop lineup in case you get lost along the way:

    1. Lucy ~ Love 2 Create 
    2. Darla ~ Caution: Crafting is Contagious 
    3. Diana ~ Diana's Free Moments 
    4. Jennifer ~ 4 Hearts Scrapboooking 
    5. Laura ~ Scrappinsweetie's Escape 
    6. Penny ~ It Makes Total Cents 
    7. Theodora ~ Celebrate Crafts 

    Saturday, December 15, 2012

    Family and Friends Blog Hop

    If you are looking for the "3D Artiste Christmas" Cross Canada blog hop you can find it here.


    Welcome to our "Family and Friends" Blog Hop where we are showcasing the exclusive Art Philosophy Cricut cartridge which can be purchased exclusively through a Close to My Heart Independent Consultant. This will be our last Art Philosophy blog hop for 2012.

    We will be showing you creations made using the Art Philosophy cartridge for our family and friends.

    If you just happened to come to this blog, you should start at the beginning at Lucy's blog - Love 2 Create . If you came here from  Lucy's blog - Love 2 Create, then you're in the right place!

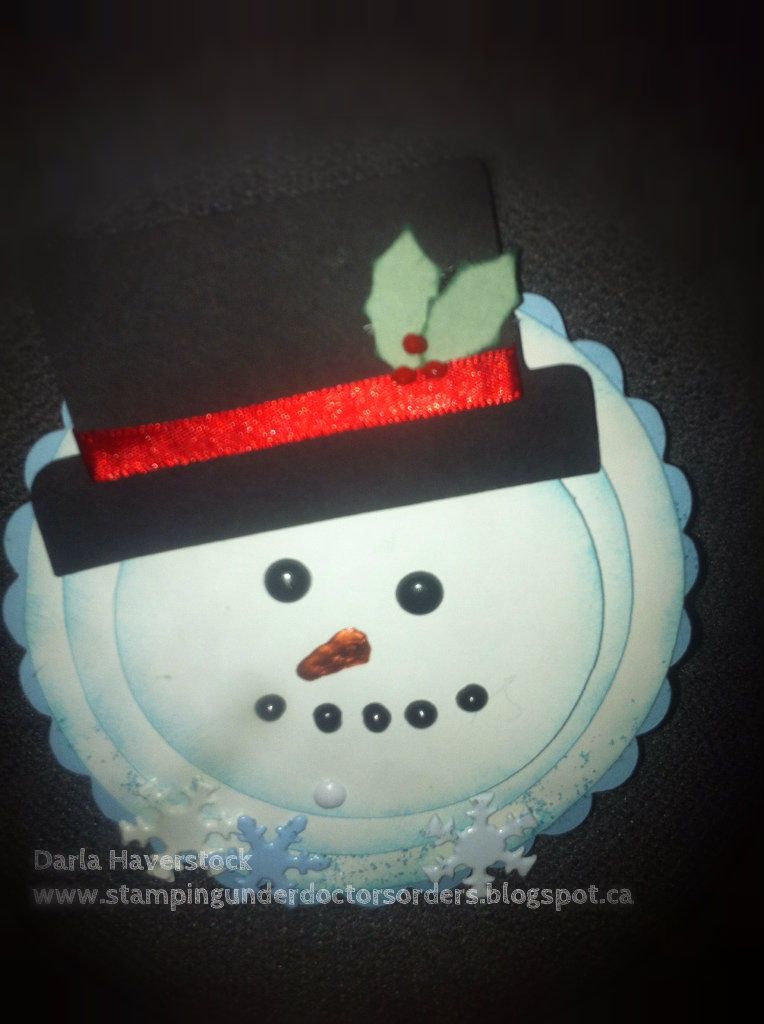
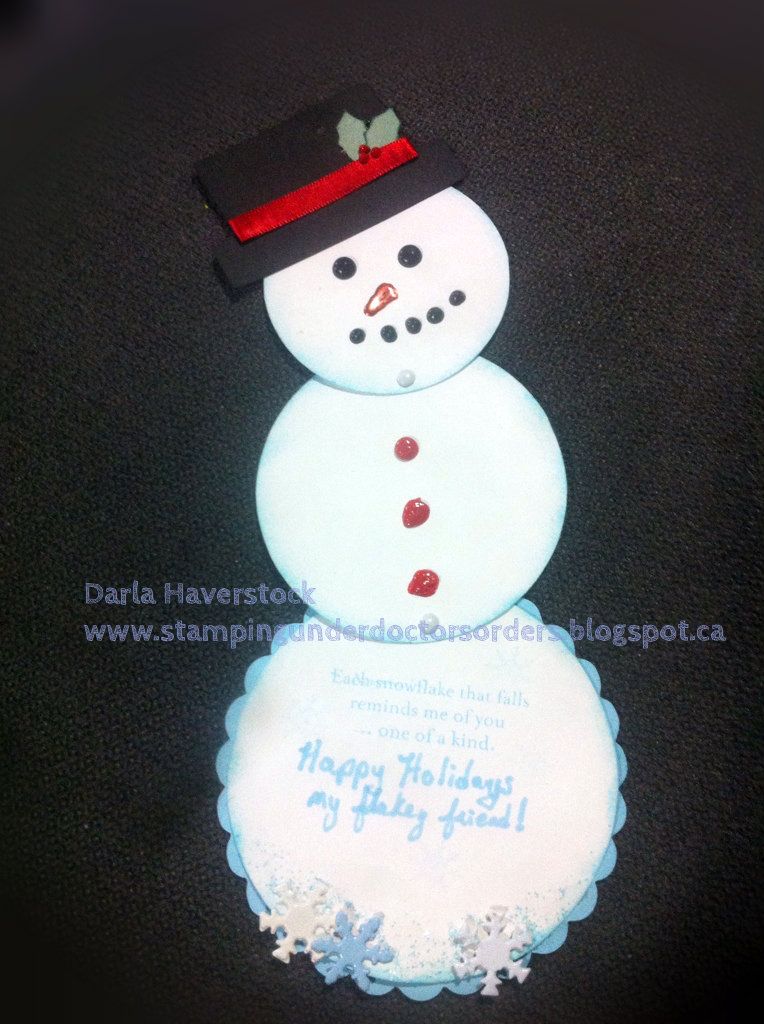
    Now I could just tell you that I made this card because holidays are all about family and friends etc etc etc... but I'd be lying. I have a friend that I used to be VERY close with but we have grown distant over the last couple years. We always did just about everything together, including work together, drive in and home together, had our first child within the same month, etc etc etc. The other thing we used to do together was do all sorts of stupid things like drive past our houses when driving home (guess we were too busy laughing and carrying on to notice) among other crazy "flakey" things we did.

    We were shopping together one day and went our own ways in the store to look around and when we met back up in the store we both had the exact same thing in our hands.... a ceramic snowman ornament with a couple snowmen arm in arm with quirky looks on their face and the little sign below them read "all my friends are just a little bit flakey". We had both decided it would be perfect for the other. After cracking up laughing neither of us ended up actually buying the ornament (not sure why... maybe just another "flakey" moment LOL) but from then on it became a running joke where every year as soon as the weather started getting colder we became "flakey" friends.

    I decided to make a card for her to give her a little laugh because well... that's what friends do! Here's my card:

    Here it is open:

    The circles (page 21) I cut at 3.5", 3" and 2.5". The scalloped circle (page 31) is 3.75".The hat is made up of the on page 58 cut at "Fit to length" 2.5" and a rectangle shape (page 44) at "fit to length" 2". The holly leaves (Leaf3, page 46) were cut at 0.75". 

    All the eyes, nose, mouth, buttons and holly berries are viva decor pen and the snowflakes on the bottom are some brads I've had for a few years.

    The next stop on your blog hop fun is Diana ~ Diana's Free Moments.


    Here's the entire blog hop lineup in case you get lost along the way:
    1. Lucy ~ Love 2 Create
    2. Darla ~ Caution: Stamping is Contagious
    3. Diana ~ Diana's Free Moments
    4. Jennifer ~ 4 Hearts Scrapbooking
    5. Laura ~ Scrappinsweetie's Escape
    6. Priscilla ~ Priscilla's Paperie
    7. Stephanie ~ The Quilted Scrapper
    8. Kindred Hearts ~ It Makes Total Cents
    Thanks for joining us - have a wonderful and safe holiday with your friends and family.

    3D Artiste Christmas

    If you are looking for the "Family and Friend blog hop" you will find it here.

    Welcome to our December Blog Hop featuring any 3D item from our exclusive Artiste Cricut Cartridge. In this Hop you will find that each consultant has created a 3D item of their choice from the Artiste, we were told it could be anything as long as it was a Christmas theme.


    If you have just hopped onto my blog, welcome to the Cross Canada blog hop! I am the official first stop on your hop. I hope you enjoy all the wonderful projects at all the stops in this hop.

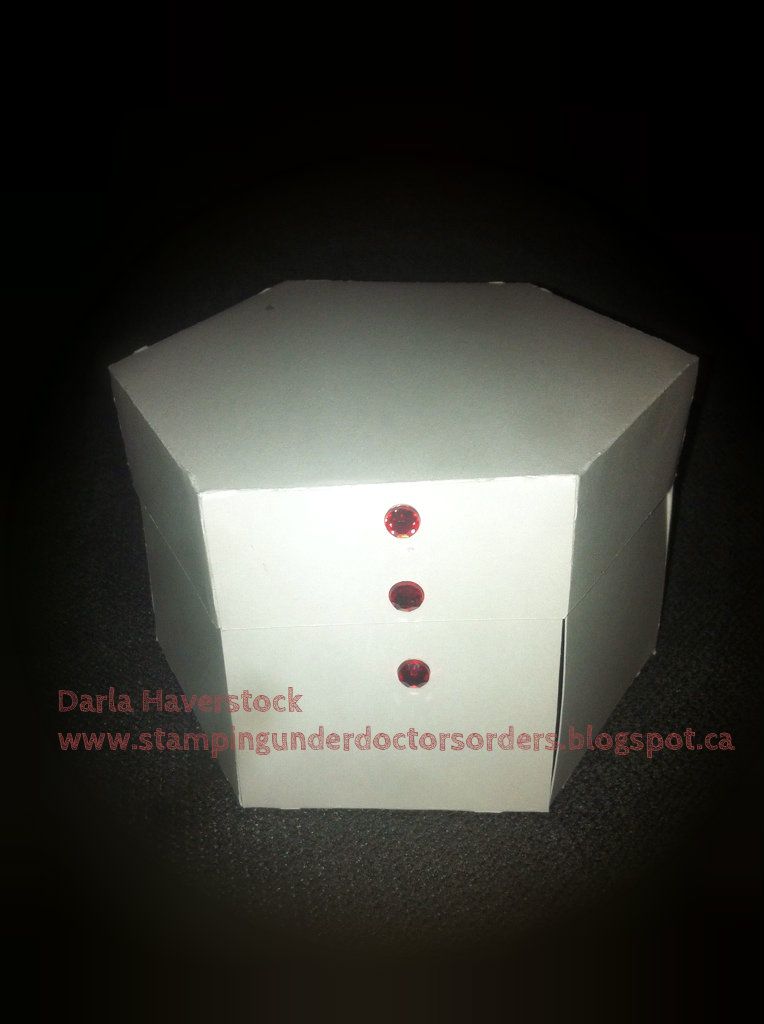
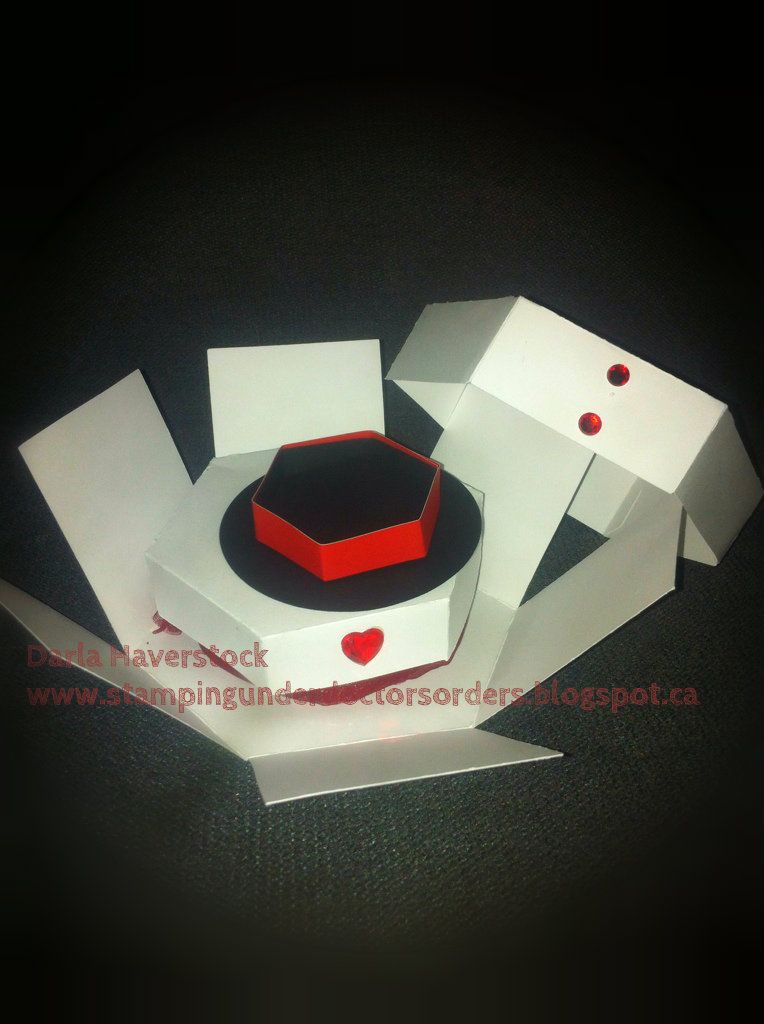
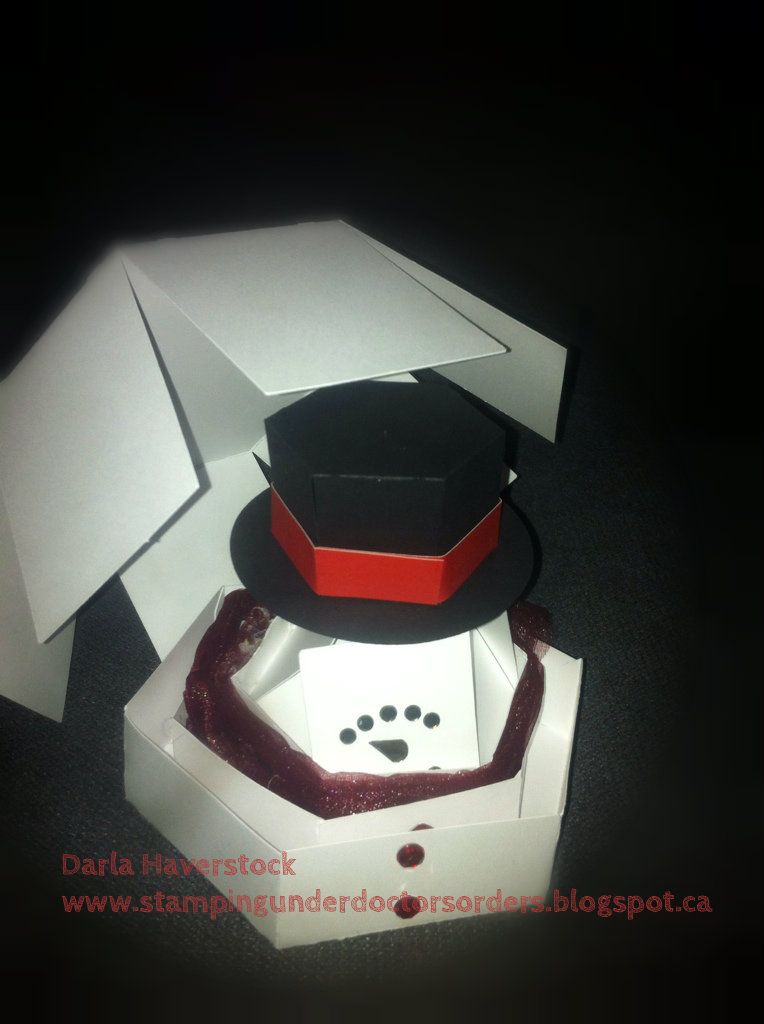
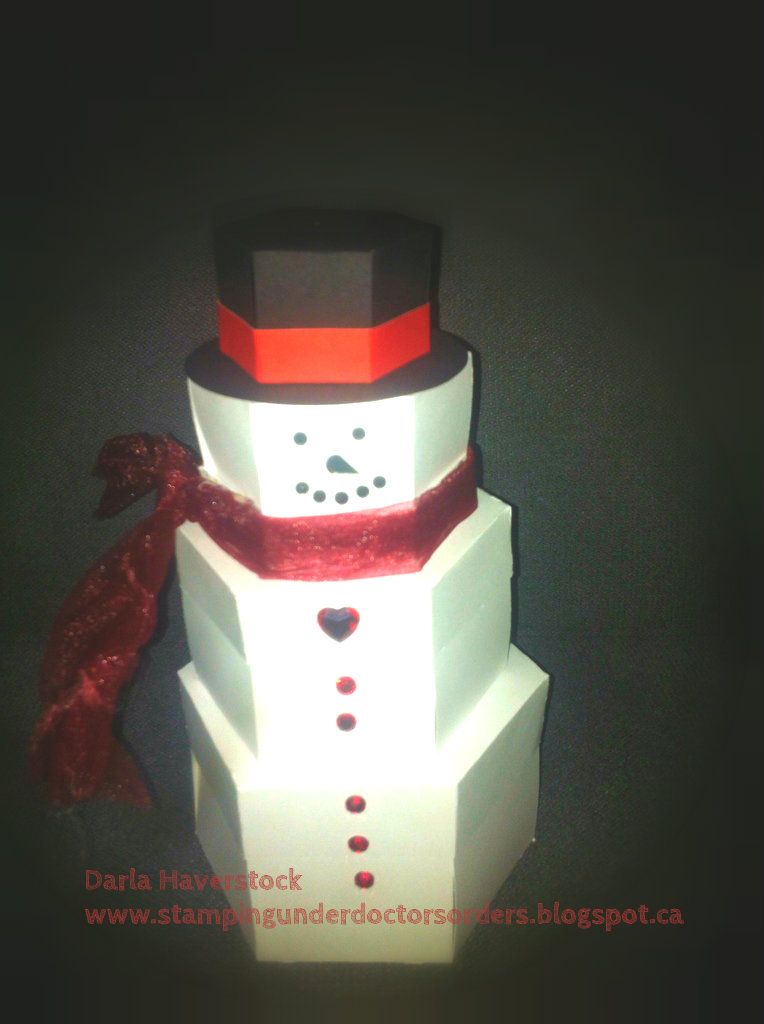
    Lately I have seen a ton of those stacking boxes that make really cute toys and ornaments around. I decided to make a Christmas ornament using this stacking box style but instead of just a plain square box I thought it would be fun to use the hexagon shaped explosion box (which can be found on page 48 of the Artiste cartridge handbook) for my project today. I might even put some family memories from this Christmas inside the 3 explosion boxes after Christmas and gift it to one of the grandparents... we'll see though since I tend not to return to projects and instead dream up new ones. LOL

    Here's the box all closed up:

    Here it is when you first open it:

    You really don't need to collapse the hat box down like the picture above show.. the outer box fits it just fine assembled (the circle brim of the at is permanently glued to the lid for the hat box so you don't have to try to get it lined up every time you put it together):

    Here it is with the 4 boxes stacked on top of each other:

    Hope you enjoyed my project today.

    Your next stop on the Cross Canada Hop is Michelle S of My Creations With Michelle .

    If you get lost along the way, you can head to Michelle S Blog, as she has the complete blog list.

    Thanks for hopping along with us - we hope we were able to inspire you to create your own Christmas cards using some of the designs and paper seen along the way. Join us again in the New Year, our first Hop is scheduled on January 15 and it is consultants choice.

    Don't forget to leave a comment, as we enjoy receiving comments to let us know how much you enjoy out projects.

      
    Get widget